Swarm Catching Tips

Swarm is in the nuc, it’s right before a rain storm. (Photo by Charlotte Ekker Wiggins)

Swarm is in the nuc, it’s right before a rain storm. (Photo by Charlotte Ekker Wiggins)

Swarm Catching Tips

It’s swarm season in Missouri. In the past it has started around Mother’s Day but this year we’ve had swarm calls for about a month earlier.

Bees swarm when the colony runs out of room. The colony raises a new queen. Once she’s eclosed, the old queen leaves with a percentage of the colony to start a new colony.

For the past three swarms, I have watched people put swarms in cardboard boot boxes and nucleus boxes (photo) without frames or with just one frame.

This nucleus box has two frames of drawn comb to entice a swarm. (Photo by Charlotte Ekker Wiggins)

This nucleus box has two frames of drawn comb to entice a swarm. (Photo by Charlotte Ekker Wiggins)

That’s a good idea at first if you are cutting the swarm out of a tree but the best way to entice a swarm into your beekeeping equipment is to use a frame with drawn comb. Remember they are looking for a new home. Offering them frames of drawn comb means they can get started laying eggs and collecting nectar.

Or better yet, a frame with both open and closed brood (baby bees). Nurse bees travelling in the swarm will want to care for the brood and will want to stay with the frame you have included.

Also once the swarm is in the new home you have offered, add more frames so they have a structure to climb on.

I like to add at least 2 more frames of drawn comb and a frame of honey.

Here’s the swarm when it was settled in the boxwood. (Photo by Charlotte Ekker Wiggins)

Here’s the swarm when it was settled in the boxwood. (Photo by Charlotte Ekker Wiggins)

Bees in a swarm tend to be docile in the first couple of days of swarming. As they run out of stored honey, they can become hungry and aggressive.

Once in the nuc and settled in their new home, feed them 1:1 sugar water so they have easy to access food.

If they are settling in during a nectar flow, they will soon prefer to bring in flower nectar than consuming the provided sugar water.

Charlotte

Small Hive Beetle Lure

Small hive beetle lure fermenting in my refrigerator. (Photo by Charlotte Ekker Wiggins)

Small hive beetle lure fermenting in my refrigerator. (Photo by Charlotte Ekker Wiggins)

Small Hive Beetle Lure

My bee buddy David was the first to share this recipe for a homemade lure to keep small hive beetle numbers low inside bee hives. For years we called it “David’s Cocktail.”

You can buy lure or you can make your own. I tend to make my own since I have banana peels galore.

Small Hive Beetle (SHB) Trap Lure Recipe (also called David's Cocktail)


½ cup apple cider vinegar
¼ cup sugar
1 cup water
1 ripe banana peel cut up finely (or two cut up banana peels if using white vinegar)

Combine all ingredients and allow to ferment for about 2 weeks. 

Fill center of re-usable traps with lure. Fill side traps 1/3 full with mineral or vegetable oil.  Replace when full of small hive beetles or every few days. Also make sure the lids are securely down or bees will die in the traps.

With hotter weather, traps should be checked and refreshed more frequently. Clear top of traps of propolis.

During spring-fall, place small hive beetle traps in opposing super corners and rotate the placement as you add supers.

For winter, place small hive beetle traps in the center of the hive where the bees will cluster.

Using small hive beetle traps is not a replacement for checking frames for small hive beetle larvae or for beekeepers themselves killing small hive beetles in hives.

Small hive beetles can take over a stressed strong colony in just a few days so carefully monitor your hives for these destructive, invasive species from sub-Sahara Africa.

Charlotte

Russian Scion Swarm Catcher

I have one of the Russian swarm catchers on a nearby tree. (Photo by Charlotte Ekker Wiggins)

I have one of the Russian swarm catchers on a nearby tree. (Photo by Charlotte Ekker Wiggins)

Russian Scion Swarm Catcher

Some beekeepers love to make, and try, new, and sometimes old things. Luckily I have two beekeeping friends who regularly are up to trying something, this time a “Russian scion” swarm catcher.

Now there are a couple of special things about this old gadget:

First, my bee buddy David, well known for not doing much if any woodwork, made one for me. Actually he made me two, one for each of my apiaries.

Secondly, I am past the period in my life where I want to climb trees, even if it is after a swarm of honeybees.

My northern apiary primarily faces down hill. (Photo by Charlotte Ekker Wiggins)

My northern apiary primarily faces down hill. (Photo by Charlotte Ekker Wiggins)

Basic Russian Apiary Tool

From what I read about the Russian scion, it is a basic tool in Russian apiaries. The device is designed to catch swarms in midflight, effectively interrupting their settling high into trees. Most swarms move in small increments to keeping scions close to hives is probably a good idea.

In illustrations I found online, Russians hang the scions from tall poles.

I placed mine on the side of a tree downwind from my apiaries, hoping the scion will attract any swarms that my colonies may generate.

Two pieces of wood form the foundation of the Russian scion. (Photo by Charlotte Ekker Wiggins)

Two pieces of wood form the foundation of the Russian scion. (Photo by Charlotte Ekker Wiggins)

How to Make a Russian Scion

According to David, Russian scions are easy to make. He made the ones he gave me from wood remnants.

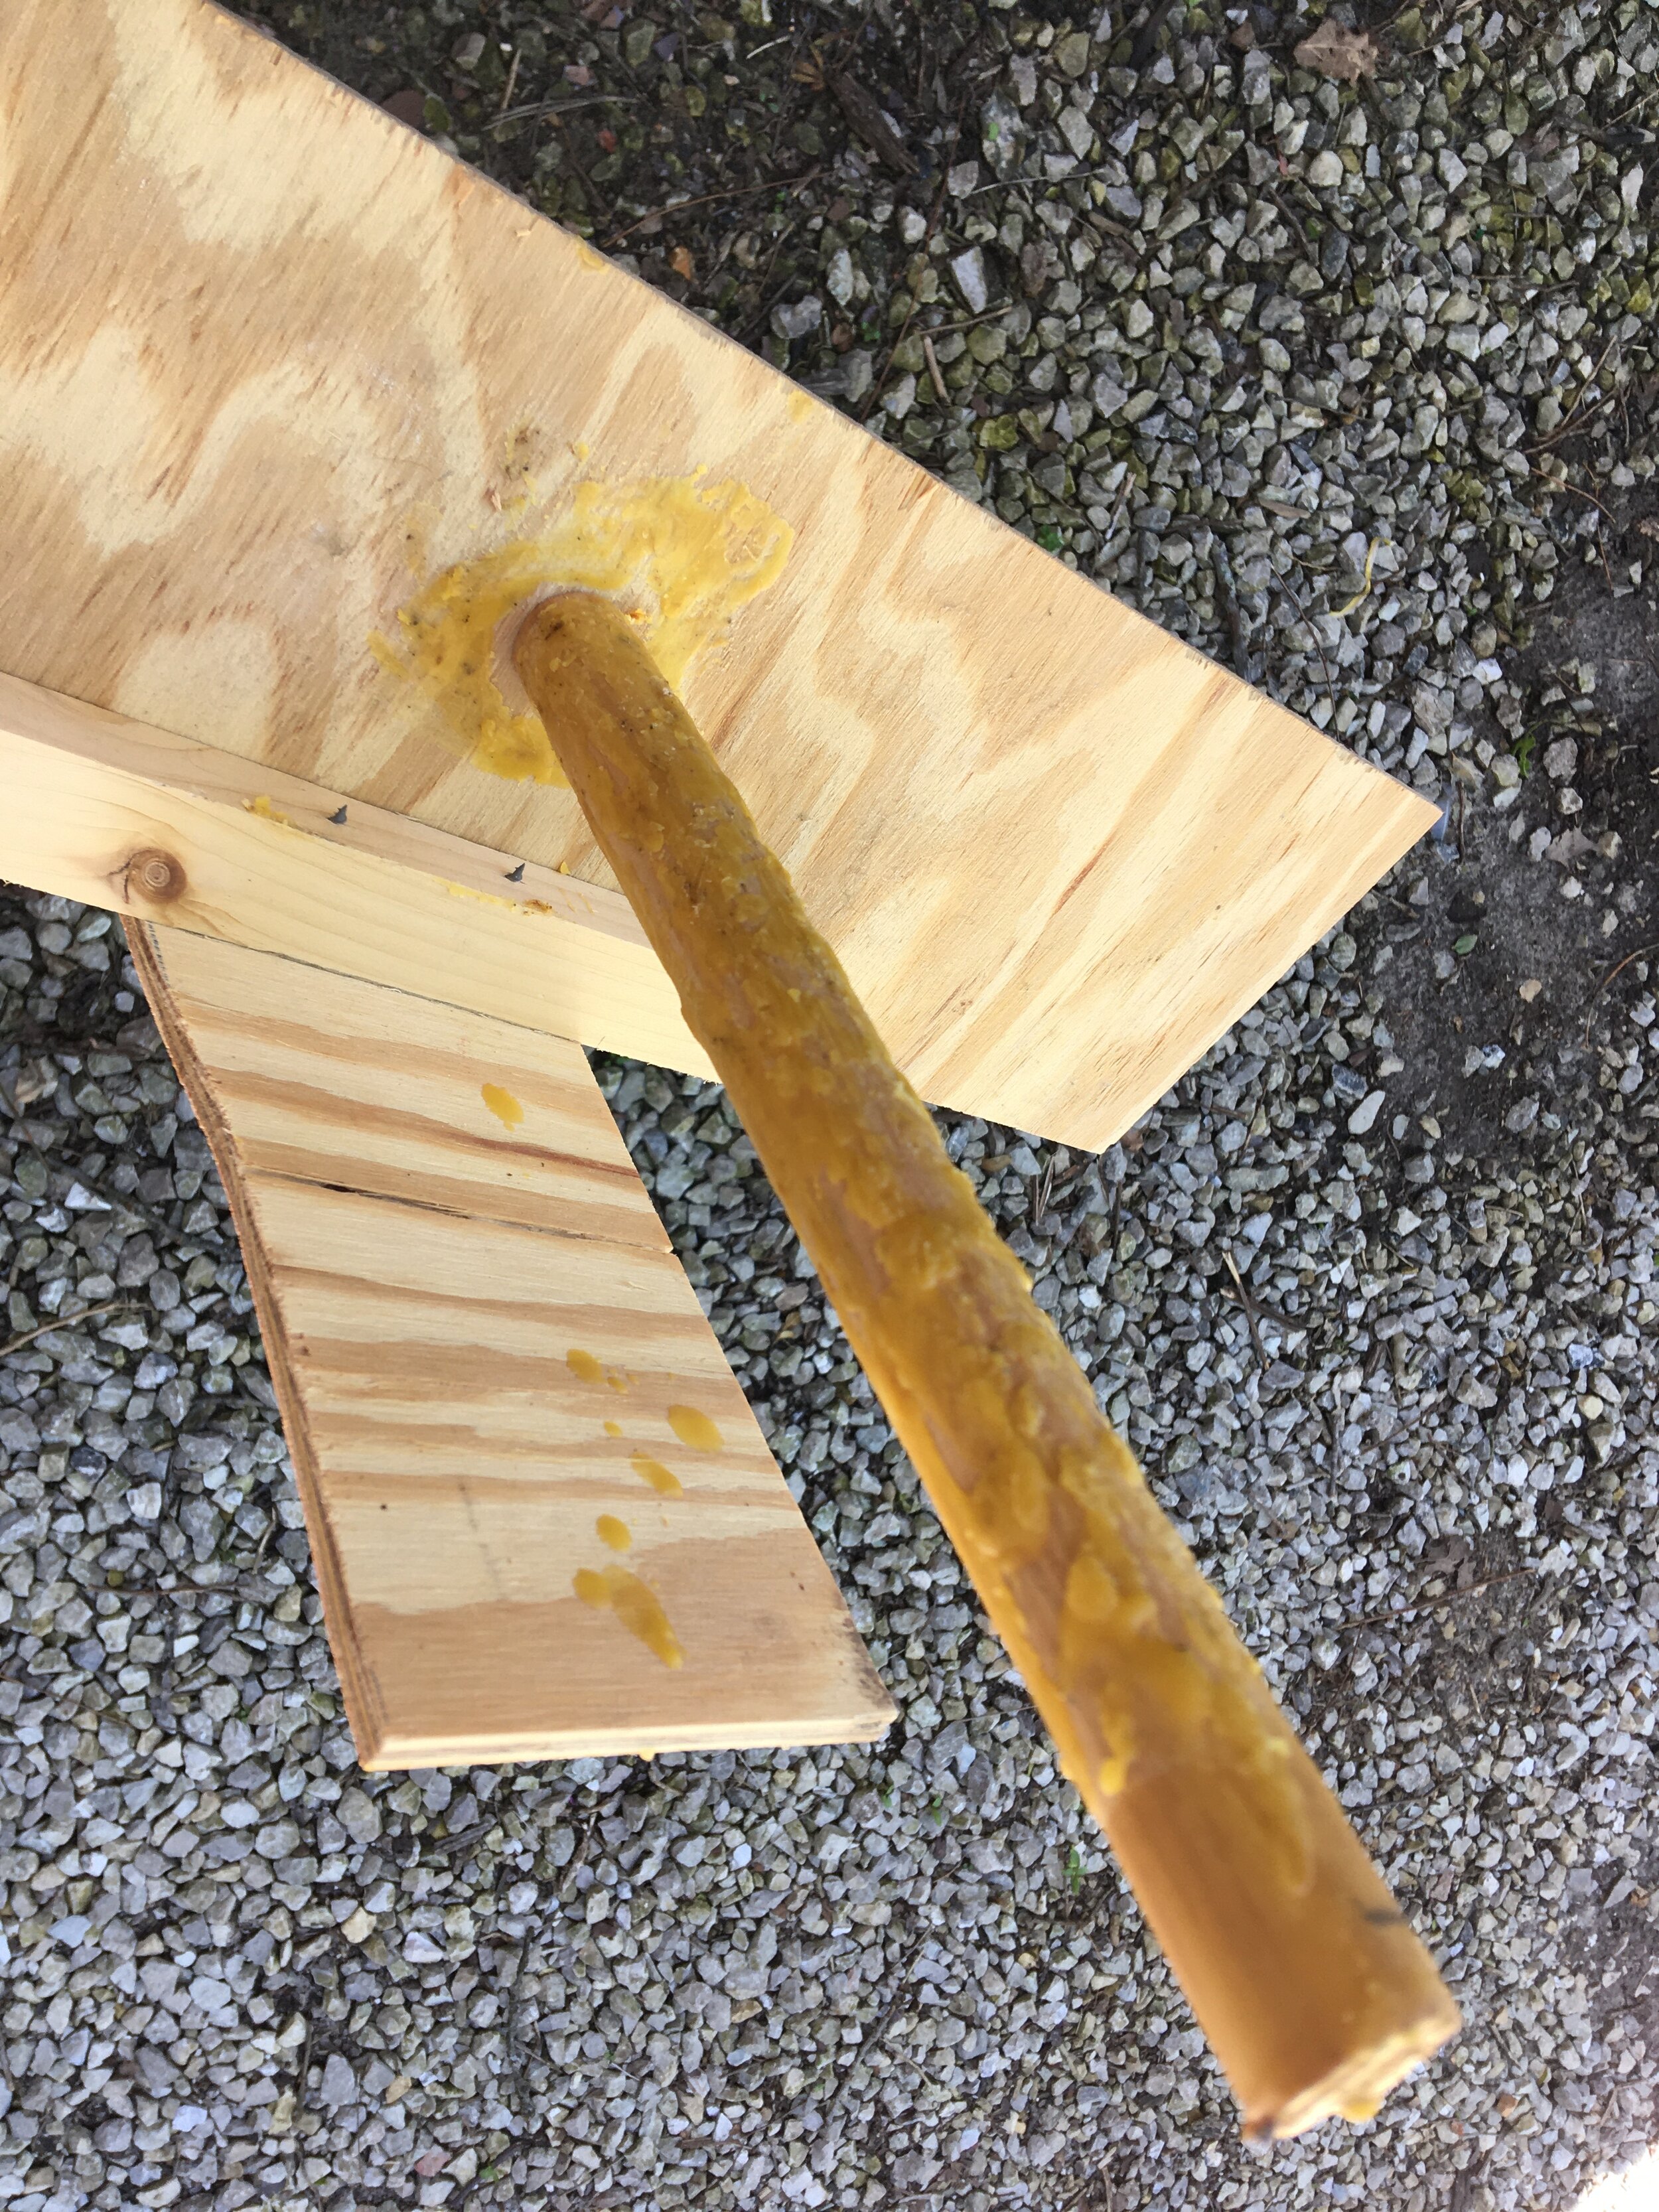
The center round pole is covered in melted wax. David said it should also be lightly covered with lemongrass, which I have yet to do.

According to a reader, lemongrass smells similar to the nasonov pheromone, which bees share to guide other bees to an area. Lemongrass is also used asa a swarm lure in swarm traps and bait hives.

The center round piece is covered in melted wax and lemongrass. (Photo by Charlotte Ekker Wiggins)

The center round piece is covered in melted wax and lemongrass. (Photo by Charlotte Ekker Wiggins)

Of all of the swarm “traps” and ways to try to entice swarms, this is definitely the easiest one to make. Especially since someone else made them for me!

Charlotte

Candy Plug

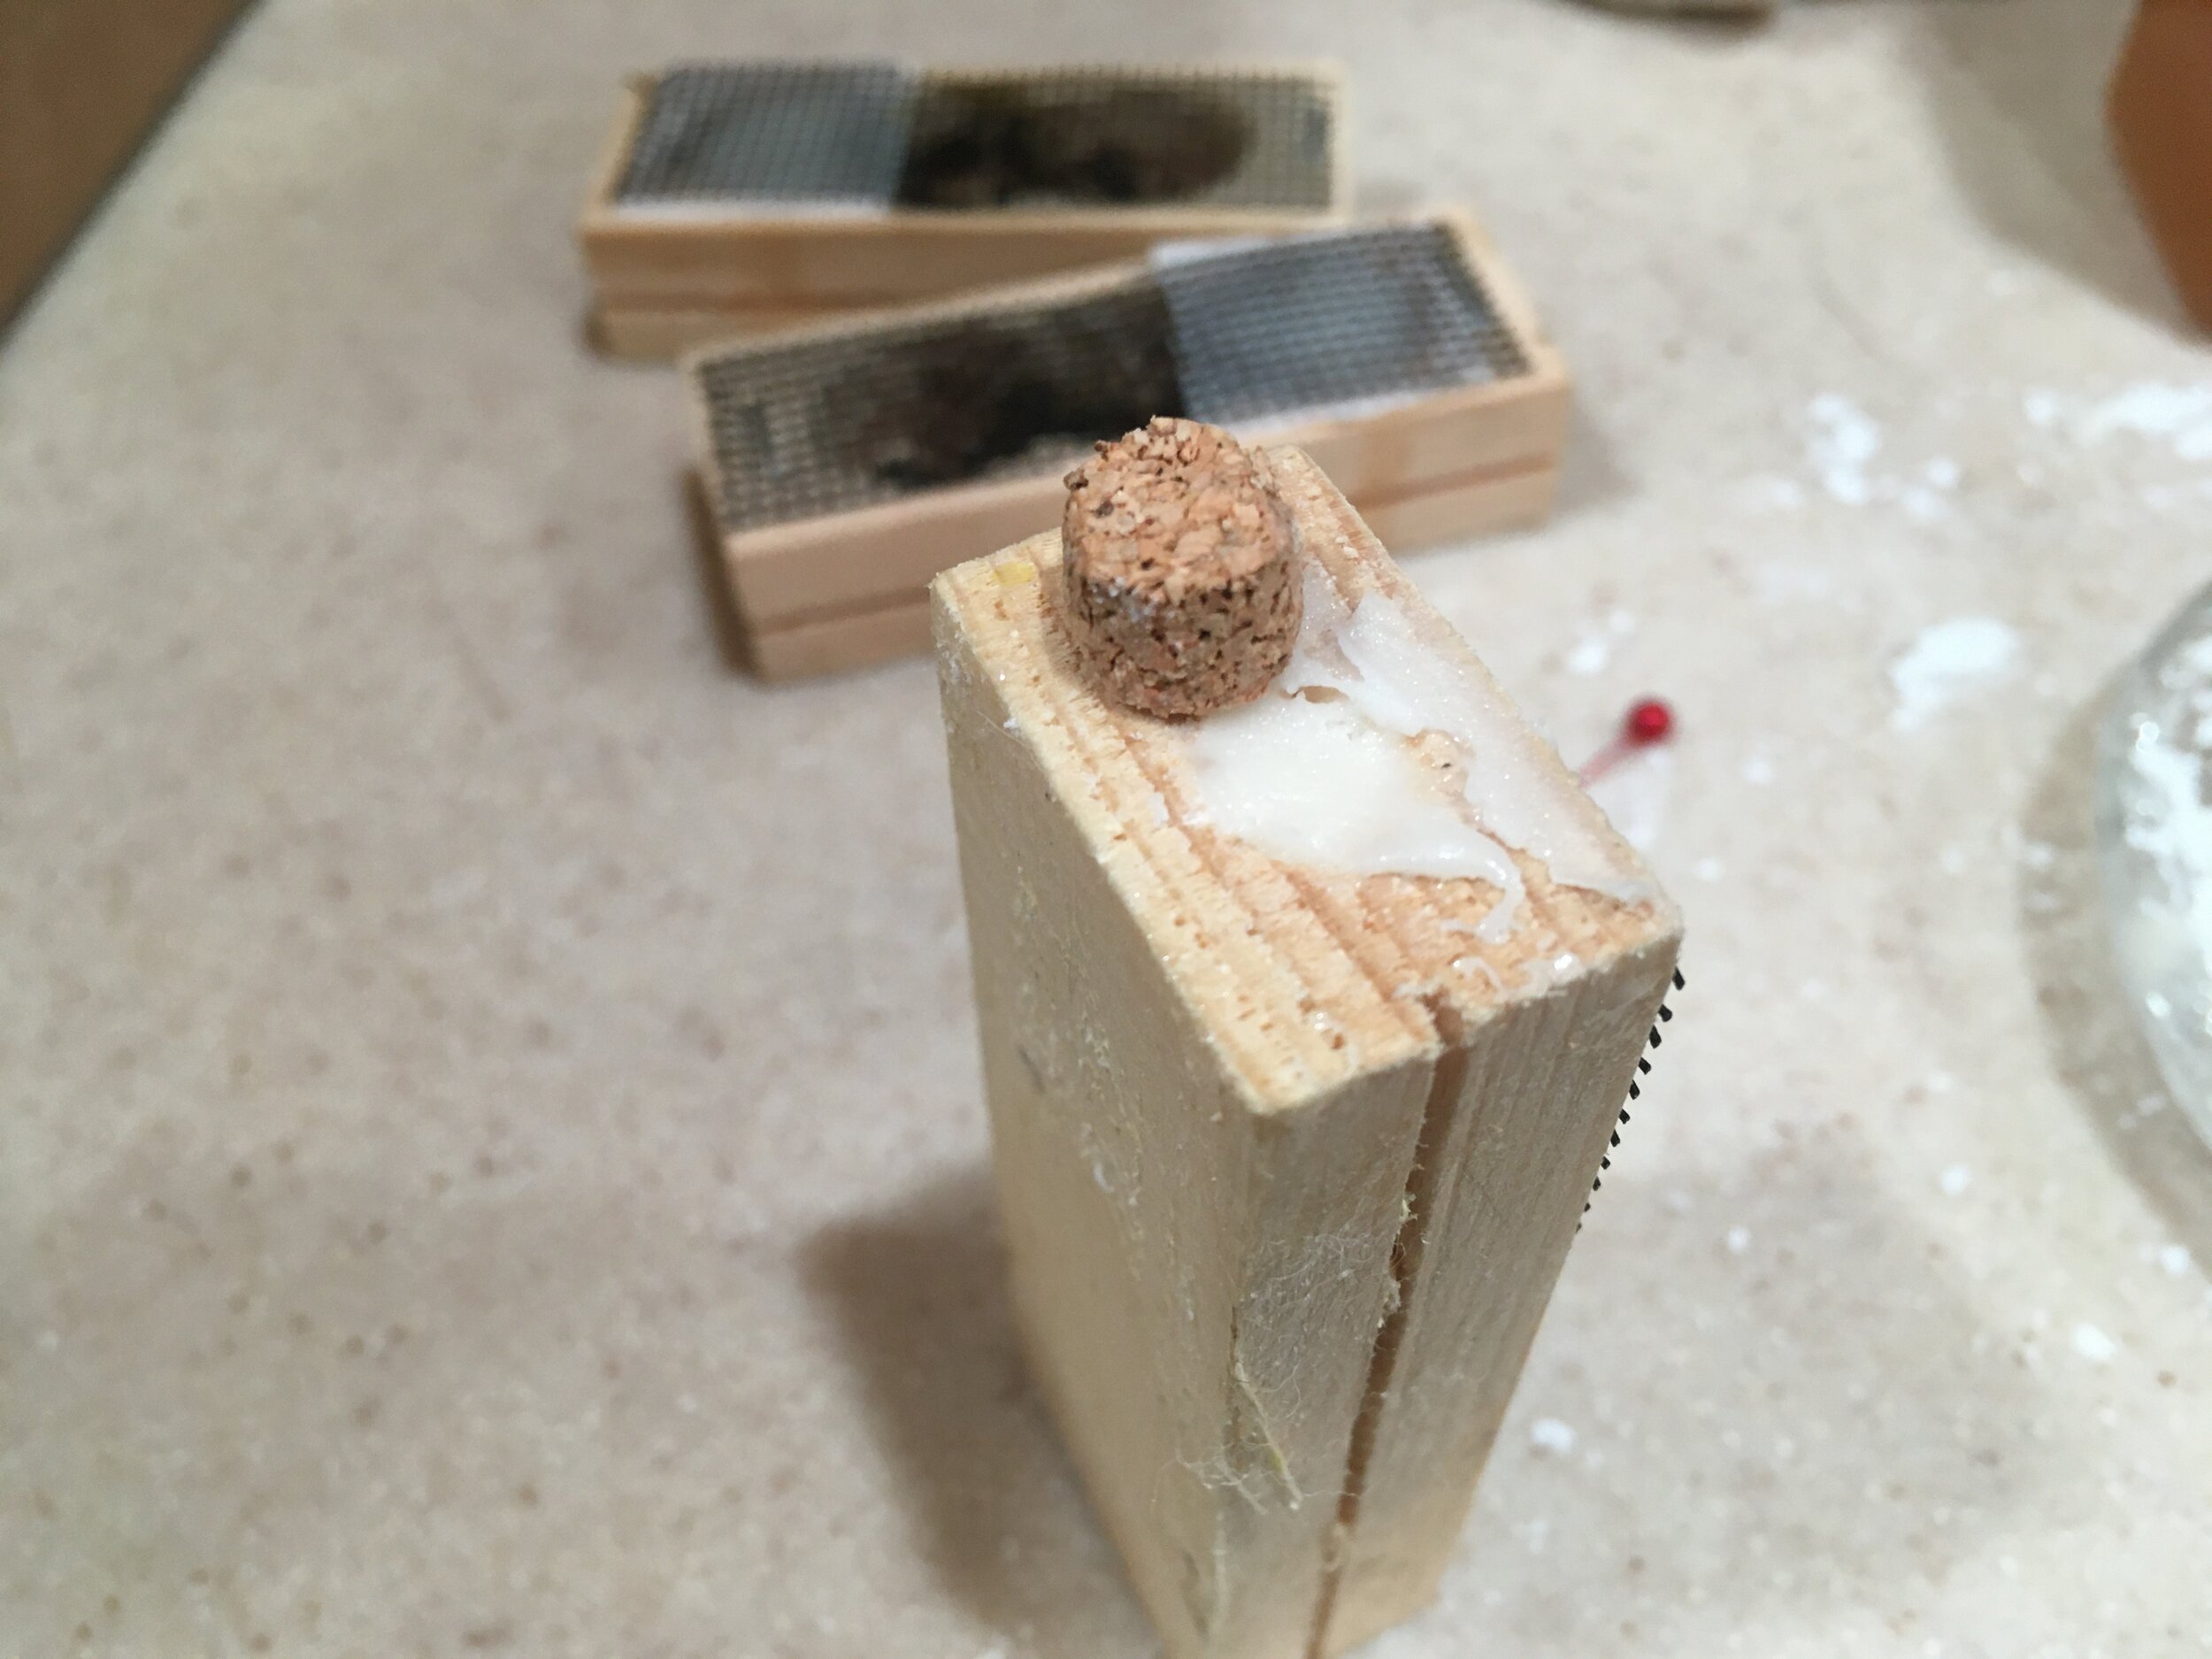
The white candy plug replaces the cork in the queen bee cage. (Photo by Charlotte Ekker Wiggins)

The white candy plug replaces the cork in the queen bee cage. (Photo by Charlotte Ekker Wiggins)

Queen Bee Box Candy Plug

The tiny boxes queen honey bees are shipped in are not all the same. It’s why we advise our beekeeping students to check the boxes to make sure the queen bee and her entourage have food to nourish them before they are released into their new home.

Some suppliers include both a candy plug or some sort on one side of the box. That candy plug is what feeds the queen bee and her attending worker bees while they live inside the box. Some “plugs’ are made out of sugar cane sugar and has to be kept moist with a daily application of a drop of water so bees can eat the sugar.

Another way to make the candy plug is to use miniature marshmallows.

I prefer making my own out of confectioner’s sugar and honey.

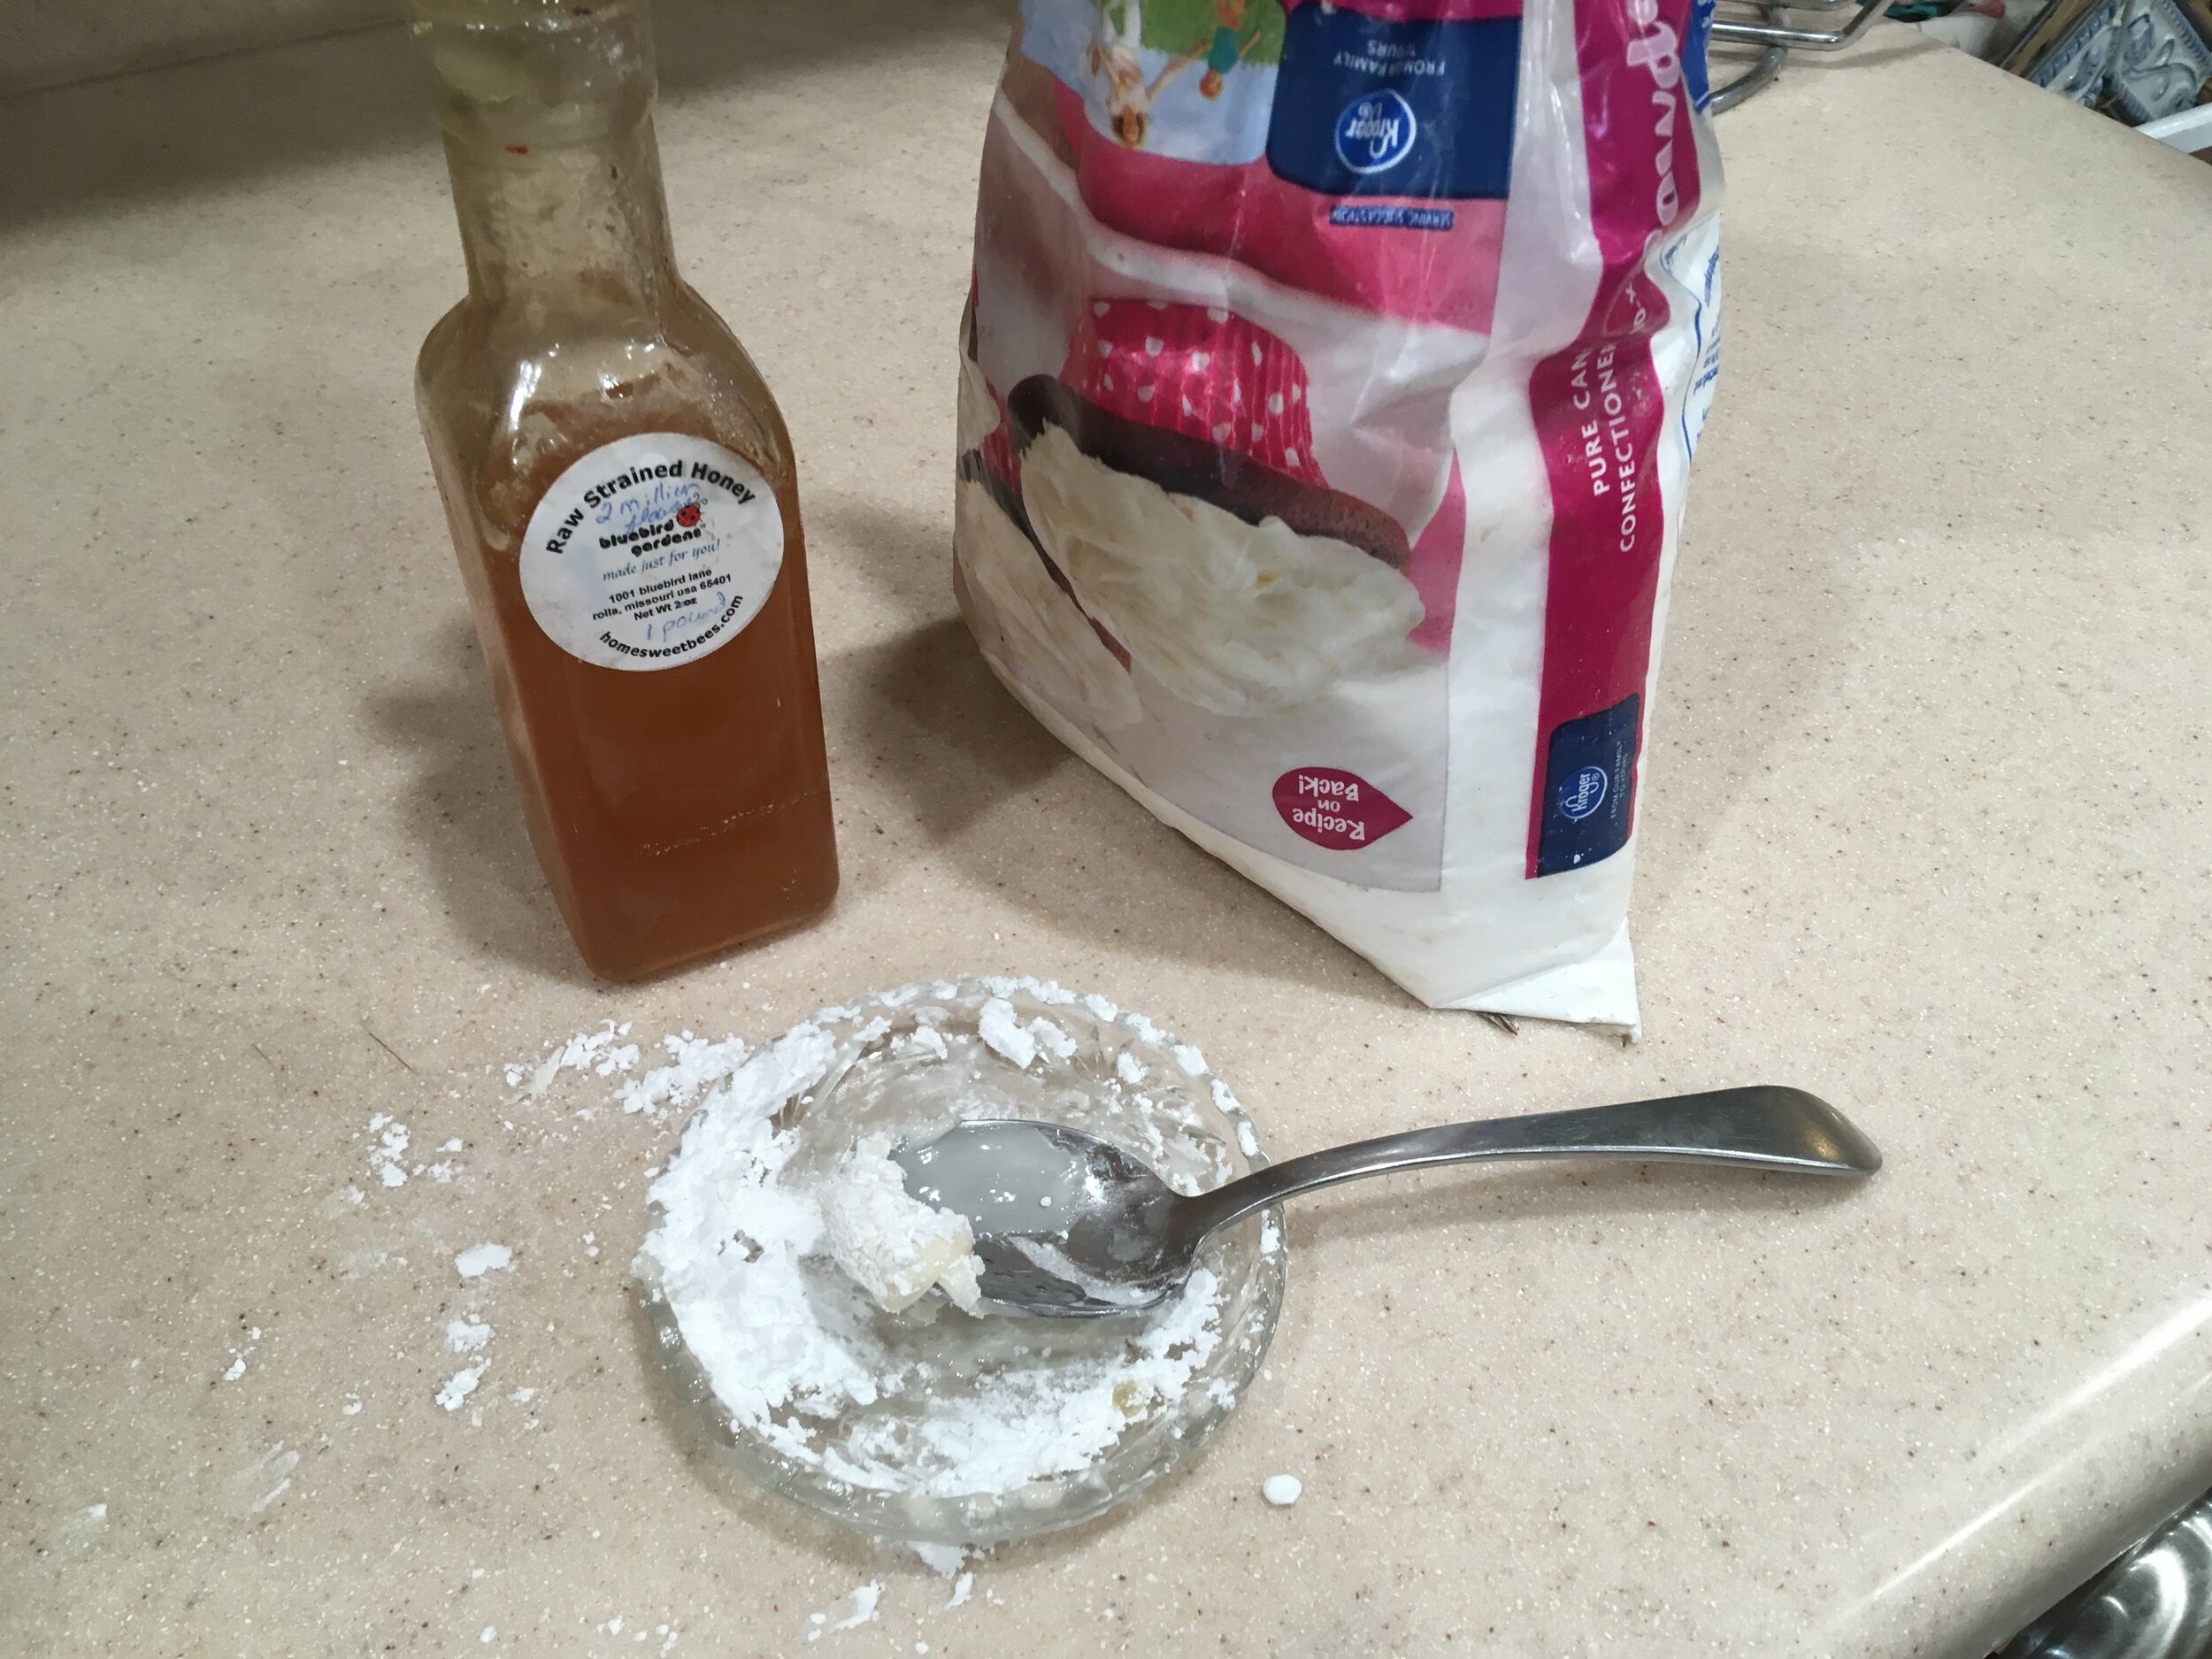
The trick is to thoroughly mix confectioner’s sugar into the honey. (Photo by Charlotte Ekker Wiggins)

The trick is to thoroughly mix confectioner’s sugar into the honey. (Photo by Charlotte Ekker Wiggins)

To make this candy plug, start with a few drops of honey that you start mixing with confectioner’s sugar.

Don’t mix it in the palm of your hand; the heat from the friction will warm up the honey and make it runny. A cold surface is better.

Keep working sugar and honey mixture until it’s very dense. (Photo by Charlotte Ekker Wiggins)

Keep working sugar and honey mixture until it’s very dense. (Photo by Charlotte Ekker Wiggins)

Keep folding the confectioner’s sugar into the honey until it is the consistency of a bread dough.

Don’t get discouraged, it will take time and patience but you will get there.

Once the candy plug is ready, you can store in a container in the refrigerator if you don’t need to immediately use it.

Charlotte

Orange Peel Fire Starters

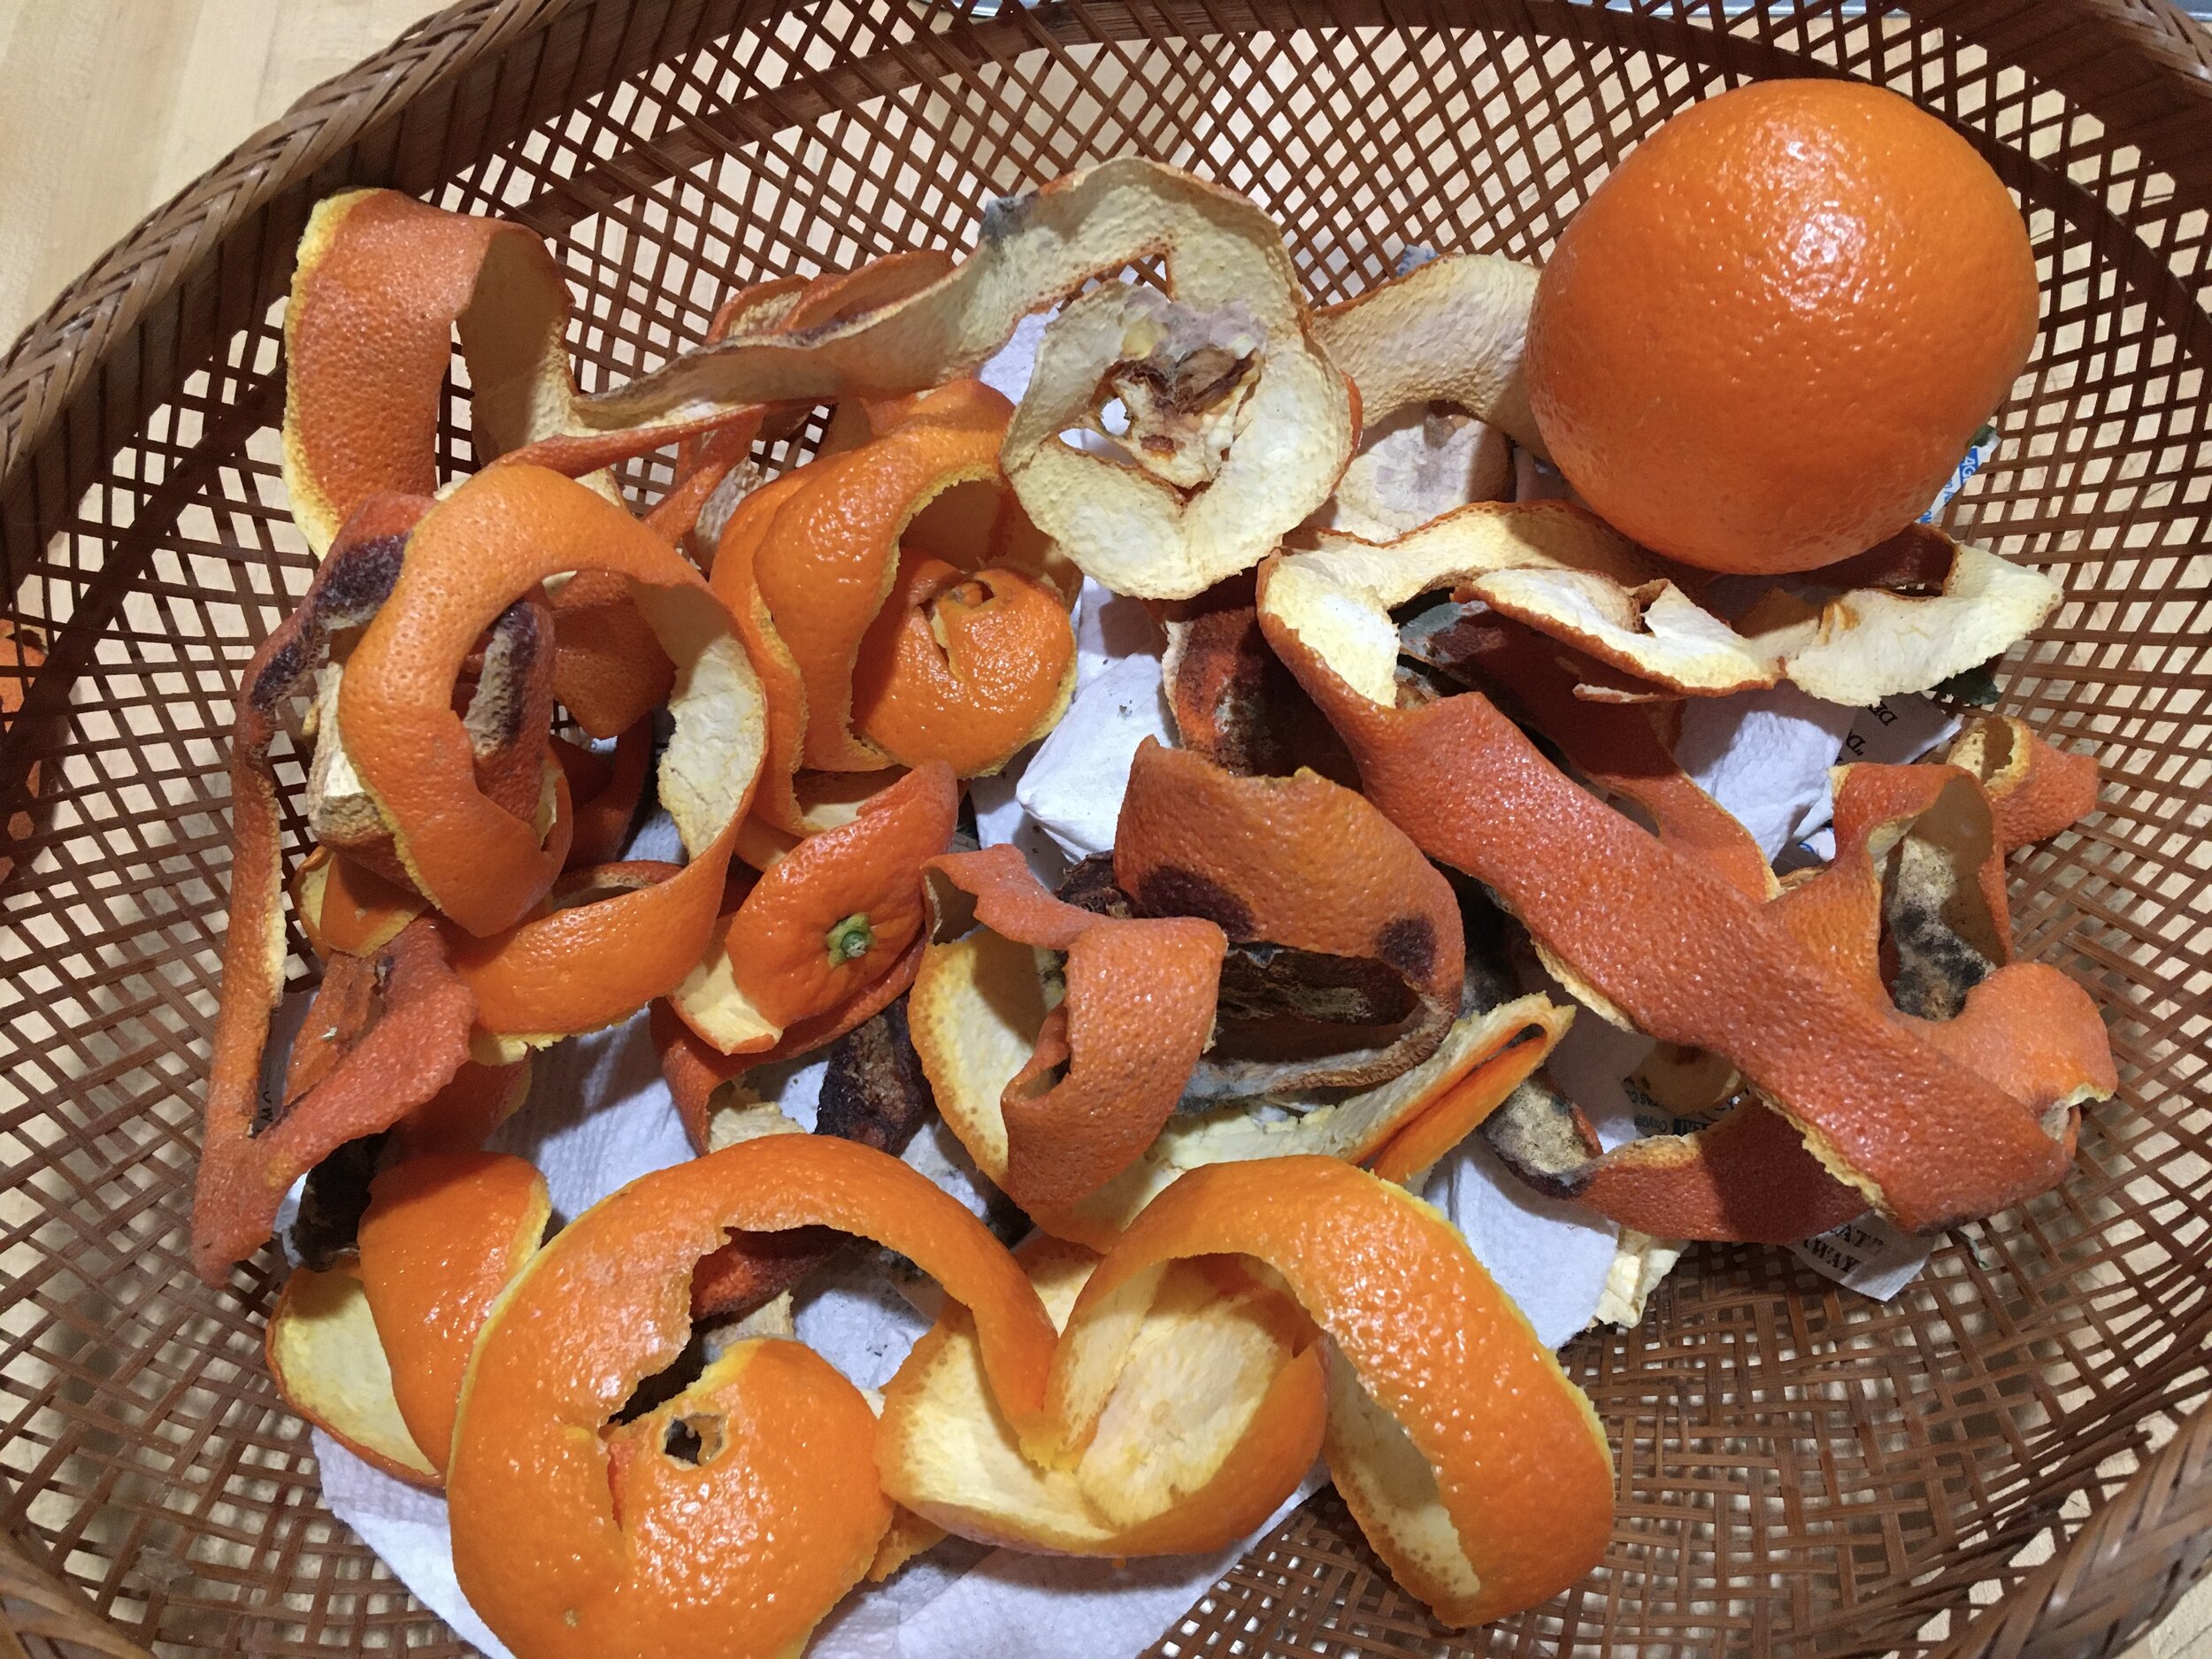
Dry orange peels in a basket on top of refrigerator. (Photo by Charlotte Ekker Wiggins)

Dry orange peels in a basket on top of refrigerator. (Photo by Charlotte Ekker Wiggins)

Orange Peel Fire Starters

As we all boost our immunity by eating more oranges, save those orange peels to repurpose them into an excellent beekeeping smoker starter.

There are a number of fire starting products on the market, from small pellets to small pieces of wood that remind me of fire starters used for fireplaces. My mother used to make some from pinecones dipped in wax, which is a good reminder of how flammable wax can be.

It doesn’t take much.

After peeling the orange, place the peel in a basket lined with paper. Slip on top of your refrigerator to dry. Once the peel is dry, you can easily break off small pieces and use them to start the fire in your beekeeping smoker.

You won’t need much. Lighting a few dry orange peels will get a fire started long enough to catch other fuel you put in the smoker; shredded newspapers, balls of paper, twigs - I am partial to dry leaves myself.

The most challenging part of getting a smoker going is getting it started. This is a nice way to repurpose those orange peels and get a leg up on having your best friend along as you visit your bees in your garden.

Charlotte

Starting a Fire

New beekeepers learning how to start a smoker. (Photo by Charlotte Ekker Wiggins)

New beekeepers learning how to start a smoker. (Photo by Charlotte Ekker Wiggins)

Starting a Fire

A smoker is often-called a beekeeper’s best friend. Keeping a fire going inside basically a large soup can is another story. It is the one ability new beekeepers have the hardest time developing, followed only by spotting the queen bee maybe on a moving frame of bees.

A smoker - a good working smoker - is a beekeeper’s best friend. (Photo by Charlotte Ekker Wiggins)

A smoker - a good working smoker - is a beekeeper’s best friend. (Photo by Charlotte Ekker Wiggins)

There’s a good reason why starting a fire in a smoker can be challenging. In addition to having the right fuel, some models are sold without a critical piece; a little tray that sits on the bottom of the metal can.

If you are buying a smoker, make sure to inspect for this vital piece. If you don’t have one, see if someone in your area can make one. A friend made me this one.

Homemade internal bottom smoker plate. (Photo by Charlotte Ekker Wiggins)

Homemade internal bottom smoker plate. (Photo by Charlotte Ekker Wiggins)

Underneath the plate are legs that keep it elevated off the bottom of the smoker so oxygen can circulate and keep the fuel burning.

The bottom legs to the smoker’s bottom plate, (Photo by Charlotte Ekker Wiggins)

The bottom legs to the smoker’s bottom plate, (Photo by Charlotte Ekker Wiggins)

If you don’t know anyone who can make one for you, use open wire with a similar bottom clearance. The idea is to keep the fuel elevated so air, and oxygen, circulates through the fuel when you use the bellows. That’s how you keep the fire going!

And there you have it, a fire in a large soup can! (Photo by Charlotte Ekker Wiggins)

And there you have it, a fire in a large soup can! (Photo by Charlotte Ekker Wiggins)

If you have never started a smoker, I recommend trying to get it lit before you open a hive. You also want to practice keeping it going so you can depend on the smoker if you need to once the hive is open.

I do tend to use muslin kitchen towels to keep my bees calm when I inspect them. The larger colonies usually take some smoke to keep them calm. Smoke makes them gorge on honey and not concentrate on what you are doing as the beekeeper.

Charlotte

Hive Tool Identification

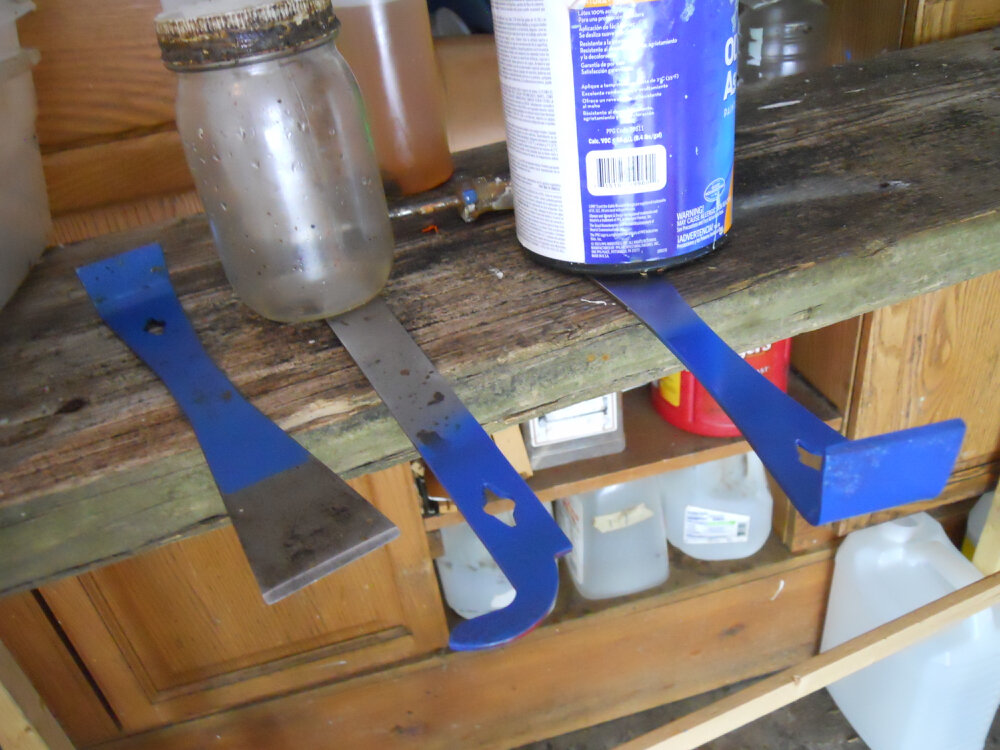
Pick a color to be able to quickly identify your hive tools. (Photo by Charlotte Ekker Wiggins)

Pick a color to be able to quickly identify your hive tools. (Photo by Charlotte Ekker Wiggins)

Hive Tool Identification

If you’re a beekeeper you are worse about loosing your hive tools than you are your garden trowel. Beekeeping hive tools are more slim and easier to slip out of a pocket. Hive tools, however, also disappear courtesy of other beekeepers who pick one up thinking it is their hive tool.

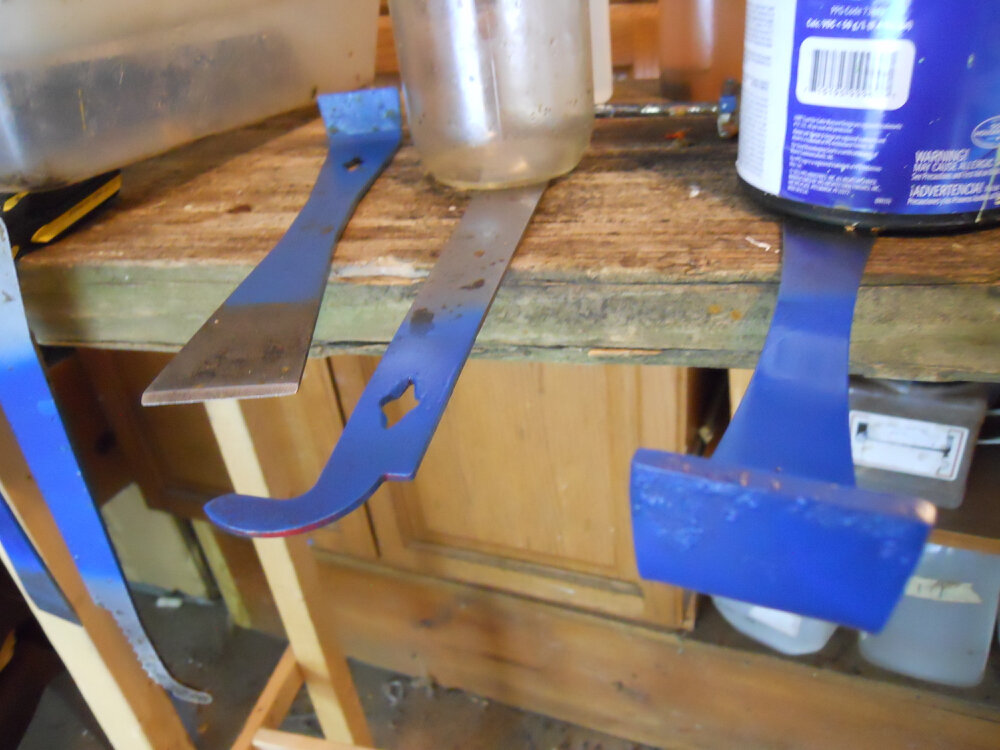
One easy way to keep hive tools separate is to paint yours. Mine are painted marine blue for Bluebird Gardens.

The process is easy. Once you decide on the color, get all hive tools ready for the paint.

Let air dry to make sure the paint sticks. (Photo by Charlotte Ekker Wiggins)

Let air dry to make sure the paint sticks. (Photo by Charlotte Ekker Wiggins)

The hardest part of this was figuring out how to allow them to dry. I ended up painting one end, letting that end dry and then spray painting the other end.

It’s a small step but one that will help ensure you don’t keep losing your tools to other beekeepers!

Charlotte

Safely Move Hives

It takes two people to easily move hives with a hive lifter. (Photo by Charlotte Ekker Wiggins)

It takes two people to easily move hives with a hive lifter. (Photo by Charlotte Ekker Wiggins)

Safely Moving Hives

Spring is here and some beekeepers will be looking for new sites for their hives, either because it’s too shady or there are not enough flowering resources to feed their bees. Or maybe they want their colonies closer to the house so they can watch them every day.

Regardless of the reason, one of the best tools I have in my beekeeping inventory is the hive lifter.

Now I put off adding this to my inventory at first. I was transitioning from 10 frames to 8 frame hives so thought that would be enough to lighten the load when I needed to move a colony.

Once I had it in hand I wondered what had taken me so long. The hive lifter makes moving hives much easier on the back and, although it requires two people to use, makes the transportation easy. Helps if you tie the hive closed so the boxes don’t move in transit.

Most beekeeping suppliers offer a form of hive lifter. Since it’s a hit and miss use item, get one and split the cost among several beekeepers.

It’s a great little tool that will save backs for many years to come!

Charlotte

Late Winter Feeding

These honeybees are running out of winter supplemental food. (Photo by Charlotte Ekker Wiggins)

These honeybees are running out of winter supplemental food. (Photo by Charlotte Ekker Wiggins)

Late Winter Feeding

It’s early March 2020, a time to check my honey bee colonies to make sure they still have enough food to get them into spring.

This is the first year since I started keeping bees 10 years ago that I not only left all of the honey on the hives last fall, but I fed them supplemental sugar. Three times. This winter has been very mild so bees have been out flying looking for something to do and consuming additional honey, and supplemental sugar, for flight fuel.

As I checked my colonies earlier today, I was surprised to find most of them at the end of their supplemental food. Yet again!

Since I didn’t have extra sugar cakes made and rain is expected in a day, I gave them the emergency sugar feeding. Emergency feeding is basically providing sugar on a piece of newspaper. In my case, I gave them the remnants of sugar cakes.

Loose sugar with pollen substitute on a strip of newspaper. (Photo by Charlotte Ekker Wiggins)

Loose sugar with pollen substitute on a strip of newspaper. (Photo by Charlotte Ekker Wiggins)

Nothing fancy but this way they won’t starve, something that often happens this time of year.

Here is another colony with the remnants of the last sugar cakes on the left. They are bringing in pollen so they haven’t touched the substitute pollen on the right. If you look closer, the bees on the right are on pieces of sugar and pollen substitute, not on the pollen substitute powder.

Another bee colony running out of winter food. (Photo by Charlotte Ekker Wiggins)

Another bee colony running out of winter food. (Photo by Charlotte Ekker Wiggins)

The leftover sugar cake pieces are hard and not accessible to the bees so I gave them a newspaper serving of easier to reach sugar and pollen substitute.

Sugar cakes on the top of a hive help absorb winter moisture. When they get rock hard, though, bees can’t get to the sugar. I usually spray the sugar cakes with water to rehydrate them.

Dinner is served! (Photo by Charlotte Ekker Wiggins)

Dinner is served! (Photo by Charlotte Ekker Wiggins)

One more colony fed with this emergency sugar feeding. This can’t provide for bees all winter but it will keep them fed until they can find flowers producing both nectar and pollen this spring.

Here’s another colony getting supplemental sugar and pollen substitute. (Photo by Charlotte Ekker Wiggins)

Here’s another colony getting supplemental sugar and pollen substitute. (Photo by Charlotte Ekker Wiggins)

I was a bit surprised at how low they are on. Bees in my garden usually end winter with surplus honey.

Beekeeping keeps me on my toes, every year is different!

Charlotte

Clam Shell Flipping

Flipping clam shells so the sugar cake bottoms dry out. (Photo by Charlotte Ekker Wiggins)

Flipping clam shells so the sugar cake bottoms dry out. (Photo by Charlotte Ekker Wiggins)

Clam Shell Flipping

It sounds like an athletic sport of sorts, doesn’t it. Actually, I found an easier way to dry my winter supplemental sugar cakes for my honey bees without making a mess out of my kitchen.

Up until now, I was repurposing those clear fruit clam shells to make the supplemental sugar cakes. To be able to use them in a hive, they need to dry out first. The clam shells make it convenient for sizing the sugar cakes as well as storing them in a cold oven until they dry.

However.

The bottom of the sugar cakes need to dry out as well. That’s where the mess came in.

Have you tried to turn a wet pail of sand? So you know what happens when you try to turn a half dry rectangle of sugar.

As I was starting to pop the sugar blocks out of the clam shells to try to turn them, the clam shell fell over on its own, turning the sugar cake on its head.

Gingerly trying this out with the rest of the clam shells, I discovered I could easily turn the clam shells over, still full of the sugar cakes, leaving the sugar cake bottoms exposed to air to dry. Without taking them out of the clam shells.

No messy kitchen. Back in the cold oven they went on cookie sheets to complete the drying out process.

The sugar is not dripping out of the clam shells and I don’t have sugar at the bottom of my oven.

I think that makes this tip a 10, don’t you?

Charlotte

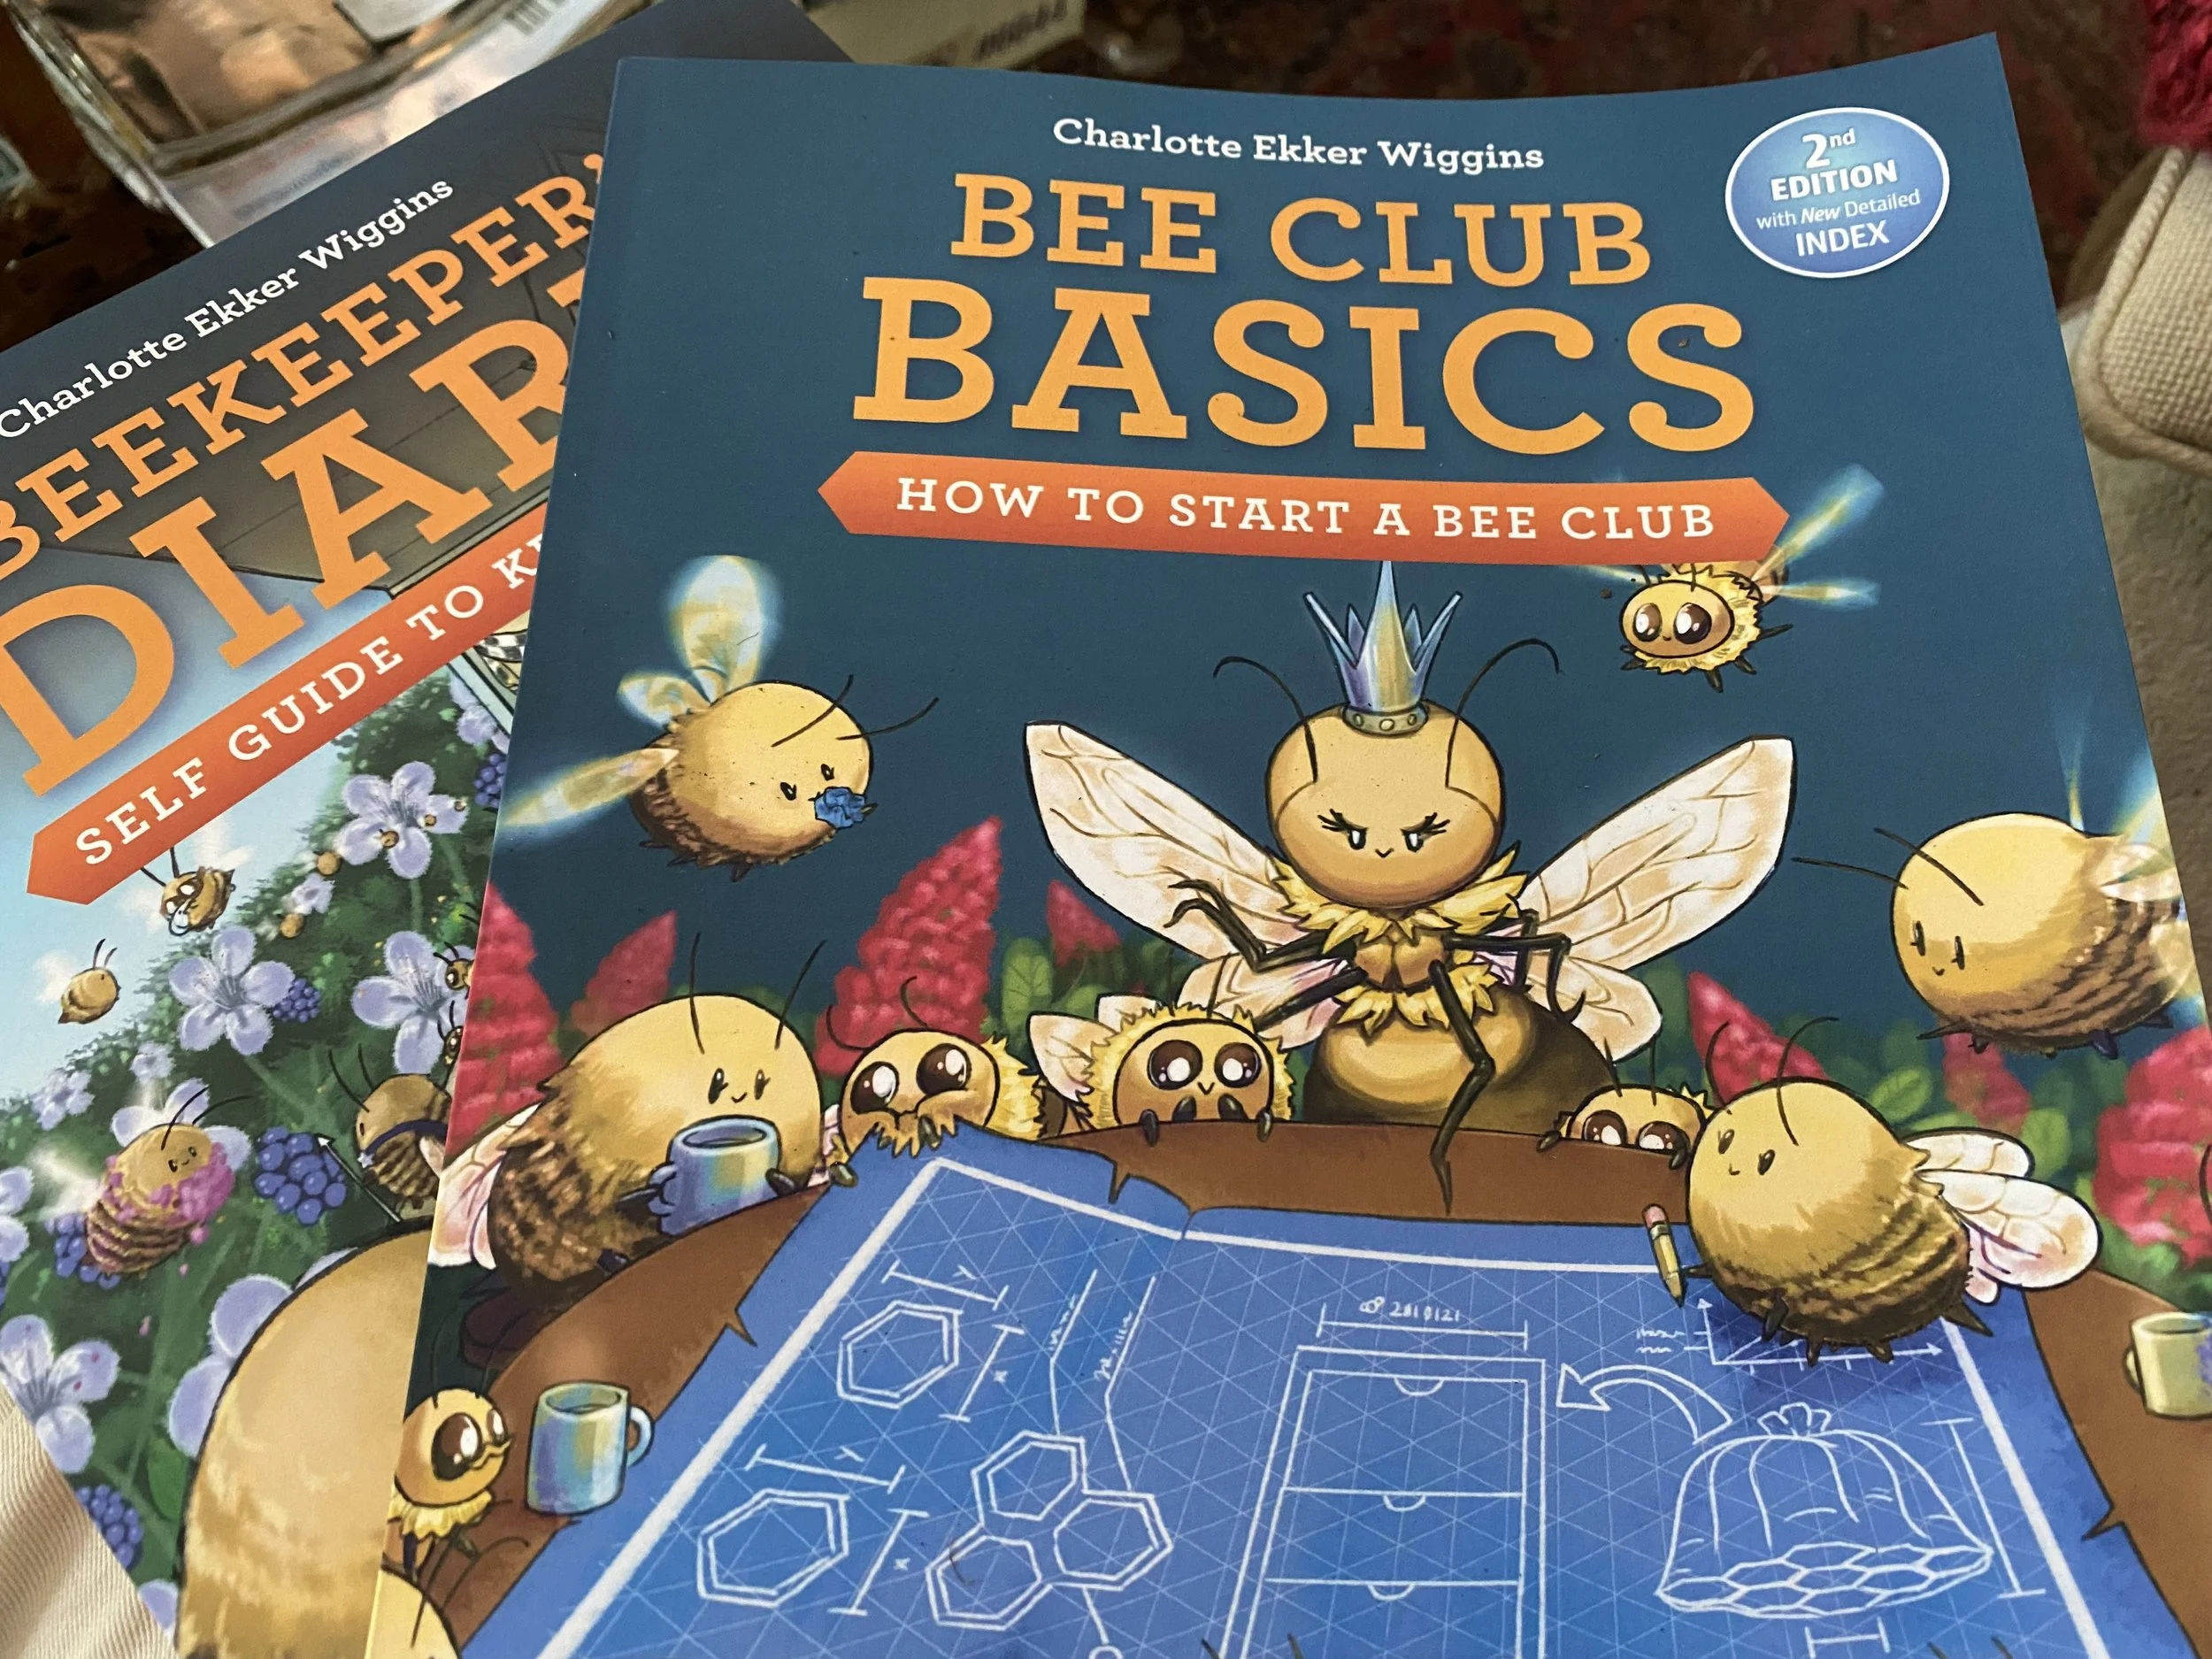
Finding Beekeeping Books

Beekeeping books our local bee club donated to our local library. (Photo by Charlotte Ekker Wiggins)

Beekeeping books our local bee club donated to our local library. (Photo by Charlotte Ekker Wiggins)

Finding Beekeeping Books

One of our new beekeeping students is so excited, she wanted to know what beekeeping books to buy online to give her a head start.

To her surprise, I told her not to buy any books just yet. She can find an excellent selection of beekeeping books at our local public library. How do I know?

Our local bee club donated the beginning beekeeping books a couple of years ago. The idea was to have a nice selection of current beekeeping books so beginning beekeepers would have easy access to a nice selection of reading material.

Now some of these beekeeping books will be read once, maybe twice. When the new beekeeper outgrows the book, it’s time to select something else. Nothing wrong with the first books, that’s why we have them at the library. Some are excellent gateway books, introducing new beekeepers to how to keep bees.

Others have excellent photos but little narrative, and even more are specialty beekeeping area books - how to raise queens and planting for pollinators.

And yes, I have read all of these beekeeping books. That’s why we donated them, my bee buddy David and I determined these were excellent reference books.

How to Check Out Books

If you have never checked out a book from a library, you will need a library card with your membership number on it. Your membership card is free if you live within city limits.

Most libraries also have a membership fee for non-city members. Where I live, the non-city membership fee is $20 a year.

Books can be checked out for 2 weeks at a time, and renewed over the phone if you haven’t finished reading it.

And now, where to find the beekeeping books.

Libraries have a numbering system tied to their catalogs. Here is the sign at our public library showing the catalog topic numbers. Beekeeping books at the Rolla Public Library are in the 637 section.

Turn right at the sign to find Rolla Public library beekeeping books,. (Photo by Charlotte Ekker Wiggins)

Turn right at the sign to find Rolla Public library beekeeping books,. (Photo by Charlotte Ekker Wiggins)

Once at the shelves, it’s time to start looking for the appropriate numbers on the side of the books.

This library section easily distracts me with books on animals. That’s after I get sidetracted by the nearby gardening section.

Tall stack, now which shelf? (Photo by Charlotte Ekker Wiggins)

Tall stack, now which shelf? (Photo by Charlotte Ekker Wiggins)

Don’t see any beekeeping books?

Me, either, until I pulled out a book on the absolute bottom shelf. The beekeeping books are all turned sideways so it’s hard to read the spines of the books.

Library Director Rebecca Buckley said the shelves are being re-organized and updated so don’t be surprised if the beekeeping books move again. The key is to follow the subject numbers.

All the way to the bottom, where it isn’t easy to see! (Photo by Charlotte Ekker Wiggins)

All the way to the bottom, where it isn’t easy to see! (Photo by Charlotte Ekker Wiggins)

Check out a book or two that interest you and get comfortable with beekeeping terms. Enjoy the photos. Realize that once you get started, you will be dealing not with static pages of information but tiny buzzing creatures that would rather have you out of their way. it’s definitely a partnership. The bees know what they are doing, now it’s your turn.

So check out a beekeeping book, your adventure is about to start!

Charlotte

Repurpose Clam Shells

Repurposed strawberry clam shells holding sugar cakes for bees. (Photo by Charlotte Ekker Wiggins)

Repurposed strawberry clam shells holding sugar cakes for bees. (Photo by Charlotte Ekker Wiggins)

Repurpose Clam Shells

I have to confess, I didn’t know what “clam shells” were when someone asked me if I had any extras. All I could think was why would someone ask me, living in the Midwest, for clam shells associated with oceans, or large bodies of water?

Turns out “clam shells” is the term for those clear containers that hold fruit and vegetables at your local grocery store.

These are two clam shells that work well for honey bee sugar cakes. (Photo by Charlotte Ekker Wiggins)

These are two clam shells that work well for honey bee sugar cakes. (Photo by Charlotte Ekker Wiggins)

Clam shells make excellent forms for drying supplemental sugar cakes for feeding honey bees over winter.

Not that you can’t use bread pans and pie tins for the supplemental sugar cakes because you can. The issue is how many supplemental sugar cakes you are planning to make. Since I make 12, one for each one of my hives, having supplemental containers like clam shells comes in handy. You want to dry out the sugar cakes in an easy to store, and use, shape.

The clam shell rectangular shape nicely fits across the horizontal length of a honey bee hive, easily fitting two lengthwise.

The other advantage of repurposing clam shells is that once dry, you can easily store two sugar cakes per clam shell. You want to make them half the size of the shells to nicely fit into the hives, which also makes shaping the sugar cakes easier.

And repurposing clam shells also come in handy to store beekeeping gloves, muslin kitchen towels and loose flower bulbs you inadvertently dig up.

Keep a supply handy with your beekeeping supplies and you may find other ways to incorporate clam shells.

Charlotte

Cleaning Hive Entrances

Snow closes off a hive entrance so bees can’t make their cleansing flights. (Photo by Charlotte Ekker Wiggins)

Snow closes off a hive entrance so bees can’t make their cleansing flights. (Photo by Charlotte Ekker Wiggins)

Cleaning Hive Entrances

It’s a beautiful sunny day after snow, you'‘re bundled up and warm and then it hits you. You have to get outside to clean off your hive entrances!

Honey bees spend winter inside hives clustered as they vibrate wing muscles to stay warm. When temperatures move to 40F or more, they will start moving away from the cluster and taking cleansing flights, taking their elimination outside.

That is, if they can get outside.

One of the best tools to clean hive entrances of snow and ice is among your gardening tools, your weed cutter. The long-handled tool usually has a forked end that makes cutting up ice easy.

One of the best gardening tools to clean hives, my weed cutter. (Photo by Charlotte Ekker Wiggins)

One of the best gardening tools to clean hives, my weed cutter. (Photo by Charlotte Ekker Wiggins)

As you remove the snow, also check behind the entrance reducer that dead bees haven’t piled up behind the small entrance.

During winter, bees will die. On sunny days, undertaker bees will drag the bodies out of the hives if they can get through the entrance. Since we usually keep entrances at the smallest opening during winter, it’s easy to get those entrances clogged with little dead bodies.

Be gentle as you slowly remove dead bodies. Some bees may be alive but have their wing muscles frozen. You also don’t want to damage or remove the propolis curtain bees may build behind the entrance reducer. Propolis is a natural antibiotic bees produce from tree sap helping to keep the colony healthy.

Don’t remove the propolis seal the bees have built, just remove the snow. (Photo by Charlotte Ekker Wiggins)

Don’t remove the propolis seal the bees have built, just remove the snow. (Photo by Charlotte Ekker Wiggins)

Once dead bee bodies and snow are removed, place the entrance reducer back. Bees will now be able to easily come and go when the temperature entices them outside.

Cleaned entrance so bees can easily keep house! (Photo by Charlotte Ekker Wiggins)

Cleaned entrance so bees can easily keep house! (Photo by Charlotte Ekker Wiggins)

If you add a feeding shim to the top of the hive, then cleaning the bottom entrance is less of an issue. Having the feeding shim holes at the top allows bees easy outside access in the event the bottom entrance is blocked with snow and ice.

A top feeding shim on one of my Missouri hives. (Photo by Charlotte Ekker Wiggins)

A top feeding shim on one of my Missouri hives. (Photo by Charlotte Ekker Wiggins)

Here’s a sneak peek of what is happening inside the top feeding shim. When bees run out of honey, they are getting fed sugar cakes at the top of the hive frames.

Large wire allows the bees to easily move in and out of the feeding shim.

You can also see the propolis they added to the feeding shim on the back side, looks like caramel drips on a cake. Leave as much of the propolis as you can, that’s how bees keep the colony protected from diseases.

A feeding shim with supplemental winter sugar cakes. (Photo by Charlotte Ekker Wiggins)

A feeding shim with supplemental winter sugar cakes. (Photo by Charlotte Ekker Wiggins)

I used to place feeding shims on my hives in late fall. Now I leave them on all year so bees can get accustomed to the top entrance and moving through the wire to get to supplemental food.

The top feeding shim also lets me stay inside after the snow fall that seals off the bottom entrance reducers. At least in theory.

I’m still usually out after a snow making sure my little girls are ok, lids still on. And after all of these years I still get excited when a see a bee out flying!

Charlotte

Trees as Wind Breaks

Christmas trees make excellent bee hive wind breaks. (Photo by Charlotte Ekker Wiggins)

Christmas trees make excellent bee hive wind breaks. (Photo by Charlotte Ekker Wiggins)

Christmas Trees as Wind Breaks

There are a number of ways you can repurpose and recycle your live Christmas trees. One way I have repurposed live Christmas trees is as wind breaks for my bee hives.

My apiary is located on the side of a Missouri limestone hill. Prevailing winds move up the hill from the southwest so having a windbreak in front of my hives is a good idea for our winters.

My hives are wrapped to help the hives against the winds. The Christmas trees then add a little extra protection.

Place Christmas trees against prevailing winds. (Photo by Charlotte Ekker Wiggins)

Place Christmas trees against prevailing winds. (Photo by Charlotte Ekker Wiggins)

You can usually get Christmas trees at your local home and garden centers only too happy to have them hauled off.

Once spring arrives, I will use the Christmas trees as flower bed mulch.

As you scatter the Christmas trees around, take time to enjoy seeing your bees if they are out.

Taking a short break to watch bees in the winter sun. (Photo by Charlotte Ekker Wiggins)

Taking a short break to watch bees in the winter sun. (Photo by Charlotte Ekker Wiggins)

If not, don’t bother them, they should be huddled inside staying warm.

When sun hits my hives, I usually see a few bees in my garden venturing out for those “cleansing flights” and then heading back in. Not having to deal with cold wind should be a nice break for them.

Charlotte

Bee Clean Up Crew

One of my favorite butterflies, painted ladies, join my honey bee clean up crew. (Photo by Charlotte Ekker Wiggins)

One of my favorite butterflies, painted ladies, join my honey bee clean up crew. (Photo by Charlotte Ekker Wiggins)

Bee Clean Up Crew

It’s been a busy fall at my apiary this year. Cold weather snuck in earlier than usual. The reconstruction of my deck, and the storage shed underneath, was behind due to delays in product shipment so I had my beekeeping equipment scattered through my garden. So what do I do? I decide to take on yet another overdue project, cleaning out my basement refrigerator.

When I started beekeeping 10 years ago, little did I know how much I would use a refrigerator. From freezing frames with small hive beetle larvae to setting creamed honey, I now consider a refrigerator a key tool in a beekeeper’s arsenal.

This particular refrigerator in the basement has also housed pots with spring bulbs for bulb gardens; bee protein patties as well as honey frames. In other words, the shelves have become quite sticky.

If you have ever tried to clean honey off any surface you know how challenging that can be. Honey is flower nectar dehydrated to 18%, making it very thick. When combined with exposure to cold, the sugar molecules transform into a creamy sticky gooey syrup. It’s crossed my mind to try to make a glue out of this some day.

My refrigerator shelves getting warmed by sunlight so bees can take up spilled honey. (Photo by Charlotte Ekker Wiggins)

My refrigerator shelves getting warmed by sunlight so bees can take up spilled honey. (Photo by Charlotte Ekker Wiggins)

Instead of tackling these myself, I decided to let the bees clean up the shelves. Waiting for a warm, fall day, I spread the refrigerator shelves on my retaining wall and waited. Once the honey bees found the honey, other pollinators joined them including fies and butterflies.

Honey bees seriously work these large globs of spilled honey. (Photo by Charlotte Ekker Wiggins)

Honey bees seriously work these large globs of spilled honey. (Photo by Charlotte Ekker Wiggins)

Since they were quite busy working the honey, it was a good opportunity to get a close up look at how they work. I pulled a chair up close and observed the visitors, and the bees, working together to collect the honey to take back to their hives for winter food.

Once one bee finds a good spot to mine, the other worker bees join in, slowly wearing away to puddle of honey.

Flies join honey bees cleaning up spilled honey. (Photo by Charlotte Ekker Wiggins)

Flies join honey bees cleaning up spilled honey. (Photo by Charlotte Ekker Wiggins)

So not all of the honey was gone. However, it was cleaned up enough to make my job much easier, and more importantly, less sticky.

The refrigerator is now ready for next year.

Charlotte

Smoker Stand

How to repurpose cut down trees to make smoker stands, especially beekeeping on a hillside. (Photo by Charlotte Ekker Wiggins)

How to repurpose cut down trees to make smoker stands, especially beekeeping on a hillside. (Photo by Charlotte Ekker Wiggins)

Smoker Stand

You’re probably thinking what’s the big deal about having a little stand for a smoker. Well, if you are keeping bees on a limestone hillside, it’s a problem.

No fun chasing a smoking smoker down a limestone hillside. (Photo by Charlotte Ekker Wiggins)

No fun chasing a smoking smoker down a limestone hillside. (Photo by Charlotte Ekker Wiggins)

Without a lot of level areas, a smoker placed on the ground has a higher chance of rolling down hill, setting everything it touches on fire. Not a good look in general but even worse when everything is so dry a spark could send the hillside up in smoke.

Keeping with my history of repurposing what is in my garden, or what I can easily add to my garden - I am taking some of the short tree stumps around and making them into smoker stands.

They were actually just stands to begin with. I don’t want to use chemicals to speed up the stump decomposition so I repurpose them. The taller ones have birdhouses on top; medium sized ones form garden decor stands and the legs for bird baths. It just so happened this one was near a hive and I stopped myself from dropping the smoker when I stuck the smoker on the level top.

I have made use of them twice now and they work quite well. Besides keeping the smoker level, I can also easily find it as I move to the next hive.

My smoker stand in use and the smoker not rolling down the hill. (Photo by Charlotte Ekker Wiggins)

My smoker stand in use and the smoker not rolling down the hill. (Photo by Charlotte Ekker Wiggins)

I am particular about the thin cedar pieces that form the top. At first I couldn’t describe what I was looking for, it was more of a I will know it when I see it.

When I spotted these cut down cedar pieces, I knew they were perfect. They look nice even with nothing on them.

I confess, I pick wood pieces that look like flowers for my stands. (Photo by Charlotte Ekker Wiggins)

I confess, I pick wood pieces that look like flowers for my stands. (Photo by Charlotte Ekker Wiggins)

I am moving some iris to surround this one. The iris will look nice nearby and, once they bloom, the pointed leaves will make it look like a giant flower in the center of the iris bed.

Apparently some of the other garden residents find them handy as well. I periodically find lizards sunning on them. Birds have stopped while carrying worms. This morning, it appears it was set for breakfast.

My smoker stands come in handy for more than holding hot smokers. (Photo by Charlotte Ekker Wiggins)

My smoker stands come in handy for more than holding hot smokers. (Photo by Charlotte Ekker Wiggins)

I recently saw a cut down stump reshaped into a chair. I may try that on the next stump that gets made in my garden but in the meantime, I like my little smoker stands.

Charlotte

Beekeeping Basket

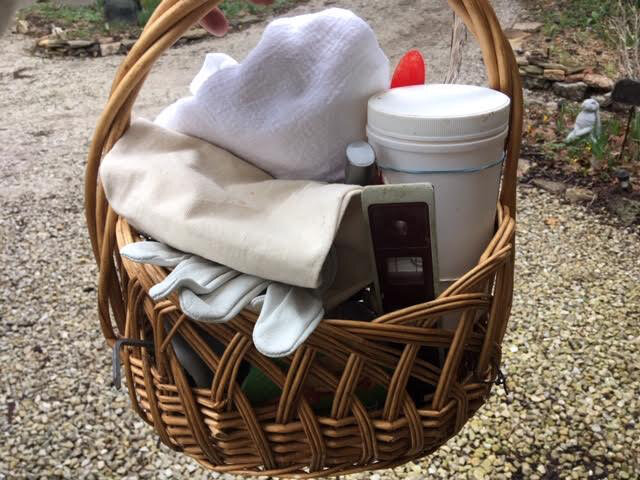
This repurposed basket makes a nice container for my basic hive inspection tools. (Photo by Charlotte Ekker Wiggins)

This repurposed basket makes a nice container for my basic hive inspection tools. (Photo by Charlotte Ekker Wiggins)

Beekeeping Basket

There are a number of options on the market for carrying beekeeper’s inspection tools around the apiary. Some use 5-gallon paint buckets, others buy gardening buckets.

My personal choice are repurposed baskets. They are lightweight compared to buckets and, when I find the right size, nicely hold my basic hive inspection tools.

I keep one packed and ready to use at all times. And yes, it includes a small portable level. I keep on a Missouri limestone hillside so I tend to check that my bee hives are not slipping down hill.

What else is in my basket?

Depending on the time of year, I carry some pollen substitute, that’s the large white container on the right. I prefer muslin kitchen towels to keep my bees calm during inspections so I toss a half a dozen of those in as I head out to the apiary.

If weather conditions are good, i don’t use gloves but I keep them close, just in case. There’s also a hive tool, small container of talcum powder to mask any stings, bungee cords, tacks in case I have to mark a frame and small plastic pots in case I find a plant I want to dig up and move. Don’t tell anyone but hive tools are handy to dig up plants!

Find repurposed baskets at thrift stores and yard sales. Antique malls may have some options as well but you will pay more for the older ones. Check how strong they are, you want something that is sturdy and will hold your hive inspection items. This would also make a nice birthday and holiday gift.

Oh. And I have some reusable small hive beetle traps and carry mineral oil in one bottle and the homemade lure in another. If I tuck them into the corner, they don’t fall over.

What do you have in your hive inspection basket?

Charlotte

Bees or Wasps

These yellow flying insects in the ground are yellow jacket wasps, not honey bees. (Photo by Charlotte Ekker Wiggins)

These yellow flying insects in the ground are yellow jacket wasps, not honey bees. (Photo by Charlotte Ekker Wiggins)

Bees or Wasps

The calls start coming in early August. There are bees flying out of a hole in the ground. They are repeatedly stinging people. Please come get the honey bees.

I even stopped someone at a local Pollinator Festival telling attendees that they had roped off an area because “bees were nesting in the ground.”

First, honey bees don’t nest in the ground.

Secondly, this time of year I can assure you if it’s in the ground these are honey bee cousins, yellow jacket wasps. Yellow jackets repeatedly sting; are usually defensive this time of year and no, they can’t be moved.

If the yellow jacket nest is not in a high traffic area, mark it off and wait for the first hard frost. The frost will kill the colony males except for the fertile females. The females will winter over to be come next year’s queens.

Even though many people don’t like wasps, they are pollinators and have a role in our ecosystems.

How to Remove Yellow Jackets

However, if they are in the way of a high traffic area that can’t be diverted, get a piece of old door screen. At dusk, place the screen over the hole and secure it with rocks or bricks. Pour hot water down the hole; the hot water will kill off the colony in the ground.

Wait until morning to remove the screen. If any wasps have survived, they will be at the screen waiting to get out.

No need to use pesticides.

Several friends have followed these instructions and told me later it worked better than any insecticide they had previously tried. I have also used this on several sites so I know it works.

Although I would rather not kill them, I understand there are times when they can be in inconvenient spots.

And yes, technically they may be related to bees but honey bees sting once, then die. And as I said in the beginning, they don’t nest in the ground.

Charlotte

How to Provide Bees Water

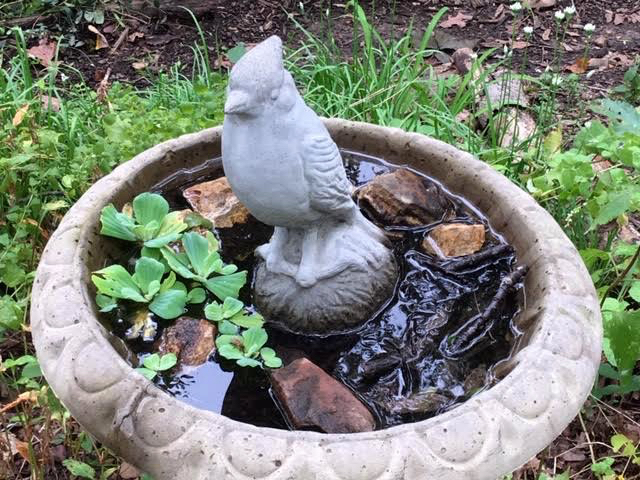
A honey bee uses water lettuce to safely collect water from one of my bird baths. (Photo by Charlotte Ekker Wiggins)

A honey bee uses water lettuce to safely collect water from one of my bird baths. (Photo by Charlotte Ekker Wiggins)

How to Provide Bees Water

Bees need water just as other living creatures do. There is a range of advice, and assumptions, beekeepers make about how to do this so let me share with you my bird bath “bee bars.”

In general, bees need water no farther than half a mile from their hives. Some recommend a water source should be within 150 feet of their homes, which makes sense to me. Having a water source close by makes it easier for bees to move it to the hives for mixing with honey and protein to make bee bread and to cool the hive. Even though bees can fly 15-20 miles per hour carrying a load, I am sure they will access a nearby water source if it provides them what they need.

Honey bees on moss in one of my “bee bar” bird baths. (Photo by Charlotte Ekker Wiggins)

Honey bees on moss in one of my “bee bar” bird baths. (Photo by Charlotte Ekker Wiggins)

Secondly, Dr. Dale Hill has explained bees like what I call “water with a bouquet,” also referred to as “dirty water.” In other words, bees will visit standing water sources with limbs, rocks and, in one of my bird baths, moss. The bees are looking for minerals, enzymes and amino acids they need to stay healthy. They find some of those elements in standing water.

So to help keep them hydrated, one of the easiest things to do is to set up bird baths, or use them ones you already have. I call them my '“bee bars” and make sure they have rocks for safe bee landing. I also add twigs and leaves to give the water that “bouquet” bees like.

It does require a shift in perspective. At one time I tried to keep bird baths clear of debris and periodically changed the water. Now I add more things to my bird baths, including overgrown water lettuce from one of my tiny ponds. The water lettuce provides the bees a safe landing spot and helps to filter the water in the bird baths.

You can find bird baths for as little as $10. The lightweight plastic ones are easy to move around but require regular checking to make sure they are level and haven’t blown over from a recent storm. I add a base of rocks around the bottom to secure them.

Does this prevent birds from using the baths? Not that I can tell, I still periodically find a bird splashing away in the bee bars with smaller rocks or along the edge of ones with the larger ones.

Charlotte


Adding Screened Inner Cover

This is a well-used screened inner cover with a one bee notch on one of the sides. (Photo by Charlotte Ekker Wiggins)

This is a well-used screened inner cover with a one bee notch on one of the sides. (Photo by Charlotte Ekker Wiggins)

Adding a Screened Inner Cover

There are some basic beekeeping techniques every beekeeper needs to learn: how to handle a hive tool, how to treat a sting, and in my mind how to properly install an inner cover on a bee hive.

The inner cover fits in between a box of frames and the hive lid. It maintains the 3/8ths of a inch spacing bees like while helping to keep the colony warm in the case of a solid inner cover. For spring and summer, I like to use screened inner covers.

They not only allow more air through the hive but with them I can peek under the lid without bees rushing me.

How to place these inner covers, however, has been the subject of debate over the years. Which side goes on top, the deeper side or the side with the screen?

The small entrance in the side of the cover is designed to give the bees a top entrance into the hive. Based on that, the screened inner cover screen goes on top.

By placing the screen side on the top, bees won’t get caught between the screen and lid. (Photo by Charlotte Ekker Wiggins)

By placing the screen side on the top, bees won’t get caught between the screen and lid. (Photo by Charlotte Ekker Wiggins)

If you place the deeper side on top, bees will be attracted by the colony pheromone and get trapped in that one inch space between the screen and the hive lid.

The same applies for the solid inner covers, although some are the same depth of both sides, making a decision unnecessary.

These hive tools should help the colony, not hurt them!

Charlotte