Homemade Small Hive Beetle Lure

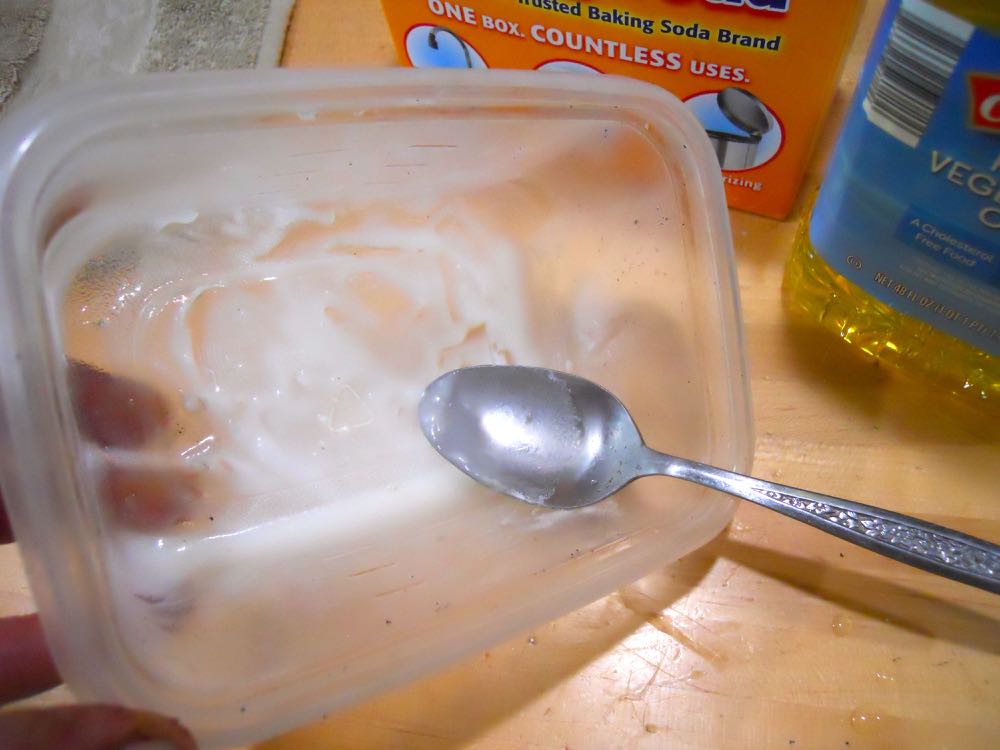
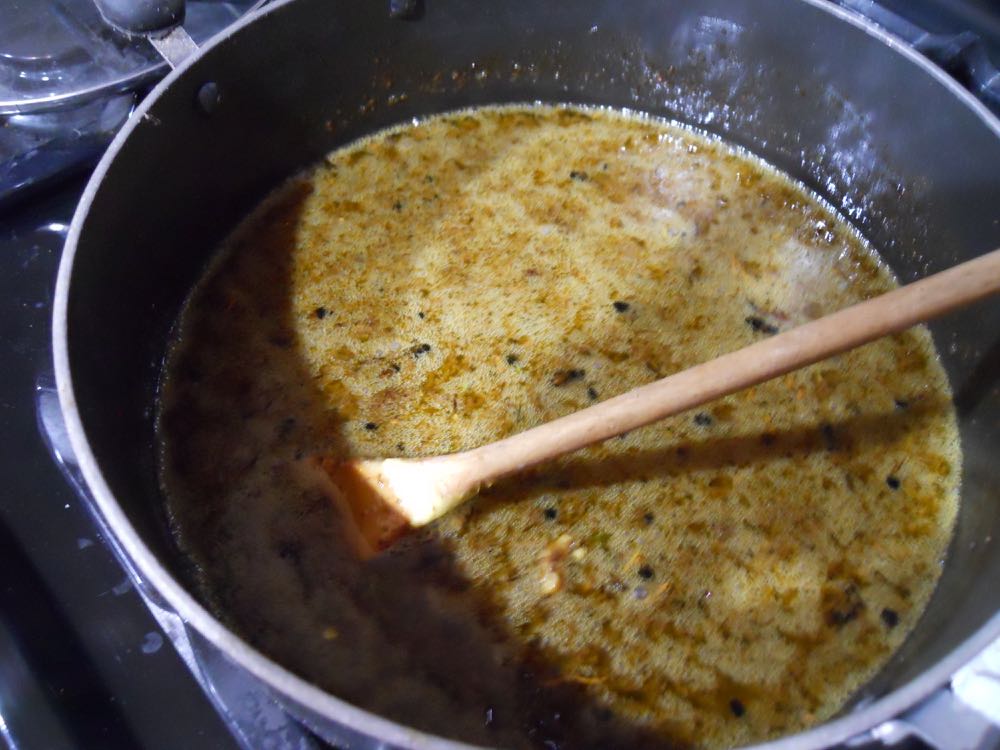
Ingredients for homemade small hive beetle lure. (Photo by Charlotte Ekker Wiggins)

Ingredients for homemade small hive beetle lure. (Photo by Charlotte Ekker Wiggins)

Homemade Small Hive Beetle Lure

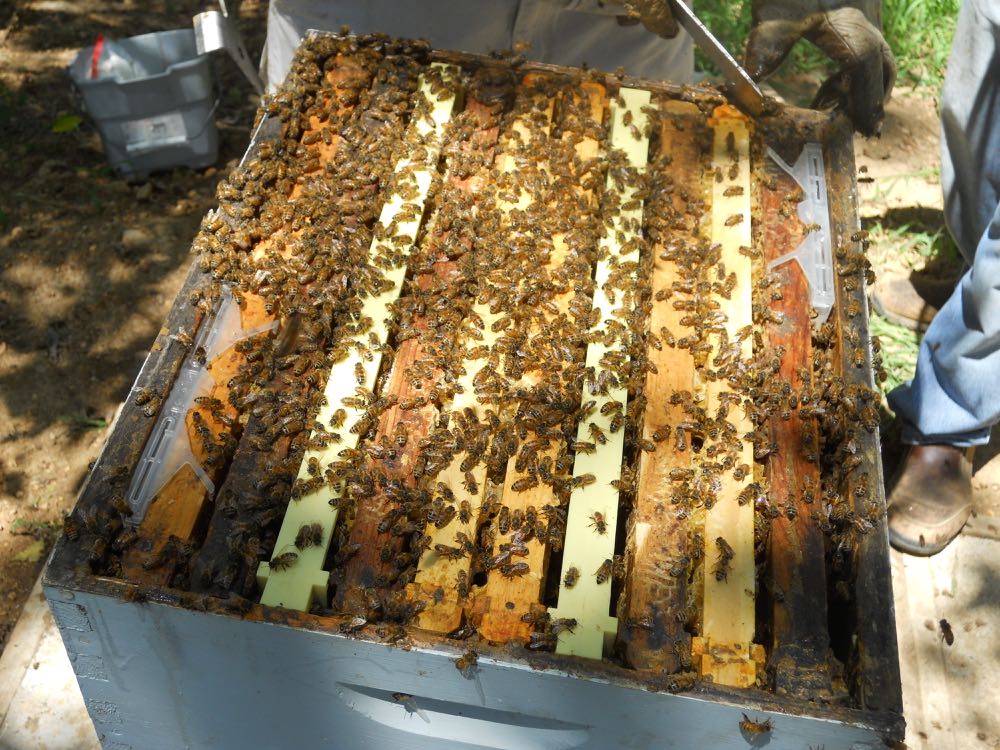
Record hot temperatures are scorching Missouri this summer, the sub-Sahara like conditions that make a ladybug-size black beetle very happy. Small hive beetles moved into Missouri about 5 years ago and, coupled with the tick-like varroa mites, can easily destroy a honey bee colony, the small hive beetles sliming their way all over the honey and forcing the colony to leave in a week’s time.

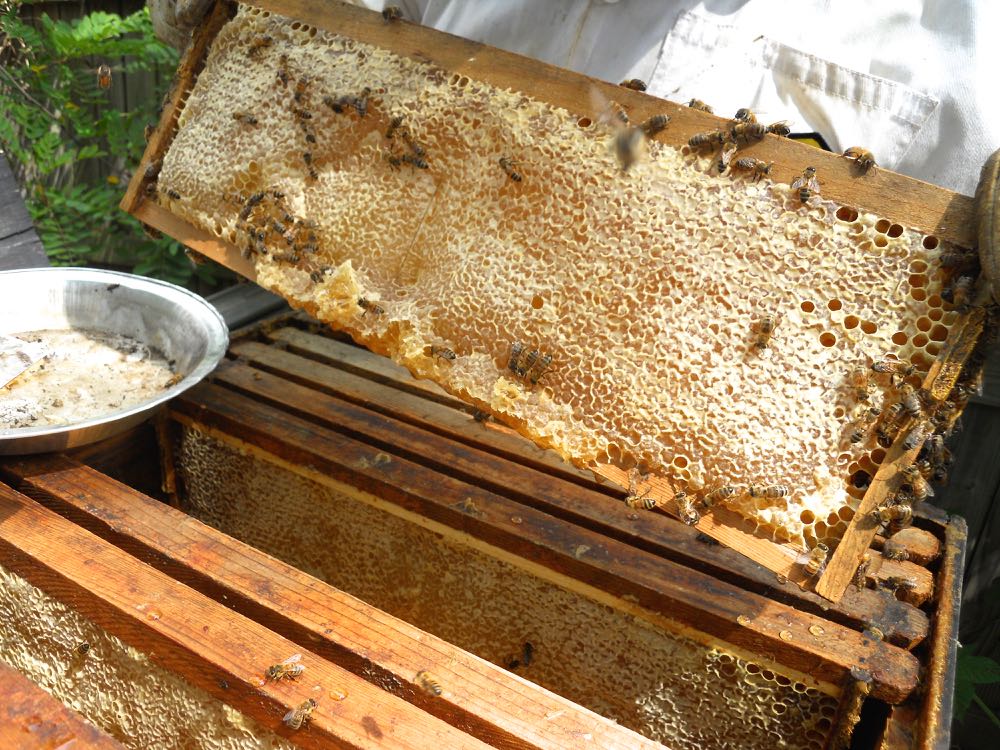
Hard to think about that when one sees the lovely hive products such as our honey samplers.

To keep small hive beetles in check, I use and recommend keeping re-usable small hive beetle traps in colonies with this homemade small hive beetle lure. The only challenge is that it takes 2 weeks to ferment so make it ahead and keep it refrigerated so you will have it when you need it.

The original small hive beetle lure recipe recommends apple cider vinegar, which helps to attract the small hive beetles. If you don’t have the apple cider vinegar, you can substitute white distilled vinegar and double the number of banana peels, the idea is to make the lure irresistible to the invasive bugs.

Once they climb into the trap after the lure, they drown in the mineral oil in the trap.

Homemade Small Hive Beetle Lure Recipe

½ cup apple cider vinegar*
¼ cup sugar
1 cup water
1 ripe banana peel cut up finely (or two cut up banana peels if using white vinegar)

*If using white vinegar, double the banana peel per batch.

One quart jar will hold a double batch of homemade small hive beetle lure.


How to Make Small Hive Beetle Lure


Combine all ingredients and allow to ferment for about 2 weeks. Fill center of re-usable traps with lure. Fill side traps 1/3 full with mineral or vegetable oil. Replace when full of SHB or every few days.

With hotter weather, traps should be checked and refreshed more frequently.

Clear top of traps of propolis.

How to Place Small Hive Beetle Traps


During spring-fall, place small hive beetle traps in opposing super corners and rotate the placement as you add supers.

For winter, place small hive beetle traps in the center of the hive where the bees will cluster.

Ingredients in a jar that will now ferment for a couple of weeks. (Photo by Charlotte Ekker Wiggins)

Ingredients in a jar that will now ferment for a couple of weeks. (Photo by Charlotte Ekker Wiggins)

This is a recipe just for the lure; you place it in small beetle traps to use.

Charlotte

Opening Queen Cage

This is a queen cage with candy plug on left in longer tube. (Photo by Charlotte Ekker Wiggins)

This is a queen cage with candy plug on left in longer tube. (Photo by Charlotte Ekker Wiggins)

Opening Queen Cage

Several beginning beekeepers have asked if they can reuse a queen cage and then how do they open it to install a queen bee. One even said they tried to get a queen bee through the small circle and she would not fit!

Trust me, don’t try that again.

Here’s how to get a queen bee into the cage. First, make sure the longer tube has a candy plug or small marshmallow. To make the candy plug, mix honey with confectioner’s sugar to a solid consistency and fill up the longer plastic plug.

To open the queen cage, first open the smaller flat round plastic plug to the right of the longer protruding plug where you place the candy fill.

Go open queen cage, pop the smaller round opening first. (Photo by Charlotte Ekker Wiggins)

Go open queen cage, pop the smaller round opening first. (Photo by Charlotte Ekker Wiggins)

With the smaller round plastic plug open, you can then gently squeeze the plastic queen cage and pop the whole top off.

Once small circle is open, you can pop open the whole queen cage top. (Photo by Charlotte Ekker Wiggins)

Once small circle is open, you can pop open the whole queen cage top. (Photo by Charlotte Ekker Wiggins)

Once filled with a queen bee and her attendants, close the top and then fold the smaller round plastic plug into the hole. Do it quickly or bees will get out. Frankly it helps to have a couple sets of hands to put the queen and attendants in and then close the two tops.

Giving someone a queen bee is almost as exciting as giving one of our beekeeper’s custom gift boxes and we do all of the packing for you!

Charlotte

Walk Away Splits

Strong, full colonies are excellent candidates for a split. (Photo by Charlotte Ekker Wiggins)

Strong, full colonies are excellent candidates for a split. (Photo by Charlotte Ekker Wiggins)

Walk Away Splits

Spring is a busy time for both honey bees and beekeepers. When a honeybee colony is running out of space, they start planning to leave, which is what honey bees do when they swarm.

If you have a big colony that you can easily divide, the walk away split is the easiest way to do that.

You split in the spring if you don’t want or need honey because the two split colonies will spend their energy re-establishing themselves and storing honey for winter food.

The walk away split is the easiest one to do and a method I have successfully used for many years.

Here are the basics:

  1. Have a second, empty hive set up and ready to use.

  2. Position the hive entrance opposite of the hive you will be working on so the bees have to re-orient themselves to their new home.

  3. Open the existing colony and start equally dividing assets: honey frames, bee bread frames, brood. Leave half in the existing hive and move the rest to the second, empty hive.

  4. You don’t need to look for the queen because you will know where she is in a couple of weeks.

  5. Leave the colonies split for two weeks so bees can settle in.

  6. Re-inspect the two colonies to see if there are signs of the queen laying. You will know which box the queen is in when you see eggs.

  7. When splitting brood, you should have given the colony without the queen eggs young enough for bees to start drawing a new queen cell. Check for signs of royal jelly in the emergency queen cells to ensure that they are, indeed, growing a new queen.

That’s the basic principle of making a “walk away split.” You divide the colony assets and, well, walk away.

It is easy but it doesn’t mean you don’t worry that everything back in the now two colonies is going as planned.

Leave them alone for a week, then go back and take a peek to make sure they are settling in. You should know by then where the queen bee is by the eggs you see being laid in royal jelly.

Then it is time to concentrate on making sure the other queenless colony raises themselves a queen bee.

Charlotte

Protecting Spring Nuc

The nuc wrapped up and sitting in my garage for the weekend. (Photo by Charlotte Ekker Wiggins)

The nuc wrapped up and sitting in my garage for the weekend. (Photo by Charlotte Ekker Wiggins)

Protecting Spring Nuc

The weather had been lovely for several days. I had completed my spring hive inspections and made up my first nucleus colony of the season to raise an extra queen in case I need one.

Nucleus colonies are nice to have since they are half the size of a regular hive and usually include gentle nurse bees and brand new arrivals.

I had also pulled a frame of brood, or capped bees, and notched the frame to encourage bees to build queen cells.

Shortly after setting up the nucleus colony, the weather took a turn back to winter. Knowing that this nuc was vulnerable, I wrapped it in one of my black quilted insulated hive wraps and moved it to my garage for the weekend.

The bees were kept inside by stuffing a muslin kitchen towel into the entrance.

I closed up the nuc entrance with one of my kitchen towels. (Photo by Charlotte Ekker Wiggins)

I closed up the nuc entrance with one of my kitchen towels. (Photo by Charlotte Ekker Wiggins)

I was feeding this small group of honeybees with sugar syrup through a mesh circle in the middle of the nuc box. Having them in my garage made it quite convenient to check them for food and give them more, if necessary.

The nuc has a second box to cover the sugar syrup feeder. (Photo by Charlotte Ekker Wiggins)

The nuc has a second box to cover the sugar syrup feeder. (Photo by Charlotte Ekker Wiggins)

By the second day, they were quite louder when I removed the jar of sugar syrup to give them more to eat. The raised noise level let me know they were not too happy to be locked inside so as soon as the forecast turned warmer, I returned them to my garden.

nuc outside.jpg

Today I checked the frame and found three new sealed queen cells so the girls have been busy.

One of the cells is now in another colony and the girls have two queen cells to raise once the queens hatch. If all goes well, one of the queens will go on a mating flight and come back to establish a new colony.

I will know in another 4 weeks or so.

Charlotte

Protecting Native Bees

Native bees sealed into bamboo sticks in a native bee house. (Photo by Charlotte Ekker Wiggins)

Native bees sealed into bamboo sticks in a native bee house. (Photo by Charlotte Ekker Wiggins)

Protecting Native Bees

Adding native bee houses to your garden is a wonderful way to add nesting spots for those solitary native bees, of which the US has about 4,000 out of the 20,000 native bees worldwide. However, most native bee houses are sold without a protective metal covering keeping birds from using the native bee houses as snacking stations.

To protect my native bee houses, I add small gauge wire around the front to keep birds from eating the bees while they hibernate in their mud-covered homes.

Several bees have settled into this native bee house in my garden. (Photo by Charlotte Ekker Wiggins)

Several bees have settled into this native bee house in my garden. (Photo by Charlotte Ekker Wiggins)

To add wire around your native bee houses, slowly cut the wire with wire cutters the length of the front of the native bee house and wider on the sides.

You also want about an inch in the front between the native bee house and the wire.

I fold, then nail one side of the wire, adjust the distance on the front, before finishing the other side. (Photo by Charlotte Ekker Wiggins)

I fold, then nail one side of the wire, adjust the distance on the front, before finishing the other side. (Photo by Charlotte Ekker Wiggins)

For native bee houses with angles, just fold the wire to fit being careful not to cut or nick your fingers.

Fold wire to fit around angled corners before nailing in place. (Photo by Charlotte Ekker Wiggins)

Fold wire to fit around angled corners before nailing in place. (Photo by Charlotte Ekker Wiggins)

Keep measuring as you nail to make sure you don’t pull the wire too tight and close to the native bee house. The idea is to keep birds from getting their beaks into the native bee nests.

Leave about an inch space at the bottom between native bee house and wire. (Photo by Charlotte Ekker Wiggins)

Leave about an inch space at the bottom between native bee house and wire. (Photo by Charlotte Ekker Wiggins)

Take it slow so you don’t puncture your hands with the cut wire.

Two more native bee houses ready to go outside. (Photo by Charlotte Ekker Wiggins)

Two more native bee houses ready to go outside. (Photo by Charlotte Ekker Wiggins)

Not all native bee houses are so large, my first native bee house has been repaired several times but still hosts native been tenants every year. The key is to protect the slumbering native bees from birds.

My first native bee house, a little worse for wear but still hosting tenants. (Photo by Charlotte Ekker Wiggins)

My first native bee house, a little worse for wear but still hosting tenants. (Photo by Charlotte Ekker Wiggins)

There are a number of sources you can tap for native bee houses, from Aldis to your local home and garden centers.

If you are handy, you can also dry bamboo and cut the stems into same length segments and make a box to house them.

Either way, having native bee houses in your garden will encourage wonderful pollinators!

Charlotte

Easy Pollen Feeders

Plastic plant pot make excellent pollen feeders. (Photo by Charlotte Ekker Wiggins)

Plastic plant pot make excellent pollen feeders. (Photo by Charlotte Ekker Wiggins)

Easy Pollen Feeders

Late winter is a challenging time for bees. If winter temperatures have fluctuated between over 40F temperatures, when bees can fly and below 40F, when bees cluster, bees may have used up their honey stores by January and run the risk of starvation.

At the same time, late winter means the queen bee has been slowly laying. She starts when daylight starts to extend at the winter solstice Dec. 21, adding more mouths to feed.

In addition to supplemental feeding in the “eke,” an added top shim, I monitor February temperatures and may give them a little supplemental pollen feeding to help them get a good strong spring start. I watch the weather forecast and note when temperatures may be over 50F for 10 days to provide the food. Pollen is what worker bees need to feed newly-hatching bees.

There are a number of pollen feeders on the market; even more you can make yourself out of PVC pipes and plastic paint buckets. I have found the plastic plant pots work well for me especially the ones with many holes on the bottom.

To ensure the plant pots don’t fall off their tree stump stands, I add a large rock at the front to hold the pots down. The rocks also give bees a place to land and to safely stage their takeoffs when their pollen baskets are full.

A rock will help anchor the plastic pollen pots. (Photo by Charlotte Ekker Wiggins)

A rock will help anchor the plastic pollen pots. (Photo by Charlotte Ekker Wiggins)

I don’t feed the Pollen substitute for long, there usually is a 2-3 week period between the end of cold weather and the beginning of floral sources in nature. Supplemental feeding encourages more egg-laying and that can mean the colony will run out of room before you can get into it to add supers and may swarm so monitoring colonies is important.

I also enjoy sitting close by and watching the bees as they come in and leave. If you are a new beekeeper, this is a good opportunity to observe your bees.

Charlotte

Winter Bee Feeding

My bees now have both winter protein in winter pollen patties as well as sugar cakes for winter food. (Photo by Charlotte Ekker Wiggins)

My bees now have both winter protein in winter pollen patties as well as sugar cakes for winter food. (Photo by Charlotte Ekker Wiggins)

Winter Bee Feeding

When I first started beekeeping, the more experienced beekeepers only talked about using sugar - mush bags, sugar cakes, candy boards - all carbs for winter supplemental feeding. I understood the concept, that this was to supplement stored honey supplies in case bees ran out mid-winter.

However, even honey, real honey, contains pollen, which is a protein source, or food for bees. More specifically, nurse bees need protein to trigger their glands to produce royal jelly so they can feed bee larvae. Studies show that under-nourished bee larvae grow up to be unhealthy bees. With the other bee stressors including pesticides, pathogens and poor foraging areas, good nutrition has become a priority in my apiary.

For two winters now I have been feeding my winter bees both sugar cakes and winter protein pollen patties in addition to giving the a medium super full of honey at the beginning of fall, then replacing empty honey frames with more frames of honey end of November. At this point in a relatively mild winter, all of my colonies are now in the top box showing very healthy colony numbers on warm days so I worry less about them pulling through winter because the cluster is too small.

So let’s take a look at a few of my hives and what I found under the inner cover when I inspected them on a sunny day that was 67F in early January 2019. I am located in mid-Missouri.

What do you find in your quick winter hive inspections under the inner cover? (Photo by Charlotte Ekker Wiggins)

What do you find in your quick winter hive inspections under the inner cover? (Photo by Charlotte Ekker Wiggins)

This is a second year queen that went into winter with very strong colony numbers. All colonies were treated with formic acid strips end of August to knock down varroa mite numbers going into winter. I treated because my varroa mite count was 10 mites per hundred when voluntarily tested by the state and analyzed by the USDA Bee lab in Maryland.

This colony has once again finished their winter protein patty. (Photo by Charlotte Ekker Wiggins)

This colony has once again finished their winter protein patty. (Photo by Charlotte Ekker Wiggins)

Even with replenished honey frames, my colonies seem to gravitate to the top of the hive on warm days.

This particular colony was like the rest, the colony had consumed the winter pollen patty so I replaced it.

Another winter protein patty quickly added before I closed up the hive. (Photo by Charlotte Ekker Wiggins)

Another winter protein patty quickly added before I closed up the hive. (Photo by Charlotte Ekker Wiggins)

Here’s another hive check. This colony is in its third year and also had finished their winter pollen patty so I added another one.

Homemade sugar cakes with winter pollen patties. (Photo by Charlotte Ekker Wiggins)

Homemade sugar cakes with winter pollen patties. (Photo by Charlotte Ekker Wiggins)

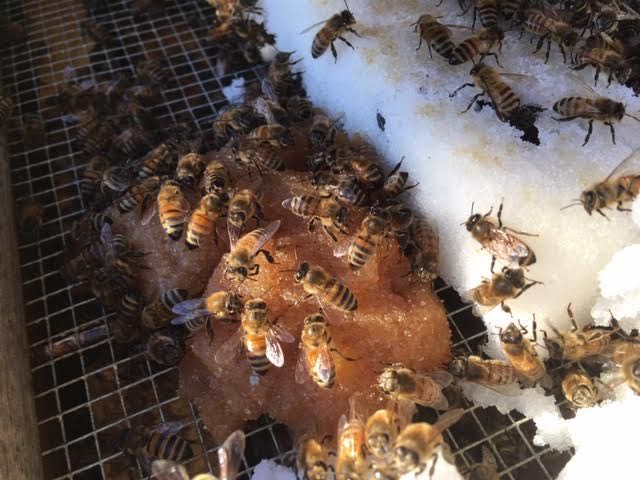
I make my own sugar cakes and now add Honey Bee Healthy to the mix in early winter, and pollen substitute for the sugar cakes I add to the colonies in January and February. Here is the recipe:

Charlotte's Bee Winter Sugar Patties Recipe 

5 lbs or 11 1/4 cups sugar
7 1/2 ounces of water (make sure it's exact)
1 teaspoon white distilled  vinegar (don't use apple cider vinegar, attracts small hive beetles)
1 tsp Honey Bee Healthy

For January-Feb use, I will add
1/4 cup Bee Pro protein to each batch

​Add Honey Bee Healthy and vinegar to measuring cup; then add water to 7 1/2 ounces. Mix well. Spread in bread pans and re-used fruit clam shells.

Leave overnight in cold oven to dry out. Once top is dry, remove and turn over on a cookie sheet to let the bottom dry out for a couple of days. If you end up with still moist patties, re-mix and add a little more sugar, then dry again.

If you don't need to use immediately, store in sealed plastic container.

Sugar patties not only provide supplemental feeding but also help to keep moisture out of the hives.

Now to yet another colony check, this one the smallest colony with a first year queen.

Smallest colony is also consuming winter protein patties. (Photo by Charlotte Ekker Wiggins)

Smallest colony is also consuming winter protein patties. (Photo by Charlotte Ekker Wiggins)

As beekeepers, especially ones who keep bees for honey, it’s easy to focus just on the carbs or sugar. For a colony to be healthy, however, and be able to collect flower nectar as both flight fuel and winter food storage, or honey, they need to be healthy and that means they first need pollen, which is protein.

I will be interested to see how my colony numbers are coming out of this relatively mild winter with the colonies getting both the nectar-substitute in the form of sugar cakes as well as protein patties.

These are the size of the protein patties I shape for each colony. (Photo by Charlotte Ekker Wiggins)

These are the size of the protein patties I shape for each colony. (Photo by Charlotte Ekker Wiggins)

Since small hive beetles also winter over inside the colony cluster, I keep my winter pollen patties small, about the size of the palm of my hand. The larger colonies may get two pollen patties, one each on the edge of the cluster and I checked the pollen patty bottoms to make sure there are no small hive beetle larvae getting established.

Do you feed your bees both sugar and protein pollen during winter feeding?

Charlotte

No Smoke, No Joke

How I use muslin kitchen towels to keep my bees calm during a hive inspection.

How I use muslin kitchen towels to keep my bees calm during a hive inspection.

No Smoke, No Joke

This may be one of my favorite beekeeping hacks, using muslin kitchen towels to keep my bees calm during a hive inspection instead of smoke.

If you are a beginning beekeeper, some of you may find that trying to keep your smoker lit, and having cool smoke, is a bit of a challenge. If the smoke coming out of the smoker is too hot, you can burn bee wings as you apply it to a hive.

There are several theories of what smoke does to a colony. From my observation I tend to lean to the one that says bees go into preparing for a quick hive escape when smoke is applied, thereby giving the beekeeper time to get in and out. The smoke stresses bees so I prefer not to use it if I don’t have to do so.

Since I take photos of what I find, I tend to need a little extra time inside my hives. Enter one of my favorite beekeeping tools, the muslin kitchen towels. They are not as beautiful as these hand-embroidered beekeeping towels but they are very handy to have in my inspection caddy. Muslin is smooth and doesn’t catch bees in their fibers. The towels themselves can be purchased at your local big box stores in the kitchen utensil section for about 75 cents per towel.

Check the packaging. I have seen the bundle of towels vary in number from 5-8 per package.

Once covered, I uncover only the width of a frame as I inspect the inside of the hive.

Once covered, I uncover only the width of a frame as I inspect the inside of the hive.

Once you’re done, you can easily wash and hang dry these muslin kitchen towels. I dry them by hanging on a towel rung so that the fabric softener doesn’t get into the towels. I don’t know what pheromones bees will pick up from fabric softener.

I also use these towels as neck scarves under my bee suit, and tied around my head when the suit hood is too big.

Muslin kitchen towels also come in handy in the kitchen only mine never quite make it there.

Charlotte

Adding Frame Ridge Metal

Frames with propolis against a wooden hive box. You bet the two stick together!

Frames with propolis against a wooden hive box. You bet the two stick together!

Adding Hive Frame Ridge Metal

If you are just starting beekeeping, this will not be exciting but trust me, do it now and you will thank me later. I'm talking about adding metal strips to the hive frame ridge so the frames easily move from side to side. In other words, the metal keeps bees from glueing the frames down with propolis, an amazing antibacterial tree sap mixture bees use to protect their home.

When I first started beekeeping, I had a challenging time getting some of the basic woodworking skills down. I still find frames I tried to nail together without glueing first with Titebond II glue. Yes, do glue your frames first. The weight of capped honey later can stress those little wooden pieces.

Same thing with adding frame ridge metal. It's easy to put off adding those strips until the ridge becomes full of propolis and you need a tire bar to remove a frame. Ok maybe a tire bar is a bit much but at my apiary, located in the middle of a limestone hillside, my bees amply apply propolis.

This spring, as I was repairing woodenware, I figured out how to get those little metal strips easily attached. I turned the box so that the inside was easy to access. Once I cut the metal strips to size, it was easy to get them nailed on.

Hammering the tiny nails into the thin metal frames is easy once you figure out how to set it up.

Hammering the tiny nails into the thin metal frames is easy once you figure out how to set it up.

A beekeeping friend suggested you can use needle nose pliers to hold those tiny nails if you don't want to hold them. Good idea if you have a tendency to hammer your fingers more than the wood.

Use wire clippers to cut the thin metal into the length you need.

Use wire clippers to cut the thin metal into the length you need.

Once you have these metal strips installed, you won't want to deal with hive bodies without them. They keep frames easily moving and make it much easier to get into and out of them.

Now the wooden frames will more easily slide across the ridge inside the bee hive.

Now the wooden frames will more easily slide across the ridge inside the bee hive.

You can add them later, too but it's better to add them when your hives boxes are brand new. The metal strips will more easily fit against the wood ridge that hasn't been filled with propolis.

If you do have propolis, set the hive box in the sun for a few minutes, it will help melt the propolis so that it is more easy to remove.

This is a gift you give yourself. Here is a gift you can give a bee lover!

Charlotte

Notching Frames for Queen Cells

A queen bee walking between the frames of a Langstroh hive in my apiary.

A queen bee walking between the frames of a Langstroh hive in my apiary.

Notching Frames for Queens

One of the critical skills for any beekeeper who wants to be sustainable is raising his or her own queen bees.  There are a variety of ways to raise queens, and one of the easiest ways is to "notch" a frame of eggs to encourage the bees to raise the queen cells. Then it's a matter of being patient until the queen bees hatch.

The critical part of encouraging worker bees to raise queen cells is finding the correct aged egg, preferably still an egg in the royal jelly where the mother queen has laid. That means seeing a very tiny white egg in a white substance in a tiny wax cell that is less than 36 hours old.

Once an egg is located, the wax cell under the egg is cut away to encourage bees to raise a queen cell.

Several notches under 36-hour or less eggs on a wax frame.

Several notches under 36-hour or less eggs on a wax frame.

This technique also works when one is splitting a colony and leaving some bees without a queen at first. My beekeeping buddies David and Tom did that with a new colony a couple of weeks ago.

We went back to see how well David had notched the frame to encourage queen cell building. Here are the bees in their new hive box.

This is a two-week or so split from a booming nucleus established a couple of months ago here.

This is a two-week or so split from a booming nucleus established a couple of months ago here.

Using a black foundation for a brood frame helps in being able to see the eggs laid in royal jelly.

How many queen cells can you see on this frame? 

How many queen cells can you see on this frame? 

The verdict? There were 14 capped queen cells and 4 open queen cells occupied and still being fed. 

So does notching work?

You bet, especially if you can see the eggs!

Charlotte

Rendering Bees Wax

Honeybees on a piece of bees wax, it's amazing how quickly they will have it cleaned out.

Honeybees on a piece of bees wax, it's amazing how quickly they will have it cleaned out.

Rendering Bees Wax

When people find out I am a beekeeper, the second question they usually ask is what do I do with all of the honey. What they really should be asking is what do I do with all of the more valuable hive by-product, the lovely wax.

Honeybees are amazing creatures. In their tiny bodies they pack a variety of glands including ones on their undersides that produce slivers of wax. Once packed on top of one another, the wax forms the intricate network of comb in which bees store pollen, nectar and larvae, the three basic components of a bee colony.

It takes 8 pounds of honey to make one pound of wax so to a beekeeper, wax is golden. Besides all of the ways people use wax – for candles, lip balm, mustache grooming – wax is also a reusable product in a hive.

To be able to reuse wax, a beekeeper can heat wax to melt it enough to store it until it can be used again.

I have tried a number of ways to render wax, from a homemade solar melter to a pre-made solar melter. The following method has proven to be quicker and easier:

How to Easily Render Bees Wax

Don’t use your regular cooking pots to do this, I purchased a pot at a local thrift store and have it stored in my garage with my other beekeeping supplies.

Also remember wax is flammable so never leave heated wax unattended or close to an open flame.

This is wax and other debris in water heated over medium heat. Wax is slowly melting.

This is wax and other debris in water heated over medium heat. Wax is slowly melting.

To melt wax on a stove, place the wax in water in a pot and stir until the wax melts into a waxy soup.

You will know its ready to pour out of the pot when all of the wax is melted.

A piece of cheesecloth over an old colander helps catch debris as the wax soup pours through.

A piece of cheesecloth over an old colander helps catch debris as the wax soup pours through.

Add cheesecloth to a beekeeping-dedicated colander sitting over a bucket of water half-filled or less.

This white plastic colander fits the top of a plastic container where I add water.

Here's why you want a dedicated pot. Once cold water hits the pot, the wax solidifies in the bottom.

Here's why you want a dedicated pot. Once cold water hits the pot, the wax solidifies in the bottom.

Once the wax is all melted, carefully pour the wax soup into the colander to collect any residue and let the remainder fall into the water.

Allow it to cool.

Once cooled, you will find a disk of wax floating on top of the water.

To purify it further, you can heat it up again, pour it through another layer of cheesecloth in a colander and pour it into another bucket of cold water until the wax doesn’t have any impurities.

Wax will form in the shape of the container and float on top of the water.

Wax will form in the shape of the container and float on top of the water.

Store in a tight container until you want to use.

Don't try to store the un-rendered wax, it does not keep well in any container.

You can melt the rendered wax again and paint it on plastic frames to re-coat them. You can also use the wax to make candles or lip balm.

Oh, the first question?

They want to know how many times I get stung.

Charlotte

How to Remove Jar Labels

Beekeepers often like to re-use glass jars for honey provided they can get the original labels off.

Beekeepers often like to re-use glass jars for honey provided they can get the original labels off.

How to Remove Glass Jar Labels

If you are just starting in beekeeping, you may not even have considered collecting glass jars for later re-use yet. Those of us with a little experience may have started the glass collection and given up when the original labels proved too hard to remove.

You can still collect those glass jars and get those stubborn labels easily removed.

First, let me confess I tried "Goof Off," "Goo Gone Pro Power," vinegar, rubbing alcohol and a couple of other products as well as leaving the jars in water overnight with soap. Some of the paper did come off but the original glue remained as a sticky film on the sides of the glass jars, such as the tiny 2 oz. glass jars.

This is my pile of 2 oz. glass jars with the original labels removed and ready for cleaning.

This is my pile of 2 oz. glass jars with the original labels removed and ready for cleaning.

Going through one of my old household cleaning books, I found this easy recipe for removing labels from glass jars: equal parts baking soda and cooking oil, mixed together into a paste.

The paste reminded me of a runny cake icing.

The mixture of baking soda and cooking oil should be the consistency of a runny icing.

The mixture of baking soda and cooking oil should be the consistency of a runny icing.

Apply the mixture generously over the original label area. Let sit for several hours or overnight.

Scrub with steel wool or a pot scrubbing sponge.

If some of the original label is still on, apply the paste again, wait a couple of hours and scrub. The original label glue will come off, I promise!

The baking soda and cooking oil mixture applied generously on the old label location.

The baking soda and cooking oil mixture applied generously on the old label location.

What I like about this paste is that it's safe to use on the jars without any chemicals. I also applied a generous amount to a large jar and it also removed that label.After a good scrub, I soaked the jars in hot water, then turned them upside down to dry on a towel.

In the photo, they look like they have metal on the bottoms but that's just a reflection from where I took the shot. They are all glass jars with nothing else.

Once scrubbed and washed, my jars are sitting upside down to dry, except for the one in front.

Once scrubbed and washed, my jars are sitting upside down to dry, except for the one in front.

Here they are filled, labelled and officially re-used. 

My little 2 oz. honey jars filled and labelled for re-use after a hot water bath.

My little 2 oz. honey jars filled and labelled for re-use after a hot water bath.

Glass jars are great for storing more than just honey. I also use them for buttons, screws and nails, flower seeds and the wide variety of cat treats. It's much easier to know I am getting low on something important when I can see it!

How to Remove Jar Labels

When you start, place the jar you want to reuse first in a larger container full of hot water with a little dishwashing liquid and let it soak for several hours or overnight. That tends to work at least half of the time.

When that doesn't work, try the baking soda and cooking oil combination.
And now you, too, can get a head start collecting jars for bottling honey and other projects!

Charlotte

Do My Bees Need Room?

Inside an 8-frame hive body with a newly-installed swarm. When will they need more room? (Photo by Charlotte Ekker Wiggins)

Inside an 8-frame hive body with a newly-installed swarm. When will they need more room? (Photo by Charlotte Ekker Wiggins)

Do My Bees Need Room?

One of the most daunting challenges for new beekeepers is deciding when to add space to a hive. Over the years, beekeeping students have asked for help in looking into their hives to determine if it "is time." It's an important question because too much room and sub-Sahara African small hive beetles could easily take over unchecked. Too little space and the colony will start building swarm cells and moving out every time a new queen hatches.

In the top photo is a newly-caught swarm installed into an 8-frame deep hive body. Bees are covering about half of the frames so here are the signs your hive needs room:

1. Space to Grow. When bees are covering 80% of the frames. For an 8-frame hive that would be 6 frames; for a 10-frame hive they should be on 8 of the 10 frames.

This brood frame has been filled with nectar, taking up all of the room where a queen could lay. (Photo by Charlotte Ekker Wiggins)

This brood frame has been filled with nectar, taking up all of the room where a queen could lay. (Photo by Charlotte Ekker Wiggins)

2. Laying Space in the Right Place. In other words, check your frames to make sure your queen has space to lay. Often as the nectar starts flowing, worker bees will stash nectar away in every nook and cranny including the brood chamber, taking laying space away from the queen. In photo is a brood frame filled with nectar, leaving the queen with no room to lay eggs.

If you find most of your frames in the brood chamber filled with nectar, take 2 frames out and place them in the box above. Replace the frames you moved up with new frames, preferably with drawn comb so the queen has room to lay.

Frame packed full of nectar than can be moved to a top box and replaced with empty comb. (Photo by Charlotte Ekker Wiggins)

Frame packed full of nectar than can be moved to a top box and replaced with empty comb. (Photo by Charlotte Ekker Wiggins)

3. Spot Difference Between Drone, Brood and Honey Frames. They can look very similar but there are distinct differences.

This is a frame of primarily drone brood, it looks like pencil erasers sticking up out of the comb. (Photo by Charlotte Ekker Wiggins)

This is a frame of primarily drone brood, it looks like pencil erasers sticking up out of the comb. (Photo by Charlotte Ekker Wiggins)

Drone brood looks like bullet casings, or pencil erasers sticking up out of the comb. By comparison, regular capped brood is flat and even with the comb. In the photo, drone brood is in the center and flat, capped brood is on either side of the frame.

Frame of capped honey, ready for a long winter's night. (Photo by Charlotte Ekker Wiggins)

Frame of capped honey, ready for a long winter's night. (Photo by Charlotte Ekker Wiggins)

A frame of capped honey can be in a variety of shapes, some are straight against the frame, others stick out because the beekeeper didn't keep the frames close together. Regardless, capped honey is easy to recognize once you start seeing the differences.

4. Now for a test. What do you see in this frame?

Left, capped brood; center, bee bread; towards right, open larvae so your queen is laying! (Photo by Charlotte Ekker Wiggins)

Left, capped brood; center, bee bread; towards right, open larvae so your queen is laying! (Photo by Charlotte Ekker Wiggins)

If you look closely at this frame, you can tell the drone cells sticking out towards the top compared to sealed brood flat against the comb. Some cells also have uncapped nectar, bee bread in a variety of colors, and a sure sign your queen is laying. So what do you think, does this colony need more room?

This queen cup (empty) was once a queen swarm cell when it was occupied. (Photo by Charlotte Ekker Wiggins)

This queen cup (empty) was once a queen swarm cell when it was occupied. (Photo by Charlotte Ekker Wiggins)

5. Check for Swarm Cells. When a colony needs room, they will build queen cells to raise a new queen so the old queen can leave with 1/3 of the colony and establish themselves in a new home. First raise the box and check underneath, see any peanut-like protusions at the bottom of the frames? Those are queen swarm cells.

If the queen cups or cells are in the middle of the frame those are supercedure queen cups or cells. For some reason, the worker bees are raising a new queen in that center queen cell to take over for the existing queen.

Is the swarm cup or cell at the bottom? Is it filled with a white substance? That's royal jelly and the worker bees are building a new queen.

Is the swarm cup at the bottom uncapped and empty? That means a new queen has hatched and perhaps already swarmed. 

Frame with little to no activity except for signs of wax moths. Your colony is in trouble. (Photo by Charlotte Ekker Wiggins)

Frame with little to no activity except for signs of wax moths. Your colony is in trouble. (Photo by Charlotte Ekker Wiggins)

6. Sure Sign of Trouble. If when you look through your frames you don't see a lot of filled cells, keep looking. Wax moths will move in when a colony is in trouble so if you see their web-like filament running through cells, your colony is in trouble. Maybe you lost your queen so go back through the frames assessing the rest of them. Remove the empty ones, move your colony into a smaller box so the remaining bees can protect the colony and start asking around for anyone who has a new queen.

Brood box of a ten-frame hive with small hive beetle traps in each of the opposite corners. (Photo by Charlotte Ekker Wiggins)

Brood box of a ten-frame hive with small hive beetle traps in each of the opposite corners. (Photo by Charlotte Ekker Wiggins)

What are you think about this hive, does it need a super? 

Charlotte

Painting Bee Hives

My 8-frame blue hive and my first grey, now repainted green 10-frame hive in my garden.

My 8-frame blue hive and my first grey, now repainted green 10-frame hive in my garden.

Painting Bee Hives

Have wooden bee hives to paint?

Good news, bee hives don't have to be a boring one color, such as white or grey, and certainly don't paint all of your hives the same color. 

Honey bees will literally "drift" from their home base as they return with pollen, often settling in the hives on the outside of their periphery. Or the hive closest to them landing with a heavy load.

Every hive should have a distinct personality. The easiest way is to give each hive a different geometric design so bees can tell which one is their home. The hives can be the same color as long as each one has a unique mark.

How to Paint Bee Hives

To paint bee hives, use a latex paint, it dries faster and is easier to clean off of you.

Don't paint the inside of the hive, only the outside and the hive rims. Also don't paint frames, inner covers and queen excluders. You can paint the edge of screened inner covers. I also recommend painting the inside of your telescoping covers so you can more easily spot small hive beetles.

Make sure you give them time to dry or they will stick.

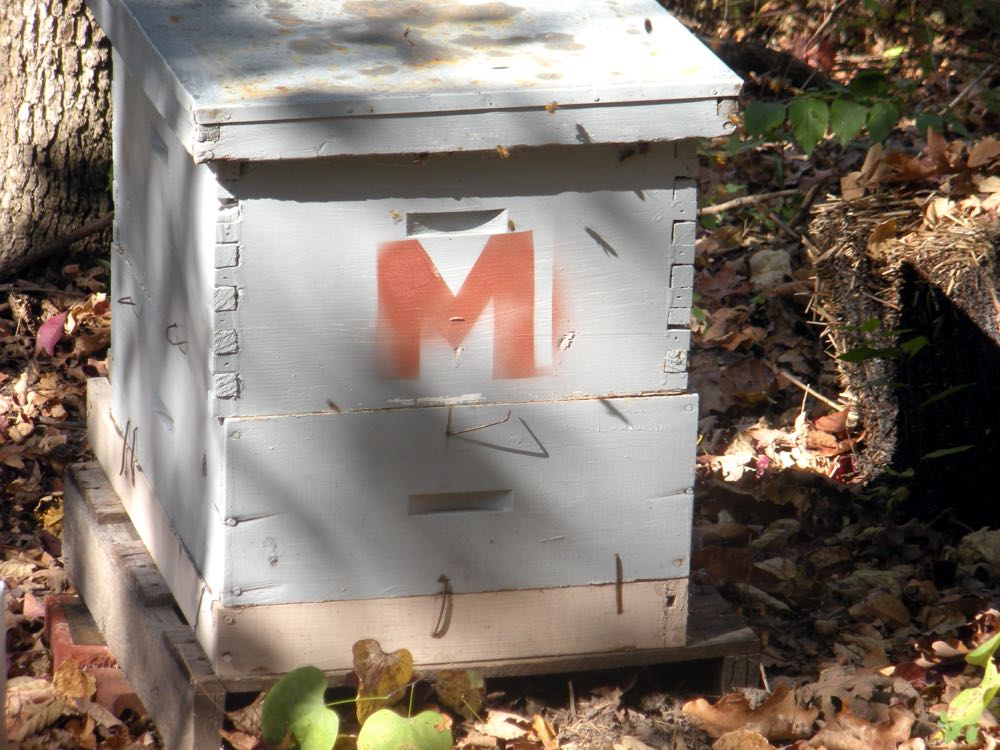
Here's one simple hive that used two paint colors to give their hive a distinct look.

This beekeeper used yellow and a dark pink to give his hive a distinct look.

This beekeeper used yellow and a dark pink to give his hive a distinct look.

If you have kids, get them involved in decorating the hive. This hive was decorated with a child's handprint motif.

Kids hand prints help to give this hive a distinct personality and look. 

Kids hand prints help to give this hive a distinct personality and look. 

Side view of these hives painted with the help of young artists.

Side view of these hives painted with the help of young artists.

My first hives were that drab grey color. I first distinguished them by adding a stencil for the name of the colony:

One of my first two hives I named after my mother, Gertrude, and my grandmother, Mildred.

One of my first two hives I named after my mother, Gertrude, and my grandmother, Mildred.

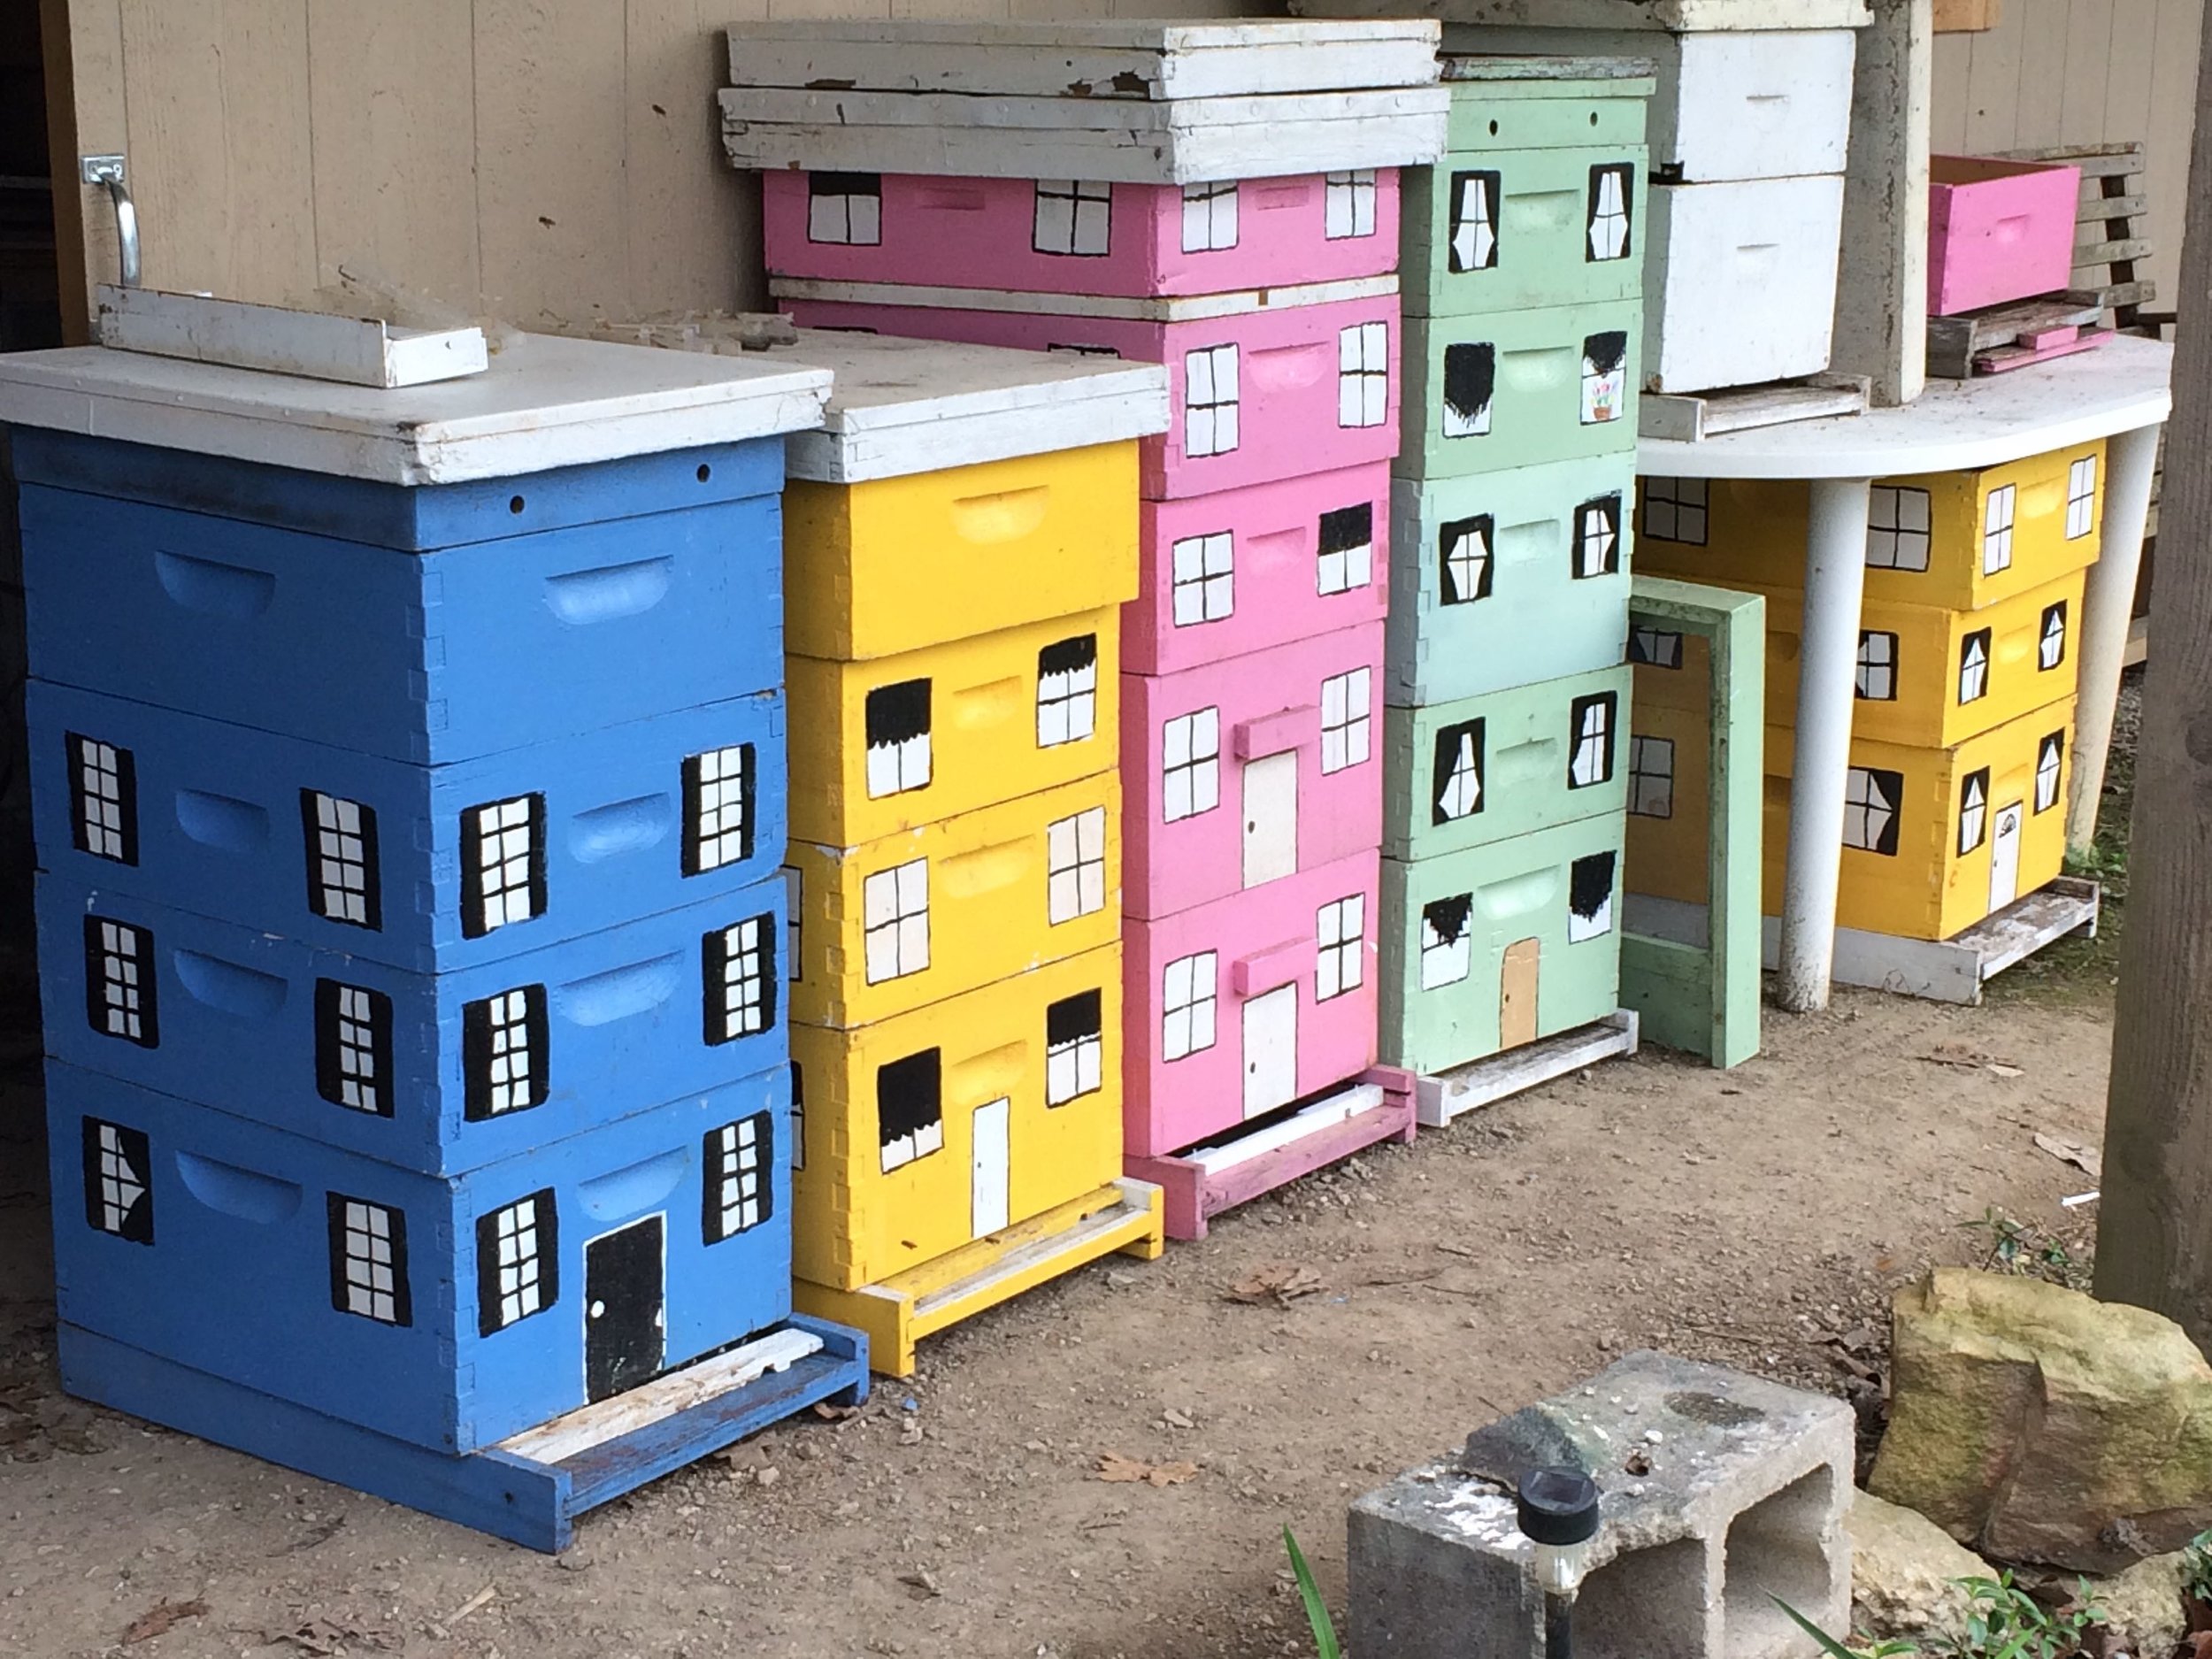
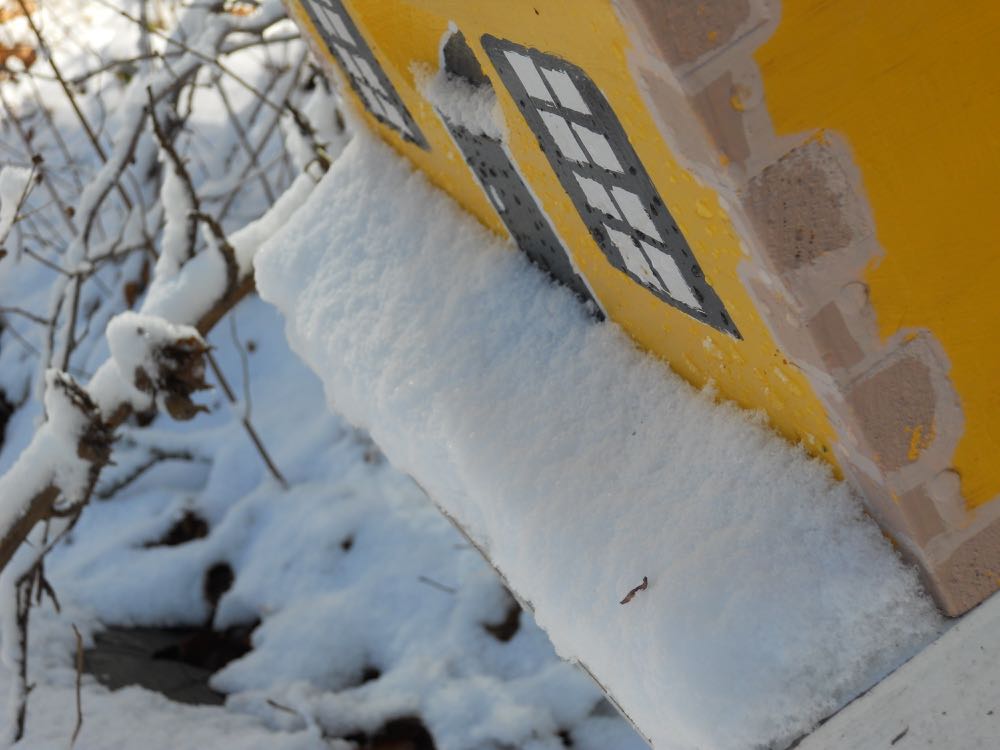
Then with a winter available, I repaired the old hives and painted them to look like houses so my neighbors better understood what the hives were.

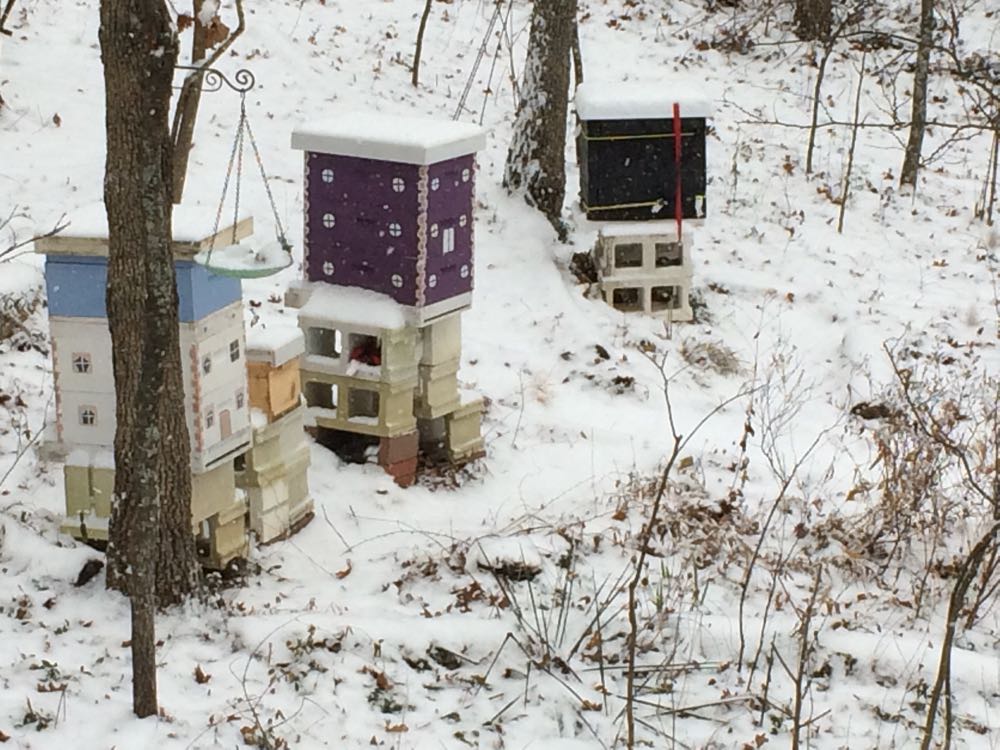
Some of my first painted bee hives repainted from their original drab grey color.

Some of my first painted bee hives repainted from their original drab grey color.

If you've visited David's apiary, you know "honey maple" hive. David has his hive colors on a spread sheet and names his colonies after the paint hive colors. His hive boxes also are painted in the same color family, going from the deep color in the bottom hive to the light color on top:

Uh, oh, honey maple hive has the color scheme out of order, wonder if David noticed!

Uh, oh, honey maple hive has the color scheme out of order, wonder if David noticed!

For his nucs, David has numbered and labelled each one as well as given them different colors.

For his nucs, David has numbered and labelled each one as well as given them different colors.

As you can see, you can be as simple, or as creative as you want to be.

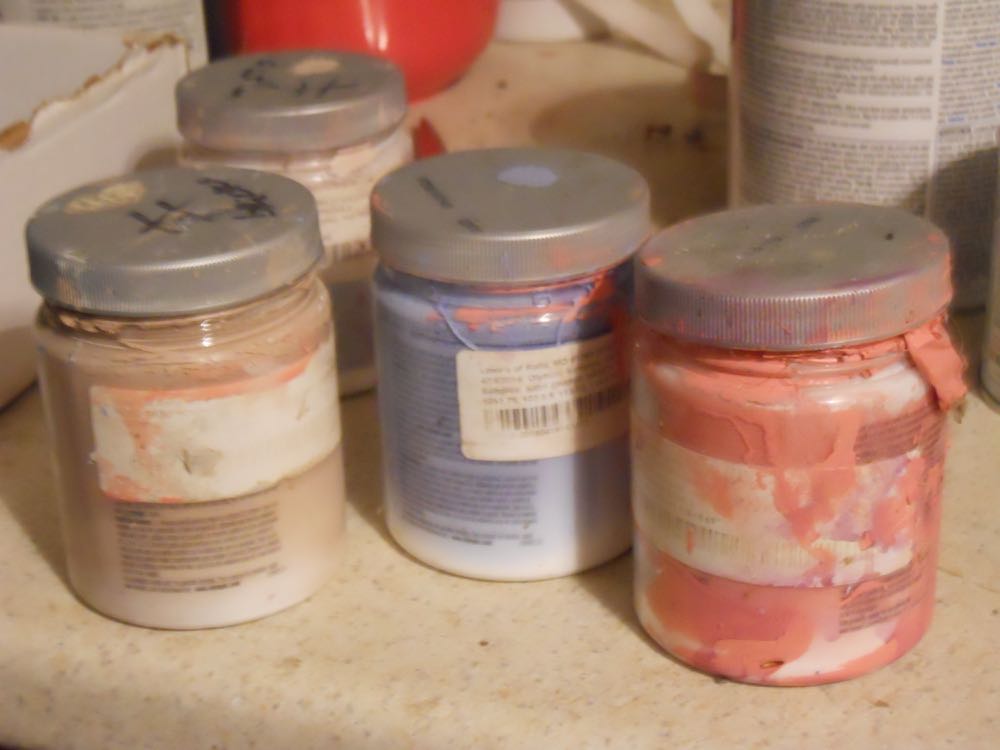
To get a variety of colors, home improvement stores sell sample jars for around $3. If you first prime your hives, the little jar of paint will easily cover 6-8 hive boxes. 

These are some of the paint samples I borrowed from David. Yes, they get a little messy.

These are some of the paint samples I borrowed from David. Yes, they get a little messy.

Big box stores also sell craft paints in small jars for $3-$5 each. 

In terms of colors, find something that will look nice in your garden. Remember bees see red as a grey color and don't like dark colors like black, brown or navy blue so pick colors that will make you, and your honeybees, happy.

Happy painting!

Charlotte

Repurposed Old Bird Bath

This old bird bath has been repurposed into a bee bar in the front of my Missouri garden.

This old bird bath has been repurposed into a bee bar in the front of my Missouri garden.

Repurposed Bird Bath Bee Bar

There are a number of ways beekeepers can provide honey bees a water source. Honey bees need a continuous water source within half mile of their home hive for a variety of reasons: to mix with food, to keep hive cool, to hydrate themselves. Just like any other creature, they need a continuous source of water.

In Missouri, the most popular recommendation is to have a pond. If not, honey bees will go looking for water, usually in the wrong places like a dog water bowl, leaking hose connection or, heaven forbid, a neighbor's nearby swimming pool. But what if you don't have a pond close by, how can you provide honey bees water?

Bird Baths Good Honey Bee Watering Spots

I use a variety of bird baths, from new ones I pick up at yard sales to this veritable antique one I have had for several decades and was almost discarded. Actually the old concrete bird bath in this example was sitting in a heap pile because the top had started to break. My handyman had hauled it off because I couldn't seem to get the top repaired and had given up working on it so he assumed I was done with it. I loved the base with the wildlife animals in the design but the top was challenging me and taking up space I needed in the garage.

Shortly thereafter, we had rain and I spotted honey bees gathered on the side as soon as the sun was out. Hopeful that I could still have this in my garden, I hauled it back to the garage to repurpose it into what I call a "bee bar." And I put a sign on it that said "do not touch" that was not intended for the bees.

Birds like to have a little depth to their bird bath so they can immerse themselves in the water and move their wings. This one had become too shallow for most birds but as I soon discovered was a good depth for giving honey bees water.

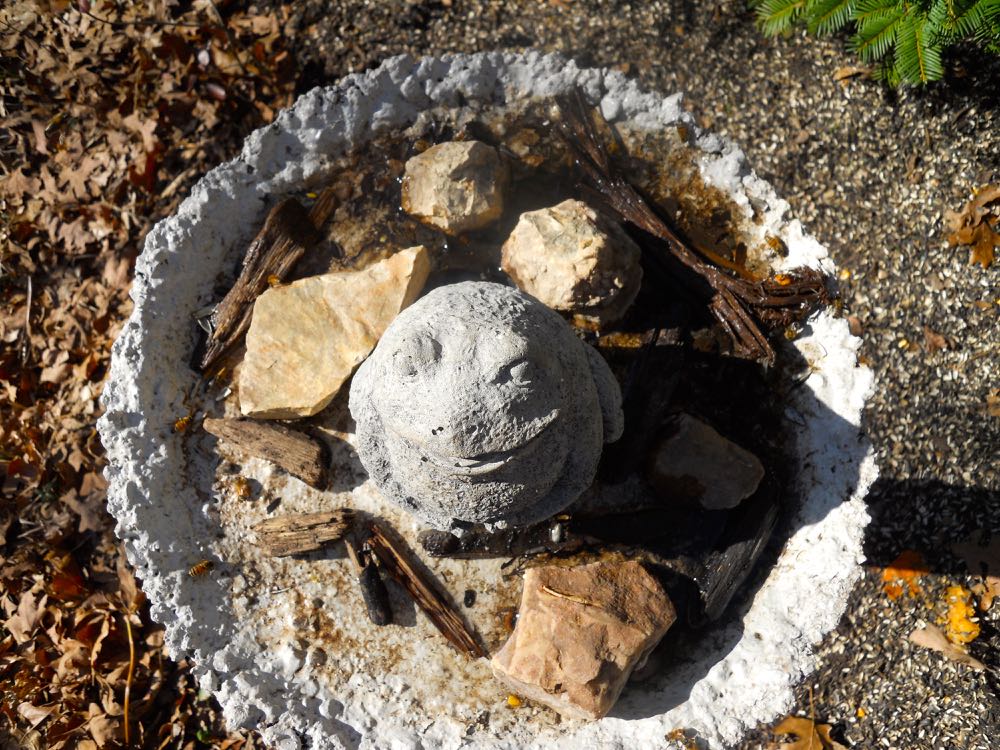
My repurposed old bird bath from the birds eye view looking down on the concrete frog.

My repurposed old bird bath from the birds eye view looking down on the concrete frog.

When I first started working on this bird bath, the edges were so worn they were literally chipping off in chunks. I had added some ready mix concrete to mend the holes hoping they weren't big enough to fall off. I was wrong. One morning I found the entire original concrete rim on the ground, leaving the repaired concrete providing a more jagged edge. Perfect safe bee landings spots!

After painting it a grey color with latex paint, then giving it a second coat, the top of the bird bath looked brand new and ready for business. The fat frog was a gift from a friend and now nicely sits in the flat center of the old repurposed bird bath.

Side view of the re-purposed bird bath into a bee bar to give my honeybees a water source.

Side view of the re-purposed bird bath into a bee bar to give my honeybees a water source.

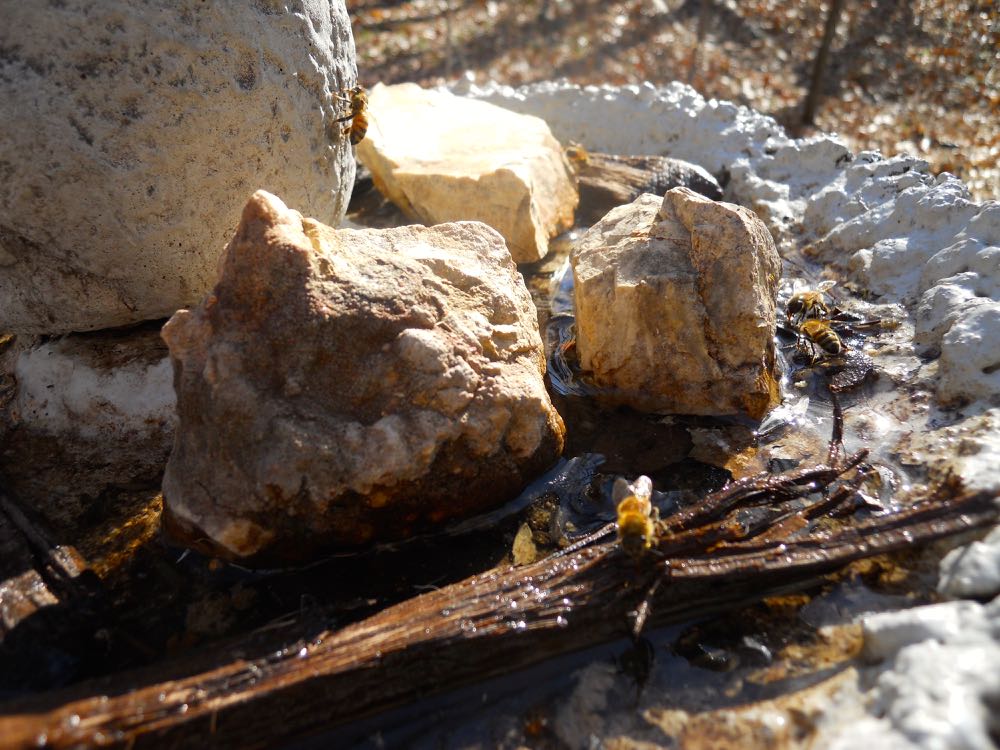
To give my honey bees safe landing spots, I added rocks and sticks so they can safely land and take up the water. Without safe landing spots, I have noticed honey bees will see their reflection in water and land in that spot, usually drowning when their delicate wings become water-logged. When I have fished them out of the water, nearby rocks and the concrete frog provide a nice drying off spot.

Tried and Tested Idea

This re-purposed bird bath has now been in use as a "bee bar" for more than a year and is working quite nicely. In addition to honey bees, I often find other pollinators including butterflies, wasps, ants and the odd bird just stopping by for a drink.

On very hot days I have to refill it because it doesn't hold as much water as other bird baths but I like the idea that it's now repurposed instead of taking up space in a landfill.

Some of my honeybees taking a drink safely from old sticks in the repurposed bird bath.

Some of my honeybees taking a drink safely from old sticks in the repurposed bird bath.

I don't worry about keeping the water clean, my honey bees seem to prefer older water with a "bouquet" to it. If leaves fall in, I leave them, it gives bees a safe place to hide in the event of a quick thunderstorm.

How do you provide your honey bees with water?

Charlotte

Watch Cues in Nature

These are some of the natural events that usually occur in Missouri in January.

These are some of the natural events that usually occur in Missouri in January.

Watch Cues in Nature

If you take one of my beginning beekeeping classes, part of your starter kit will include a Missouri Department of Conservation calendar. That's because watching cues in nature is an important part of being a successful beekeeper.

Watching nature, also called phenology, is tracking what is happening in nature. There are a number of reasons why people pay attention to nature's calendar.  According to the National Phenology Network, everything is connected.

"Many birds time their nesting so that eggs hatch when insects are available to feed nestlings.  Likewise, insect emergence is often synchronized with leaf out in host plants. For people, earlier flowering means earlier allergies.  Farmers and gardeners need to know the schedule of plant and insect development to decide when to apply fertilizers and pesticides and when to plant to avoid frosts. Phenology influences the abundance and distribution of organisms, ecosystem services, food webs, and global cycles of water and carbon. In turn, phenology may be altered by changes in temperature and precipitation.  

"Changes in phenological events like flowering and animal migration are among the most sensitive biological responses to climate change. Across the world, many spring events are occurring earlier—and fall events are happening later—than they did in the past. However, not all species are changing at the same rate or direction, leading to mismatches. How plants and animals respond can help us predict whether their populations will grow or shrink – making phenology a “leading indicator” of climate change impacts."

On a much, much smaller scale, I have watched nature in my one-acre Missouri hillside garden since I moved here in the 1980s. My first entry in my garden diary was a notation about raccoons and wild turkeys. The other early notations marked when wildflowers were blooming, an important fact for tracking bee food sources.

Since then, my garden has become a certified wildlife garden and Monarch Way station. My neighbors call it "daffodiland" and I worry when I don't see something in, or on, my flowers. I often wonder about people who say gardens are calm and peaceful, mine seems to be teeming with activity.

Missouri Department of Conservation's Natural Events Calendar gives you a peek at what should be happening in your garden, noting every month what wildflowers should be blooming, for example. Here's an example for April 2018:

Missouri Department of Conservation's Natural Event calendar includes wildflowers in bloom.

Missouri Department of Conservation's Natural Event calendar includes wildflowers in bloom.

The other handy reference in this calendar is when average frost starts and ends, as well as what trees should be in bloom. Trees are now another important source of pollen for honeybees.

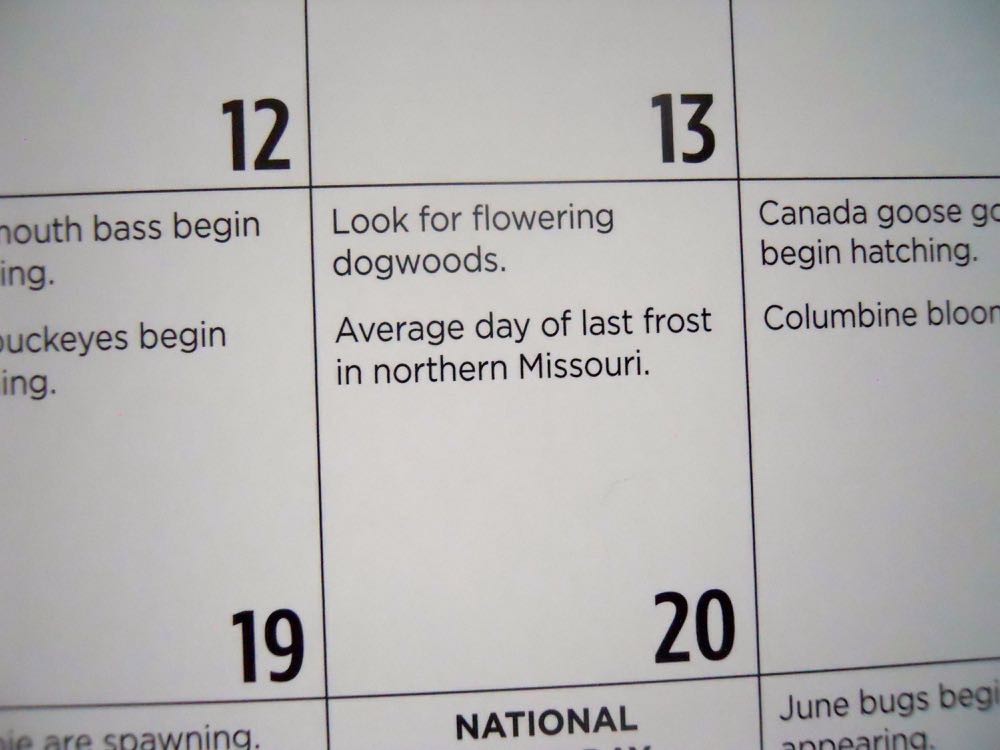
Missouri Department of Conservation Natural Events calendar includes daily event listings.

Missouri Department of Conservation Natural Events calendar includes daily event listings.

The daily listings also making watching nature easier, especially if this is a new practice for you. In addition to when trees and flowers are blooming, the calendar notes other important developments: when June bugs begin appearing, when hummingbirds migrate, when chiggers start biting.

It's an excellent resource and customized to our state conditions.

Gorgeous photography is another wonderful element of these lovely $10 calendars.

Gorgeous photography is another wonderful element of these lovely $10 calendars.

In addition, this $10 calendar has wonderful photos from Missouri Department of Conservation's award-winning photographers. You may have seen some of these photos in Missouri Department of Conservation's free monthly magazine.

What, a wild turkey swimming??

What, a wild turkey swimming??

And, on the backside of the calendar, there is usually an unusual event featured. This picture of a wild turkey swimming immediately caught my eye because I know from watching these lovely wild birds, they don't like to swim.

I have my Natural Events Calendar hanging in my kitchen. I use it to add reminders of when I should be doing things in my apiary, and as a reminder to add notations to my regular beekeeping and garden diaries. 

Charlotte


Bee Hive Wind Breaks

I'm using a piece of cardboard to give my hives a bit of a winter wind break at the entrance.

I'm using a piece of cardboard to give my hives a bit of a winter wind break at the entrance.

Bee Hive Wind Breaks

When I first started beekeeping 8 years ago, it was popular to talk about how to create winter wind breaks around hives. The suggestions included building a wall of straw; making a wooden wall in front of the hives lined up in a row, and a variety of concrete block and brick walls, or combinations of both. One excellent woodworker even talked about adding little awnings over his hives, which prompted me to think to myself, if I only could make half this stuff out of fabric I would be golden!

Adding items around hives is also an easy suggestion if one has hives on a flat area. Mine are on the side of a limestone hillside, I'm lucky the hives aren't slipping down the hill let alone trying to keep any semblance of a wall standing.

One year I did try the bales of straw in front of my two hives but one of the bales ended up getting knocked down the hill. The most colorful theory was that a bear pushed it over but I would bet a raccoon may have taken an inadvertent slide. Later in the year, I rested my smoker on the top of the bale and  almost set it on fire.

A local hardware store gave away cut Christmas trees so I used them as hive wind breaks.

A local hardware store gave away cut Christmas trees so I used them as hive wind breaks.

Another year I recycled Christmas trees in front of hives to give them some wind protection and a little possum family settled in. That option did work better than the straw, at least the baby possums hung on to the trees at one point. I assume that helped to keep the trees from rolling away, as well as the tenacious possums.

This year, with temperatures tanking below 0F, I felt out of practice adequately winterizing my hives, especially when the winds were hitting me earlier today and dropping the already cold temperatures even further.

As I looked out over my apiary, I decided I was ok with the extra honey super I put on them, giving each colony two honey supers. The black wrap also seemed to be doing it's job, and all lids were nicely sealed over the solid inner covers but I needed to do something to cut the wind hitting the entrance reducers: a cardboard awning of sorts.

To make sure the cardboard stays, I cut it long to fit under the black quilted wrap.

To make sure the cardboard stays, I cut it long to fit under the black quilted wrap.

Selecting a heavy cardboard box, I cut it to the approximate width of my 8-frame hives, tucked a 2-inch border at the bottom and scooted the cardboard under the black insulated wrap I already have around the hive bodies.

Would you believe no bees came out to check what I was doing?? Well, would you in this kind of weather?

Here I am sneaking the cardboard up under the black wrap to keep it dry from snow and rain.

Here I am sneaking the cardboard up under the black wrap to keep it dry from snow and rain.

These aren't designed to do much more than ferry the cutting winds from directly hitting the bottom hive entrances where I fit in the smallest opening entrance reducers.

The side openings to the cardboard awnings will allow bees to leave if the weather turns warm before I can get out to remove these, and the bungee cords should hold them in place. The plastic wrap will keep the cardboard dry if it rains.

Will they work?

I feel better already!

Charlotte

Winter Colony Cluster Check

Checking for a colony cluster can be as simple as lifting the hive top quickly and finding heat.

Checking for a colony cluster can be as simple as lifting the hive top quickly and finding heat.

Winter Colony Cluster Check

I sometimes cringe when beginning beekeepers contact me after they've opened their hives mid-winter to see if their honey bees are still alive. Even though I repeatedly remind everyone not to break the propolis seals bees have built and not to touch the hives after October, there are always a few who rationalize why they did what they did, then wonder later why their bees didn't make it through winter. 

It's hard to not check, I know but if you must, still don't break open the hive and destroy the propolis seals. That's how the bees make their hives airtight for winter. When the propolis seals are broken, the bees don't have the time to make repairs and the open cracks in hives then let in cold, wind and especially rain, which can quickly kill a bee colony.

The only relatively safe thing you can do to check if the bees are alive is to peek under the lid and, with your bare hand, try to locate the heat the cluster is generating inside the hive.

Honeybees don't hibernate through winter, they literally shiver in a cluster with the queen in the middle, consuming the honey they made earlier in the season for carbs and energy. It's amazing to think those little creatures can keep the hive so warm.

Once you locate the heat, close it up, you have your confirmation that the colony is still alive.

The honeybee cluster can generate a lot of heat that's easy to find with your hand.

The honeybee cluster can generate a lot of heat that's easy to find with your hand.

The day before our late December winter storm forecast, I decided to check on hive stores. This year I gave each colony 2 medium supers full of honey instead of one per colony since last year the colonies were at the top of the hive at Christmas. Late falls and warm winter temperatures mean bees are out flying and consuming their honey at a faster rate than when they are clustered. I didn't want to find any colonies dead from starvation so I took my extra sugar cake supply with me just in case I found a cluster on top.

Sure enough, the last colony I checked was at the top, festooning off the screened inner cover I was also going to change to solid inner covers. 

This is another colony with the cluster at the top and into the emergency sugar cakes.

This is another colony with the cluster at the top and into the emergency sugar cakes.

Not wanting to disturb the bees any more than necessary, I snuck the sugar cake bar over the cluster and closed the hive lid for a few minutes.

I gave them an extra cake first on top of the wired inner cover to get them settled.

I gave them an extra cake first on top of the wired inner cover to get them settled.

When I returned a few minutes later, I was able to sneak the old sugar cake out and place the new one right over the cluster with little fuss.

When I checked a few minutes later, the bees were checking out the sugar cake.

I was able to quickly sneak the sugar cake under the wired inner cover with little disturbance.

I was able to quickly sneak the sugar cake under the wired inner cover with little disturbance.

The few bees that flew up when I took off the screened inner cover were heading back inside the hive, with only one bee that needed a personal escort to find the hive entrance.

The few bees that flew out of the top were quickly going back in through the bottom entrance.

The few bees that flew out of the top were quickly going back in through the bottom entrance.

As I refilled the bird feeders and suet holders, I forgot to replace the screened inner covers with solid inner covers until later that evening. With my flashlight as a guide, I quickly removed the screened inner covers and added the solid ones. At that point, even this yellow hive didn't have any bees at the top so it was easy enough to quickly make the switch.

Temperatures are below zero at night now. It's still tempting to want to go out and check the bees but I know they are snug in their homes with enough food so I won't until our next day with the temperature in the 50s. It will be a good time to check on food stores then to make sure they all have enough food to make it into spring.

Spring. Can't wait to see it!

Charlotte

Winterizing Honeybee Hives

Some of my equipment and supplies to get my honeybee hives ready for winter this year.

Some of my equipment and supplies to get my honeybee hives ready for winter this year.

Winterizing Honeybee Hives

I'm not going to say I waited until the last minute to get this done this year but let's just say the temperatures dipped precipitously the following day.

My holdup was getting those emergency sugar cakes dry enough to place on the feeding shims I have at the top of the honeybee hives. I keep the shims on all year to give the bees a second entry and exit to the hive, especially in winter when the front of the hives can get covered in snow.

Snow can easily close up the small hive entrance and leave honeybees without a way to get out.

Snow can easily close up the small hive entrance and leave honeybees without a way to get out.

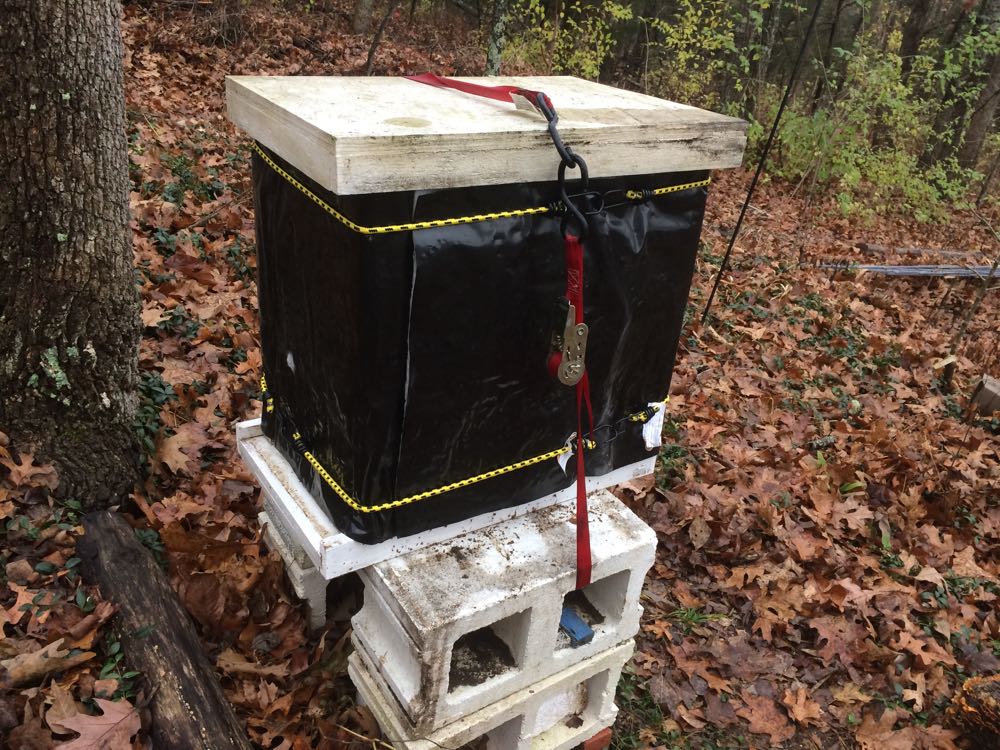
The other challenge with getting hives ready for winter is making sure the quilted insulated black hive wrap doesn't cover the entrance, either.

After wrapping the hives to help keep the wind out, I check the front to make sure it's still open.

After wrapping the hives to help keep the wind out, I check the front to make sure it's still open.

I also have a wrestling match of sorts using those red straps. I find them hard to release to elongate them so I also invested in these bungee cords. Did I pick them out because of their color scheme? Well, what do you think??

I bought these bungee cords because of their colors, very bee-inspired.

I bought these bungee cords because of their colors, very bee-inspired.

The bungee cords hold the insulated black wrap at the top and bottom of the hives. Then I use the red straps to secure the hives to the concrete blocks I painted white earlier to discourage ants.

Another advantage of having concrete blocks is that I can tuck entrance reducers and other equipment into the side cubby holes.

This colony is tucked in and ready for winter weather, including emergency food at the top.

This colony is tucked in and ready for winter weather, including emergency food at the top.

Before I strap down the hive, I added emergency sugar cakes to the shim at the top. This year, I also left two medium supers full of honey on each colony.

Last year, I found the colonies at the top of their honey-full medium at Christmas so I had to add sugar cakes almost two months earlier than I have in the past. Not knowing what the weather was going to be like this fall and winter, I decided to hedge my bets and give them extra honey, which is much better than these emergency sugar cakes I make. 

Emergency sugar cakes formed in bread pans nicely fit across my honeybee hives.

Emergency sugar cakes formed in bread pans nicely fit across my honeybee hives.

In addition to the emergency sugar cakes, I added a 1x1 inch square of winter pollen patty next to or just under a corner of the sugar cake. Anything larger and I will most likely be feeding small hive beetles instead of honeybees.

Some of my honeybees snacking on the sugar cakes at Christmas this year.

Some of my honeybees snacking on the sugar cakes at Christmas this year.

I don't break the propolis seals on the hives through winter but I can peek under the hood at the top and place my hand inside to find the heat generated by where the cluster is sitting. Once I know where the cluster is located, I can add the sugar cakes over that space so that I know the bees will hit the emergency food as they work their way up through the honey frames.

Honeybees don't hibernate, they literally shiver in a cluster while they consume honey to give them energy. And if/when they run out of honey, the sugar cakes come in handy to supplement them.

Another view of the honeybees on the emergency sugar cakes at the top of the hives.

Another view of the honeybees on the emergency sugar cakes at the top of the hives.

Once the hive is given the extra sugar cakes, it's time to close it up and hope that all will go well as the colony braves winter.

Sugar cakes not only feed but help absorb moisture out of the hive during winter.

Sugar cakes not only feed but help absorb moisture out of the hive during winter.

I had a few peppermint candy canes left over so I added those in the shims. I read somewhere the peppermint is a natural antibacterial so I placed one in each hive wishing the girls a happy Christmas.

Last year, snow arrived before I had all of my hives wrapped, I beat the snow this year.

Last year, snow arrived before I had all of my hives wrapped, I beat the snow this year.

Most of these colonies were spring splits with one being a swarm from a known bee tree. The two mother colonies had drone frames removed mid-spring to break the varroa mite cycle and mid-August were tested for the mites. The alcohol wash had less than 2 mites per 100.

Next year, winterizing will start in August with a varroa mite treatment that ends several steps I will take to minimize varroa in all ofthe colonies, starting in spring. Until then, I hope the colonies are dry and well fed so they can make it through winter. This is the hardest time for me, looking out my window to see the hives out in the cold and wondering if they are okay....

Charlotte

Safely Watering Bees

Water lettuce Pistia stratiotes makes a nice safe landing spot for bees gathering water.

Water lettuce Pistia stratiotes makes a nice safe landing spot for bees gathering water.

Safely Watering Bees

Winter is settling into my garden and I am already missing green - anything green. The garden looks very brown as leaves cover most of the ground and I try to keep my bird baths full of water for my bees.

The National Weather Service today said we had the driest November on record this year, and December doesn't look very promising in terms of precipitation. One of things I tried earlier this year to keep my bees safely drinking from bird baths was adding water lettuce Pistia stratiotes.

These fast-growing, non-native Missouri plants are offered for sale in garden centers for contained ponds. I purchased only 3 to add to a small pond and within weeks the pond was almost covered so I moved some to bird baths. Within days bees were landing in the center of the water lettuce and safely taking drinks so I spread the plants to the rest of the bird baths.

Water lettuce off shoots grow fast and can be moved to other bird baths.

Water lettuce off shoots grow fast and can be moved to other bird baths.

As long as I kept the bird baths in water, the water lettuce nicely survived and provided a safe landing spot for bees.

Surprisingly, the greenery in the bird baths did not prevent birds from taking a drink or even bathing, they just moved in between the water lettuce plants.

To make sure the bird baths were safe, I also added a few pieces of gravel and small twigs to the bird baths to give anything small that fell in a safe place to climb back out. 

The green of the water lettuce made a nice contrast to watch the bees up close.

Keep water lettuce out of rivers and other running water areas, it can be invasive.

Keep water lettuce out of rivers and other running water areas, it can be invasive.

A friend has taken a water lettuce start and is going to try to winter it over. If successful, I will get a start back next spring and then within a few weeks, the bird baths will once again have safe landing spots for bees to stop in and get a drink.

Charlotte