How to Remove Jar Labels

Beekeepers often like to re-use glass jars for honey provided they can get the original labels off.

Beekeepers often like to re-use glass jars for honey provided they can get the original labels off.

How to Remove Glass Jar Labels

If you are just starting in beekeeping, you may not even have considered collecting glass jars for later re-use yet. Those of us with a little experience may have started the glass collection and given up when the original labels proved too hard to remove.

You can still collect those glass jars and get those stubborn labels easily removed.

First, let me confess I tried "Goof Off," "Goo Gone Pro Power," vinegar, rubbing alcohol and a couple of other products as well as leaving the jars in water overnight with soap. Some of the paper did come off but the original glue remained as a sticky film on the sides of the glass jars, such as the tiny 2 oz. glass jars.

This is my pile of 2 oz. glass jars with the original labels removed and ready for cleaning.

This is my pile of 2 oz. glass jars with the original labels removed and ready for cleaning.

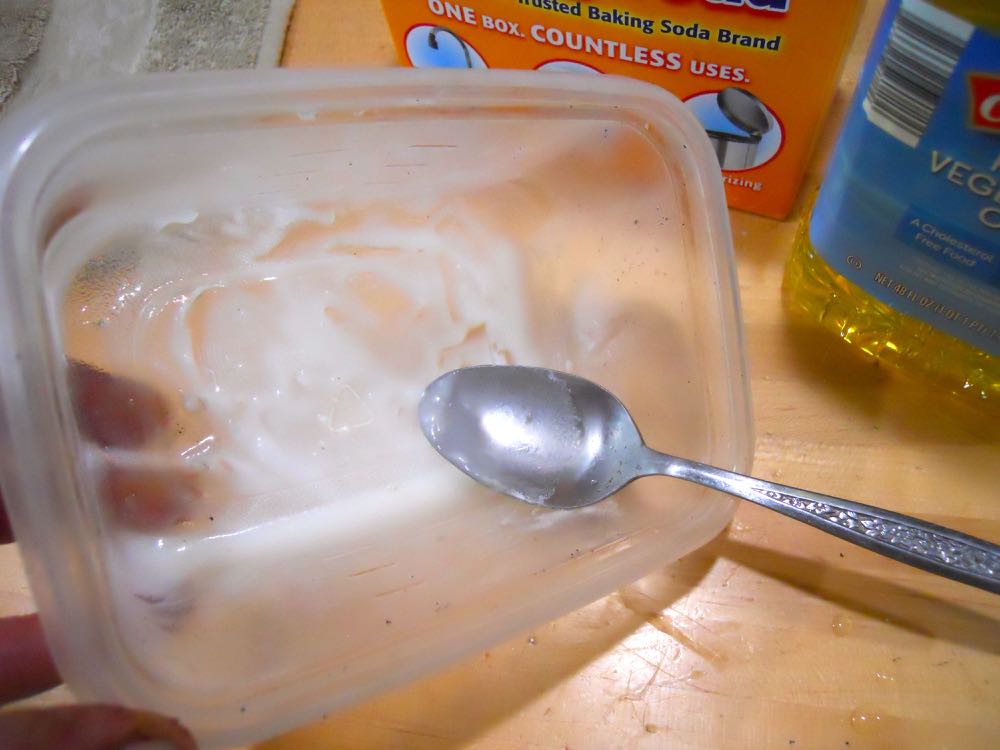
Going through one of my old household cleaning books, I found this easy recipe for removing labels from glass jars: equal parts baking soda and cooking oil, mixed together into a paste.

The paste reminded me of a runny cake icing.

The mixture of baking soda and cooking oil should be the consistency of a runny icing.

The mixture of baking soda and cooking oil should be the consistency of a runny icing.

Apply the mixture generously over the original label area. Let sit for several hours or overnight.

Scrub with steel wool or a pot scrubbing sponge.

If some of the original label is still on, apply the paste again, wait a couple of hours and scrub. The original label glue will come off, I promise!

The baking soda and cooking oil mixture applied generously on the old label location.

The baking soda and cooking oil mixture applied generously on the old label location.

What I like about this paste is that it's safe to use on the jars without any chemicals. I also applied a generous amount to a large jar and it also removed that label.After a good scrub, I soaked the jars in hot water, then turned them upside down to dry on a towel.

In the photo, they look like they have metal on the bottoms but that's just a reflection from where I took the shot. They are all glass jars with nothing else.

Once scrubbed and washed, my jars are sitting upside down to dry, except for the one in front.

Once scrubbed and washed, my jars are sitting upside down to dry, except for the one in front.

Here they are filled, labelled and officially re-used. 

My little 2 oz. honey jars filled and labelled for re-use after a hot water bath.

My little 2 oz. honey jars filled and labelled for re-use after a hot water bath.

Glass jars are great for storing more than just honey. I also use them for buttons, screws and nails, flower seeds and the wide variety of cat treats. It's much easier to know I am getting low on something important when I can see it!

How to Remove Jar Labels

When you start, place the jar you want to reuse first in a larger container full of hot water with a little dishwashing liquid and let it soak for several hours or overnight. That tends to work at least half of the time.

When that doesn't work, try the baking soda and cooking oil combination.

And now you, too, can get a head start collecting jars for bottling honey and other projects!

Charlotte

How to Make Creamed Honey

Creamed honey becomes solid, is not sticky and ships easily, a must for my gifts.

Creamed honey becomes solid, is not sticky and ships easily, a must for my gifts.

How to Make Creamed Honey

When I think about how worried I was before the first time I tried to make whatever you want to call this - whipped honey, spun honey, I call it creamed honey - let me assure you. this is NOT hard to do. There are a couple of key steps that make this a success so let me cover those right here:

1. You will need an area that is not heated to store the seeded honey in jars to set. I have used both an unheated storage area and my garage, both successfully. Ideal temperature is around 50F to 57F.

2. You will need a seed starter. There are several options on the market from a dry powder option to actual creamed honey. I have only used actual creamed honey and started with one I found at a grocery store. Once I had mine, however, I didn't have to buy any more because I used mine as my starter for my next batches.

3. The containers you want to pour the seeded honey in. There is no middle step in this process, no weeks in between when you make the creamed honey and when you bottle it. The raw honey is mixed with the seed, then it is poured into the final containers to set. If you are planning to make this for gifts, then collect the containers you plan to use and have them clean, on hand and ready to be used.

I start with a nice smooth creamed honey for starter, such as Sue Bee Spun Honey. A friend has used a start of my creamed honey and made her own, and so forth.

I start with a nice smooth creamed honey for starter, such as Sue Bee Spun Honey. A friend has used a start of my creamed honey and made her own, and so forth.

How to Make Creamed Honey

The basic ratio is one part creamed honey to 10 parts raw strained honey. Select a wonderful seeded honey to start because the raw strained honey will copy those crystals.

Pour the room temperature raw honey in a bowl; add the room temperature seeded honey, then slowly mix it. When I started, I would carefully mix by hand, which is fine for small quantities. This time, I mixed it with a beater on low until light and fluffy, about 3 minutes or so. Don't beat on high or you will end up with huge air bubbles in the mixture. 

Pour into containers. Add lids. I lined a cardboard box with plastic, added the containers, then stored in the cool area to set.

Since I used a beater on low to mix the honey and seed, the creamed honey had tiny bubbles. I could have left the mixture in the bowl overnight, scooped the froth with bubbles off, then poured the mixture into the containers but I didn't think about that at the time.

Here's how my tiny containers looked with their tiny bubbles.

This year's creamed honey mixed on low with a mixer had small bubbles once it was set.

This year's creamed honey mixed on low with a mixer had small bubbles once it was set.

The 2 oz. containers set within a day. The larger 6 oz. containers set within a couple of days so I am assuming larger containers will take a little longer to be ready. In general, it should take a week to 10 days for the honey to fully set so I left them for the full time.

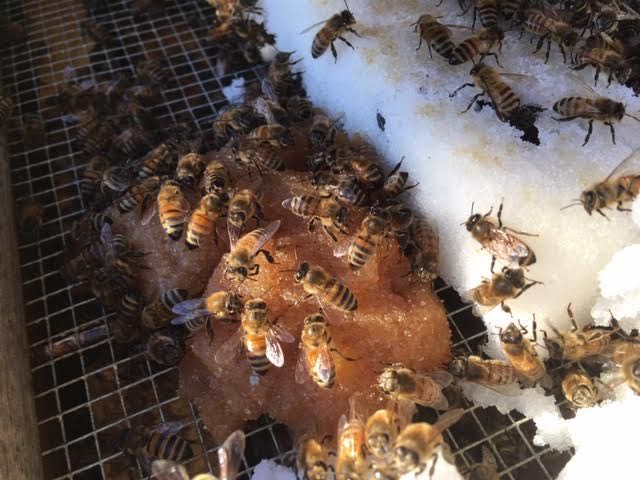
If you don't like how they turned out, place the mixture in a glass jar in a pan of hot water off the heat source and let it melt back to liquified honey. I have also fed creamed honey back to my bees on a warm winter day to enjoy watching them.

Store creamed honey in a cool area, not close to heat such as the stove or in a window. For most people, it doesn't last long so they don't have to worry about storage!

Charlotte

Honey and More Gift Packages

My honey gift boxes this year included honey samples, bee ornament and sweat head band.

My honey gift boxes this year included honey samples, bee ornament and sweat head band.

Gift-Giving Honey

When I started harvesting honey, I had the hardest time finding containers I liked to showcase my honeybees hard work. It takes a bee a lifetime to make 1/12th of a teaspoon of honey. Ever since I read that, even a tiny spill seems like a waste.

In the years since, when I have had very little honey to share, it's even more of a challenge to figure out how to bottle what little I do have. This year, I decided to make gift boxes combining several items:

I found 2 ounce plastic containers I liked so I could easily ship and share different honey colors and flavors of the season with friends, family and fellow beekeepers. The trick was to have labels that shared good information.

Two ounce honey jars harvested from different times of the year demonstrate different flavors.

Two ounce honey jars harvested from different times of the year demonstrate different flavors.

In addition to the honey samples, I made them what we laughingly-called our "bee ninja" sweat bands, terry cloth head bands made to custom fit different head sizes designed to keep sweat out of their eyes as they inspect hives. I asked them to give me individual head measurements this spring without telling them why.

These will come in quite handy next spring and summer.

Bee sweat band made out of terry cloth with elastic band on the back.

Bee sweat band made out of terry cloth with elastic band on the back.

The little embroidered bee matches the beekeeping club mascot. He was a bit of a challenge to find but I lucked out at a craft store during a business trip this fall. The head bands would have been fine without him.

Handblown in Missouri honeybee ornament.

Handblown in Missouri honeybee ornament.

The little hand-blown bee ornaments were made by a local glass blower for our bee club honey contest prizes.

My beekeeping friends, who can be quite competitive, expressed disappointment that their honey didn't win in the earlier honey competition but only I knew I had some extra ornaments set aside. 

Simple things each by themselves but packaged together, I thought they turned into very nice little thank you gift packages.

Charlotte