Opening Queen Cage

This is a queen cage with candy plug on left in longer tube. (Photo by Charlotte Ekker Wiggins)

This is a queen cage with candy plug on left in longer tube. (Photo by Charlotte Ekker Wiggins)

Opening Queen Cage

Several beginning beekeepers have asked if they can reuse a queen cage and then how do they open it to install a queen bee. One even said they tried to get a queen bee through the small circle and she would not fit!

Trust me, don’t try that again.

Here’s how to get a queen bee into the cage. First, make sure the longer tube has a candy plug or small marshmallow. To make the candy plug, mix honey with confectioner’s sugar to a solid consistency and fill up the longer plastic plug.

To open the queen cage, first open the smaller flat round plastic plug to the right of the longer protruding plug where you place the candy fill.

Go open queen cage, pop the smaller round opening first. (Photo by Charlotte Ekker Wiggins)

Go open queen cage, pop the smaller round opening first. (Photo by Charlotte Ekker Wiggins)

With the smaller round plastic plug open, you can then gently squeeze the plastic queen cage and pop the whole top off.

Once small circle is open, you can pop open the whole queen cage top. (Photo by Charlotte Ekker Wiggins)

Once small circle is open, you can pop open the whole queen cage top. (Photo by Charlotte Ekker Wiggins)

Once filled with a queen bee and her attendants, close the top and then fold the smaller round plastic plug into the hole. Do it quickly or bees will get out. Frankly it helps to have a couple sets of hands to put the queen and attendants in and then close the two tops.

Giving someone a queen bee is almost as exciting as giving one of our beekeeper’s custom gift boxes and we do all of the packing for you!

Charlotte

No Smoke, No Joke

How I use muslin kitchen towels to keep my bees calm during a hive inspection.

How I use muslin kitchen towels to keep my bees calm during a hive inspection.

No Smoke, No Joke

This may be one of my favorite beekeeping hacks, using muslin kitchen towels to keep my bees calm during a hive inspection instead of smoke.

If you are a beginning beekeeper, some of you may find that trying to keep your smoker lit, and having cool smoke, is a bit of a challenge. If the smoke coming out of the smoker is too hot, you can burn bee wings as you apply it to a hive.

There are several theories of what smoke does to a colony. From my observation I tend to lean to the one that says bees go into preparing for a quick hive escape when smoke is applied, thereby giving the beekeeper time to get in and out. The smoke stresses bees so I prefer not to use it if I don’t have to do so.

Since I take photos of what I find, I tend to need a little extra time inside my hives. Enter one of my favorite beekeeping tools, the muslin kitchen towels. They are not as beautiful as these hand-embroidered beekeeping towels but they are very handy to have in my inspection caddy. Muslin is smooth and doesn’t catch bees in their fibers. The towels themselves can be purchased at your local big box stores in the kitchen utensil section for about 75 cents per towel.

Check the packaging. I have seen the bundle of towels vary in number from 5-8 per package.

Once covered, I uncover only the width of a frame as I inspect the inside of the hive.

Once covered, I uncover only the width of a frame as I inspect the inside of the hive.

Once you’re done, you can easily wash and hang dry these muslin kitchen towels. I dry them by hanging on a towel rung so that the fabric softener doesn’t get into the towels. I don’t know what pheromones bees will pick up from fabric softener.

I also use these towels as neck scarves under my bee suit, and tied around my head when the suit hood is too big.

Muslin kitchen towels also come in handy in the kitchen only mine never quite make it there.

Charlotte

Repurposed Old Bird Bath

This old bird bath has been repurposed into a bee bar in the front of my Missouri garden.

This old bird bath has been repurposed into a bee bar in the front of my Missouri garden.

Repurposed Bird Bath Bee Bar

There are a number of ways beekeepers can provide honey bees a water source. Honey bees need a continuous water source within half mile of their home hive for a variety of reasons: to mix with food, to keep hive cool, to hydrate themselves. Just like any other creature, they need a continuous source of water.

In Missouri, the most popular recommendation is to have a pond. If not, honey bees will go looking for water, usually in the wrong places like a dog water bowl, leaking hose connection or, heaven forbid, a neighbor's nearby swimming pool. But what if you don't have a pond close by, how can you provide honey bees water?

Bird Baths Good Honey Bee Watering Spots

I use a variety of bird baths, from new ones I pick up at yard sales to this veritable antique one I have had for several decades and was almost discarded. Actually the old concrete bird bath in this example was sitting in a heap pile because the top had started to break. My handyman had hauled it off because I couldn't seem to get the top repaired and had given up working on it so he assumed I was done with it. I loved the base with the wildlife animals in the design but the top was challenging me and taking up space I needed in the garage.

Shortly thereafter, we had rain and I spotted honey bees gathered on the side as soon as the sun was out. Hopeful that I could still have this in my garden, I hauled it back to the garage to repurpose it into what I call a "bee bar." And I put a sign on it that said "do not touch" that was not intended for the bees.

Birds like to have a little depth to their bird bath so they can immerse themselves in the water and move their wings. This one had become too shallow for most birds but as I soon discovered was a good depth for giving honey bees water.

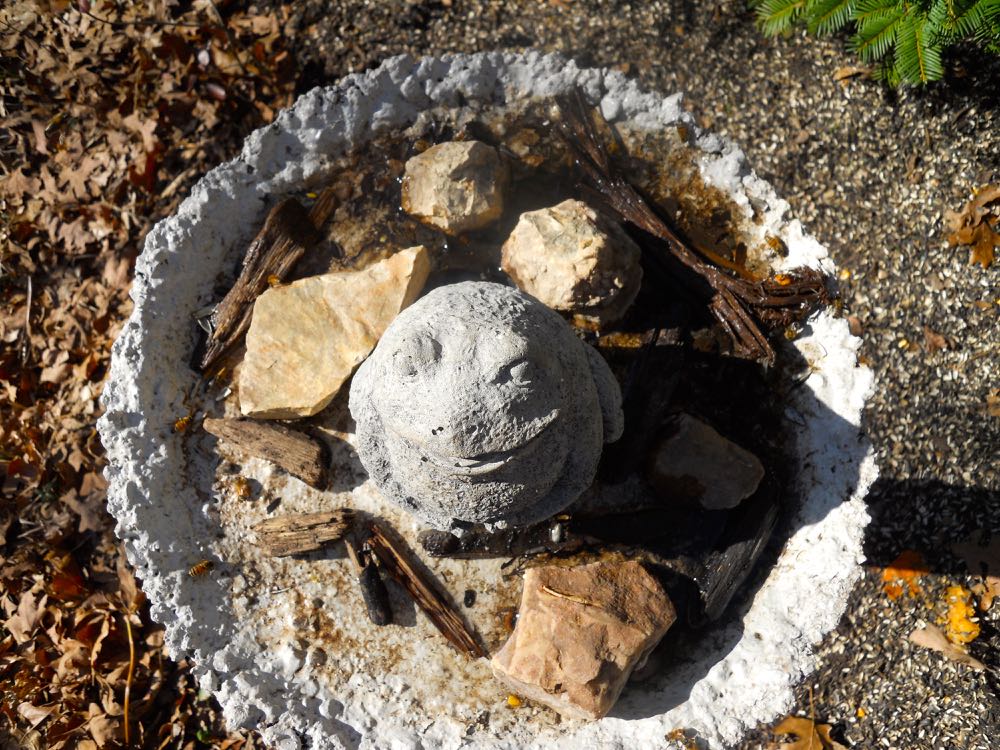
My repurposed old bird bath from the birds eye view looking down on the concrete frog.

My repurposed old bird bath from the birds eye view looking down on the concrete frog.

When I first started working on this bird bath, the edges were so worn they were literally chipping off in chunks. I had added some ready mix concrete to mend the holes hoping they weren't big enough to fall off. I was wrong. One morning I found the entire original concrete rim on the ground, leaving the repaired concrete providing a more jagged edge. Perfect safe bee landings spots!

After painting it a grey color with latex paint, then giving it a second coat, the top of the bird bath looked brand new and ready for business. The fat frog was a gift from a friend and now nicely sits in the flat center of the old repurposed bird bath.

Side view of the re-purposed bird bath into a bee bar to give my honeybees a water source.

Side view of the re-purposed bird bath into a bee bar to give my honeybees a water source.

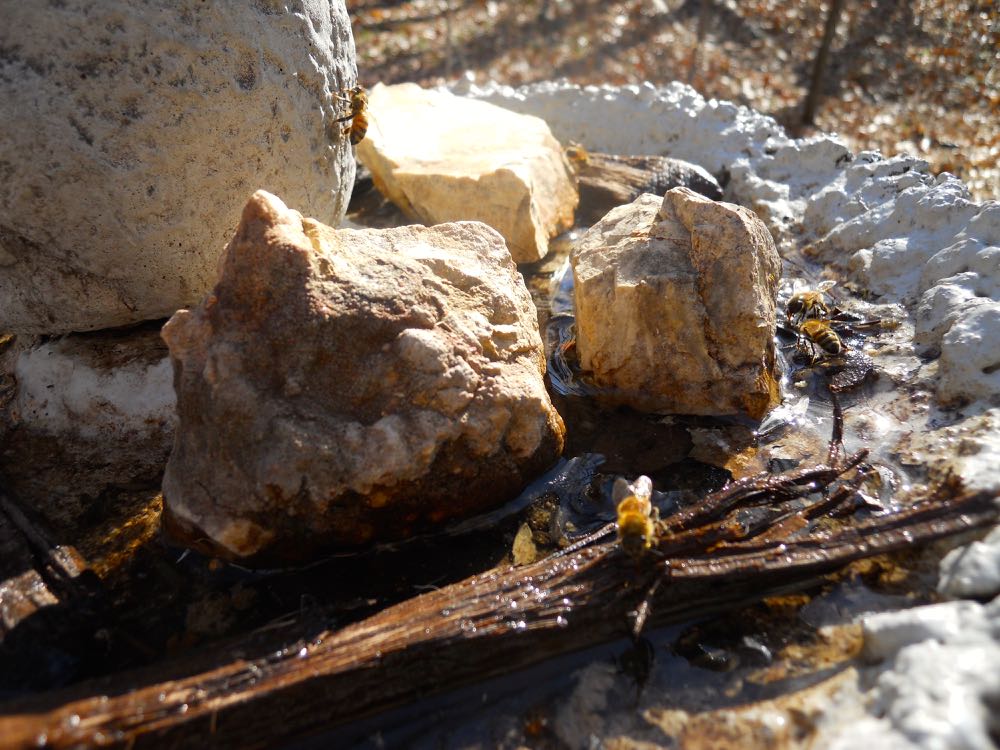
To give my honey bees safe landing spots, I added rocks and sticks so they can safely land and take up the water. Without safe landing spots, I have noticed honey bees will see their reflection in water and land in that spot, usually drowning when their delicate wings become water-logged. When I have fished them out of the water, nearby rocks and the concrete frog provide a nice drying off spot.

Tried and Tested Idea

This re-purposed bird bath has now been in use as a "bee bar" for more than a year and is working quite nicely. In addition to honey bees, I often find other pollinators including butterflies, wasps, ants and the odd bird just stopping by for a drink.

On very hot days I have to refill it because it doesn't hold as much water as other bird baths but I like the idea that it's now repurposed instead of taking up space in a landfill.

Some of my honeybees taking a drink safely from old sticks in the repurposed bird bath.

Some of my honeybees taking a drink safely from old sticks in the repurposed bird bath.

I don't worry about keeping the water clean, my honey bees seem to prefer older water with a "bouquet" to it. If leaves fall in, I leave them, it gives bees a safe place to hide in the event of a quick thunderstorm.

How do you provide your honey bees with water?

Charlotte

Beginning Beekeeping Class January 27, 2018

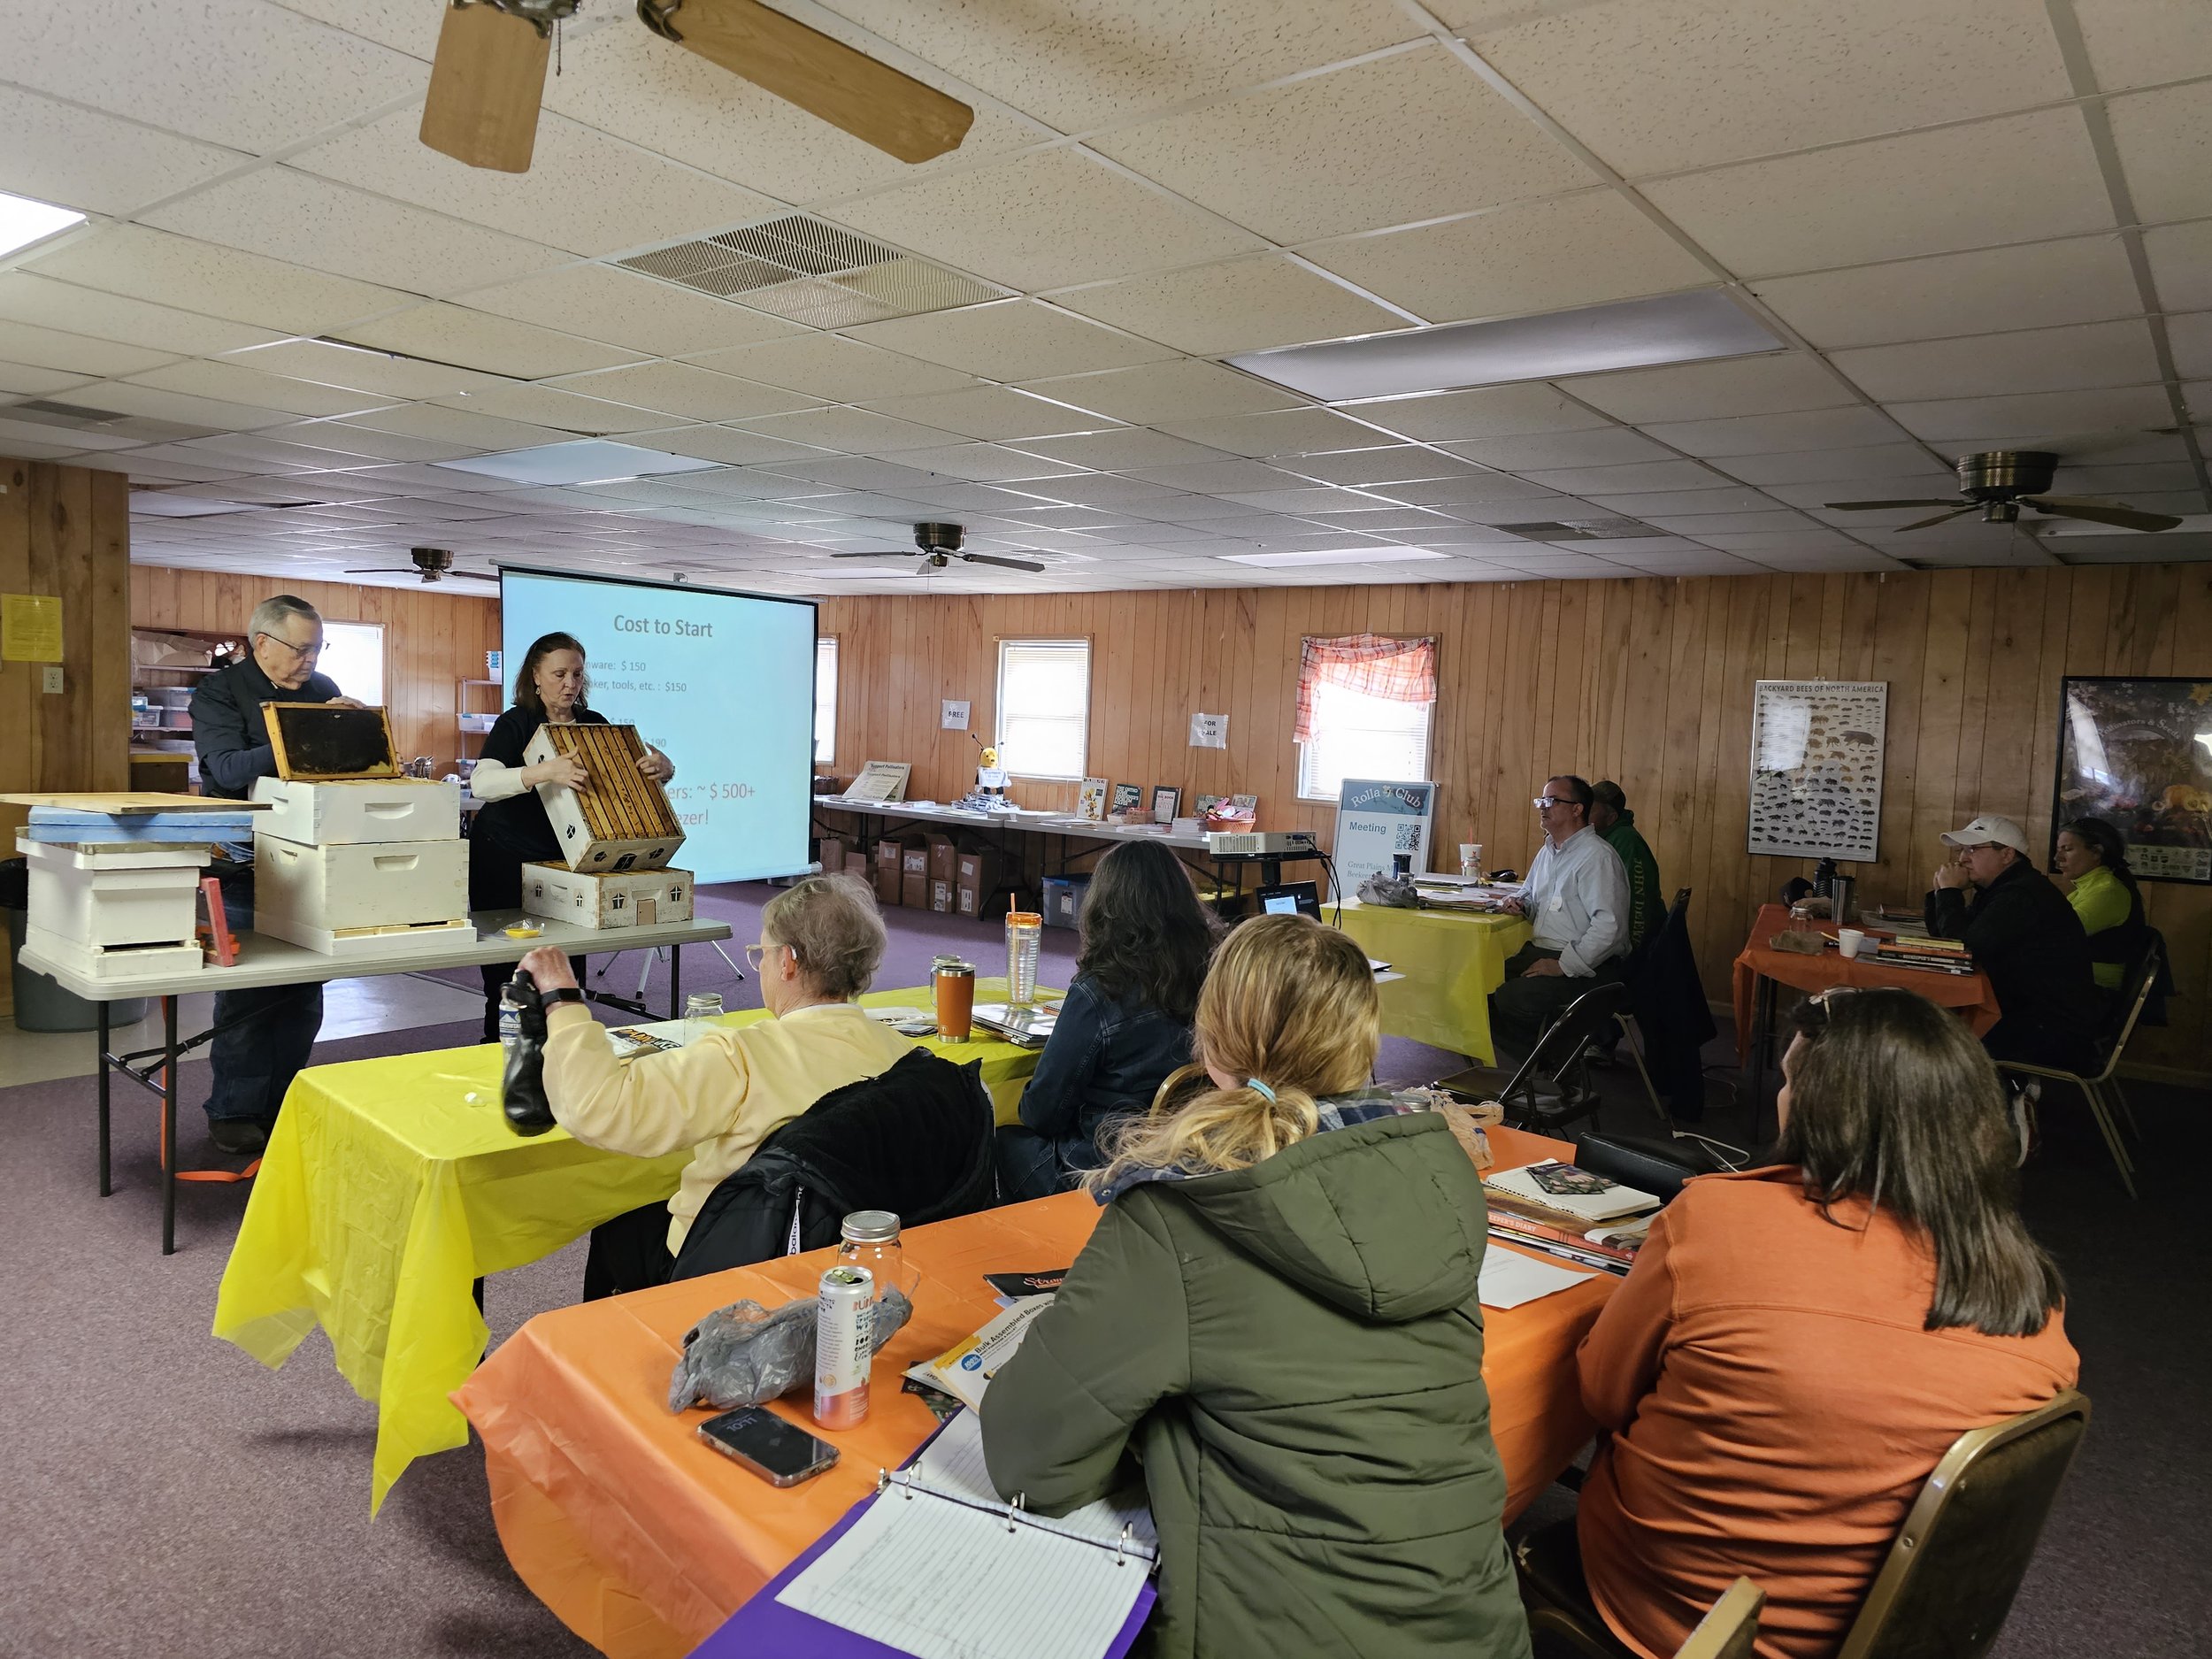
Teaching the start of an earlier beginning beekeeping class in Rolla, Mo.

Teaching the start of an earlier beginning beekeeping class in Rolla, Mo.

Beginning Beekeeping Class January 27, 2018

Looking forward to meeting new potential beekeepers at our next beginning beekeeping class in Rolla, Mo. on Saturday, January 27, 2018. Registration is now open for the beginning beekeeping class Saturday, January 27, 2018 at Brownwood Estates Clubhouse, 1341 California, Rolla, Mo. from 9 a.m. to 3 p.m.  

Cost is $50 per person including a beginning beekeeping book, natural events calendar, beekeeping diary, catered lunch and refreshments.

Class size is limited; attendees must be at least 15 years of age or older.

To pre-register, send your name, email and phone number to rollabees at gmail.com and a check to David Draker, 1951 Monterey Drive, Rolla, Mo. 65401.

 Gift certificates also available, email check and details to rollabees at gmail.comwith payment.

The basic beekeeping classes will include basic bee behavior and biology; beekeeping equipment needs and costs; how to properly use beekeeping equipment, how to set up bee hives; basic pests and diseases and how to help bee colonies get through their first winter.

David Draker, right, guides a discussion at a monthly Rolla Bee Club meeting.

David Draker, right, guides a discussion at a monthly Rolla Bee Club meeting.

This class has a local beekeeping club that supports beginning beekeepers with monthly meetings at the same class location from 2 p.m. to 4 p.m.

Both classes qualify for Phelps County Master Gardeners continuing education and Meramec Hills Chapter Master Gardeners advanced training.

Rolla Bee Club is sponsored by Bluebird Gardens Foundation, a charitable foundation part of the Community Foundation of the Ozarks.

Charlotte

Winter Colony Cluster Check

Checking for a colony cluster can be as simple as lifting the hive top quickly and finding heat.

Checking for a colony cluster can be as simple as lifting the hive top quickly and finding heat.

Winter Colony Cluster Check

I sometimes cringe when beginning beekeepers contact me after they've opened their hives mid-winter to see if their honey bees are still alive. Even though I repeatedly remind everyone not to break the propolis seals bees have built and not to touch the hives after October, there are always a few who rationalize why they did what they did, then wonder later why their bees didn't make it through winter. 

It's hard to not check, I know but if you must, still don't break open the hive and destroy the propolis seals. That's how the bees make their hives airtight for winter. When the propolis seals are broken, the bees don't have the time to make repairs and the open cracks in hives then let in cold, wind and especially rain, which can quickly kill a bee colony.

The only relatively safe thing you can do to check if the bees are alive is to peek under the lid and, with your bare hand, try to locate the heat the cluster is generating inside the hive.

Honeybees don't hibernate through winter, they literally shiver in a cluster with the queen in the middle, consuming the honey they made earlier in the season for carbs and energy. It's amazing to think those little creatures can keep the hive so warm.

Once you locate the heat, close it up, you have your confirmation that the colony is still alive.

The honeybee cluster can generate a lot of heat that's easy to find with your hand.

The honeybee cluster can generate a lot of heat that's easy to find with your hand.

The day before our late December winter storm forecast, I decided to check on hive stores. This year I gave each colony 2 medium supers full of honey instead of one per colony since last year the colonies were at the top of the hive at Christmas. Late falls and warm winter temperatures mean bees are out flying and consuming their honey at a faster rate than when they are clustered. I didn't want to find any colonies dead from starvation so I took my extra sugar cake supply with me just in case I found a cluster on top.

Sure enough, the last colony I checked was at the top, festooning off the screened inner cover I was also going to change to solid inner covers. 

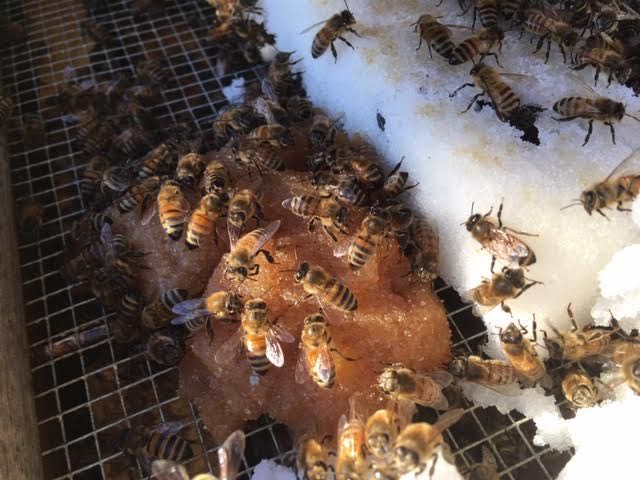
This is another colony with the cluster at the top and into the emergency sugar cakes.

This is another colony with the cluster at the top and into the emergency sugar cakes.

Not wanting to disturb the bees any more than necessary, I snuck the sugar cake bar over the cluster and closed the hive lid for a few minutes.

I gave them an extra cake first on top of the wired inner cover to get them settled.

I gave them an extra cake first on top of the wired inner cover to get them settled.

When I returned a few minutes later, I was able to sneak the old sugar cake out and place the new one right over the cluster with little fuss.

When I checked a few minutes later, the bees were checking out the sugar cake.

I was able to quickly sneak the sugar cake under the wired inner cover with little disturbance.

I was able to quickly sneak the sugar cake under the wired inner cover with little disturbance.

The few bees that flew up when I took off the screened inner cover were heading back inside the hive, with only one bee that needed a personal escort to find the hive entrance.

The few bees that flew out of the top were quickly going back in through the bottom entrance.

The few bees that flew out of the top were quickly going back in through the bottom entrance.

As I refilled the bird feeders and suet holders, I forgot to replace the screened inner covers with solid inner covers until later that evening. With my flashlight as a guide, I quickly removed the screened inner covers and added the solid ones. At that point, even this yellow hive didn't have any bees at the top so it was easy enough to quickly make the switch.

Temperatures are below zero at night now. It's still tempting to want to go out and check the bees but I know they are snug in their homes with enough food so I won't until our next day with the temperature in the 50s. It will be a good time to check on food stores then to make sure they all have enough food to make it into spring.

Spring. Can't wait to see it!

Charlotte

New Bee Syrup Feeder

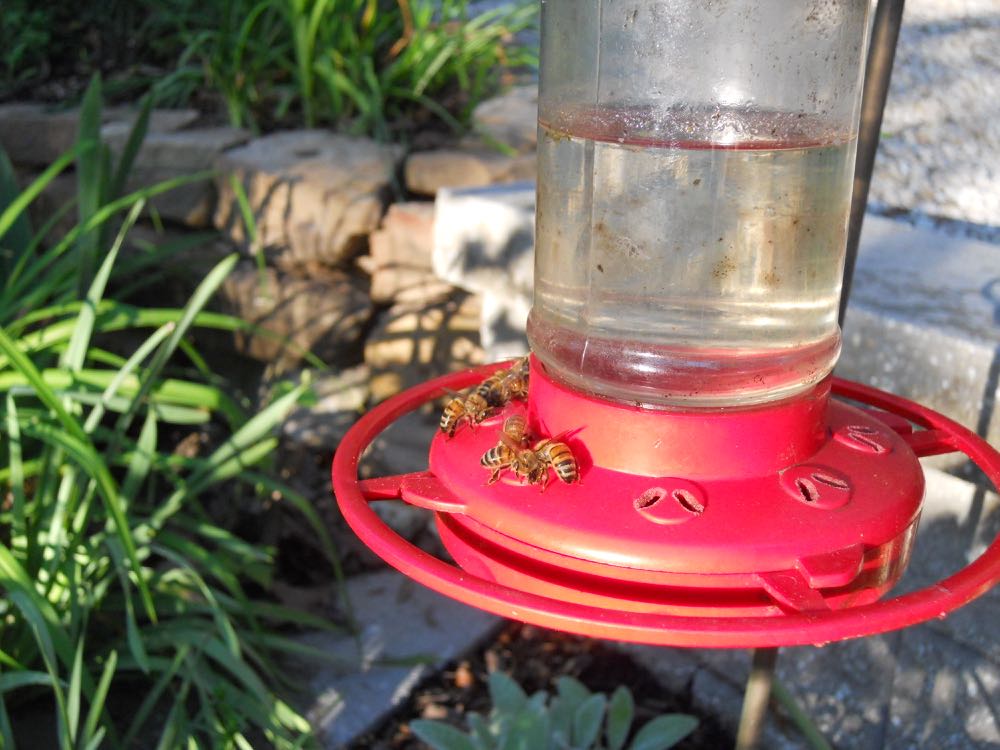
My honeybees taking a drink of hummingbird sugar water at a hummingbird feeder.

My honeybees taking a drink of hummingbird sugar water at a hummingbird feeder.

New Bee Syrup Feeder

There are only a very few situations where I recommend feeding bees sugar syrup to supplement what they may find in nature; catching swarms and when making two-frame splits come immediately to mind. There may be other special situations but, in general, I try not to feed my honeybees sugar syrup.

My bees apparently don't agree. Right after hanging my hummingbird feeders around the garden, with a 4 to 1 water/sugar syrup, one of the hummingbird feeders was getting emptied out faster than the rest. Suspecting my resident raccoon may have been sipping the sugar water, I started watching the hummingbird feeder shortly after filing in.

No big visitors to the feeder but bees were constantly around it. Even when I took the hummingbird feeder down to wash out and replenish, bees were waiting for the hummingbird feeder's return.

No other feeders have regular bee visitors like this one. It is within the flight path of one of my hives so maybe that's what makes it a popular stopping point as they head out to find pollen sources.

And the hummingbird feeder?

It has little slits designed to allow hummingbirds access but supposedly keeps everyone else out, including bees.

Maybe they should promote it as a bee syrup feeder instead!

Charlotte

Pollinator Hotels

This fancy pollinator hotel even has a roof full of low maintenance blooming succulents. 

This fancy pollinator hotel even has a roof full of low maintenance blooming succulents. 

Pollinator Hotels

You have probably seen them periodically on the internet, fancy pollinator hotels that attract a variety of native pollinators including native bees, butterflies and wasps. 

I have yet to see one with a lot of renters using it but then most native pollinators, such as native bees, are solitary. Nevertheless, I do check the simple ones I have in my garden and find even simple ones attract tenants throughout the growing season. Let's take a look at a few homemade pollinator hotels.

This first one was made by a local master gardener using an old piece of furniture, license plates and cleaning out wood pieces from his workshop.

An old piece of furniture is turned into a fancy pollinator hotel with bamboo sticks.

An old piece of furniture is turned into a fancy pollinator hotel with bamboo sticks.

The front is covered with wire to keep curious night time visitors from pulling bamboo sticks and other pieces out of the cabinet.

A wire mesh attached to the front helps to keep the pollinator hotel rooms safe for renters.

A wire mesh attached to the front helps to keep the pollinator hotel rooms safe for renters.

A collection of license plates was repurposed into a handy roof, giving the furniture piece good cover.

Old license plates were used as roof shingles on this homemade pollinator hotel.

Old license plates were used as roof shingles on this homemade pollinator hotel.

If this is too ambitious of a project, here is a simpler use of a license plate pollinator hotel, a circular piece of wood with a license plate roof cover.

A simpler pollinator hotel was made out of this license plate-covered piece of wood.

A simpler pollinator hotel was made out of this license plate-covered piece of wood.

I also like this mason bee house made by a colleague several years ago as a Christmas gift. The simple design can be made in a shorter version with a roof covered in a license plate if you have extra ones.

This one will get covered in a climbing red rose in another month or so.

A colleague made me this mason bee house as a Christmas present.

A colleague made me this mason bee house as a Christmas present.

And even simpler, this little boxy pollinator hotel features bamboo pieces with a small center circle and a wooden roof.

My roof separated last winter so I just put a shim in the space, then painted it. Didn't want to go into extensive renovations or I might miss out on the main pollinating rental season!

Another simple pollinator house from bamboo sticks hanging from a tree in my garden.

Another simple pollinator house from bamboo sticks hanging from a tree in my garden.

If you don't want to make a pollinator house, you can find a number of them available at home and garden centers. They are a wonderful way to welcome native pollinators to your garden!

Charlotte

Sandy Bird Bath

Sandy bird bath gives my bees a safe place to land near one of my bird feeders.

Sandy bird bath gives my bees a safe place to land near one of my bird feeders.

Sandy Bird Bath

Over the years, I have experimented with a variety of bird bath additions to give my honeybees a safe place to land while they get a drink of water. Honeybees need water for a variety of reasons, from hydration to take water back to the hive to use in food production and to ventilate the hive.

From twigs and leaves to rocks and statuaries, my bird baths have gone from simple bowls holding water to virtual sandy beaches - literally.

The latest experiment is this bird bath at the front of my house lined with sand. I keep it saturated with water so bees can easily get moisture without having to walk into the deep end on the other side of the rocks. 

The bird bath is a little too close to the bird feeder. Sunflower seed hulls end up dotting the sandy edge but it doesn't seem to bother the bees.

One of my honeybees that lived through winter at the edge of the bird bath.

One of my honeybees that lived through winter at the edge of the bird bath.

One of the questions I researched last year was how far should the water source be located. According to Larry Connors, the water source should be no farther than half a mile from the hive. This bird bath is about halfway between my two bee gardens, maybe 200 feet from the closest apiaries.

Rocks in the bird bath help give honeybees a safe landing spot.

Rocks in the bird bath help give honeybees a safe landing spot.

Besides sticks, I also add larger rocks to my bird baths to give bees a safe place to land. If I have to choose between large and small rocks, I prefer smaller rocks so bees can still easily reach water but still be safe from falling in.

Sand also gives honeybees a safe place to land to take up moisture.

Sand also gives honeybees a safe place to land to take up moisture.

That's why the sand works well, it gives bees a safe place to land while giving them easy and safe access to moisture.

Charlotte

Minimize Small Hive Beetles

Joining my bee buddy David, left, at a first spring hive inspection.

Joining my bee buddy David, left, at a first spring hive inspection.

Minimize Small Hive Beetles

We have had a mild winter this past year, which means another bad year combating small hive beetles. 

Last year, the little black beetles devastated many hives, including strong ones, in the matter of a couple of weeks. Originally from sub-sahara Africa, the ladybug-size black bugs can lay up to 2,000 eggs a day in dark hive corners. If left undisturbed, the larvae will quickly slime the comb, honey and even the bees, eventually chasing bee colonies out of the hive.

There is a definite rotten smell to a colony infested with small hive beetle larvae.

What is worse, most beekeepers first dealing with this pest will scrape the larvae into the ground, where the worms will pulpate and grow into more small hive beetles. The beetles will fly up to 7 miles, infesting other nearby colonies.

As beekeepers start their spring inspections, it's important that they take a plastic container with a lid with them where they can scrape the bottom of the hive, sight unseen. The frass at the bottom of the hive will contain left over wax where  small hive beetle larvae will hatch. To try to control the beetle population, scrape that out of the hive and burn it.

Frass and debris off the bottom board was scooped into a plastic bag, not poured onto ground.

Frass and debris off the bottom board was scooped into a plastic bag, not poured onto ground.

Look at the photo above, can you see the small hive beetle larvae in the frass?

Initially, many beekeepers were telling me small hive beetles would die over winter. Inspecting colonies that died, we found that the beetles were wintering over inside the colony clusters and, in some cases, surviving where the bees had died.

Small hive beetles have been wintering over inside the clustering bees.

Small hive beetles have been wintering over inside the clustering bees.

So in addition to killing the small hive beetle bugs, beekeepers need to remove the actual larvae, often found in the bottom of frames and boxes.

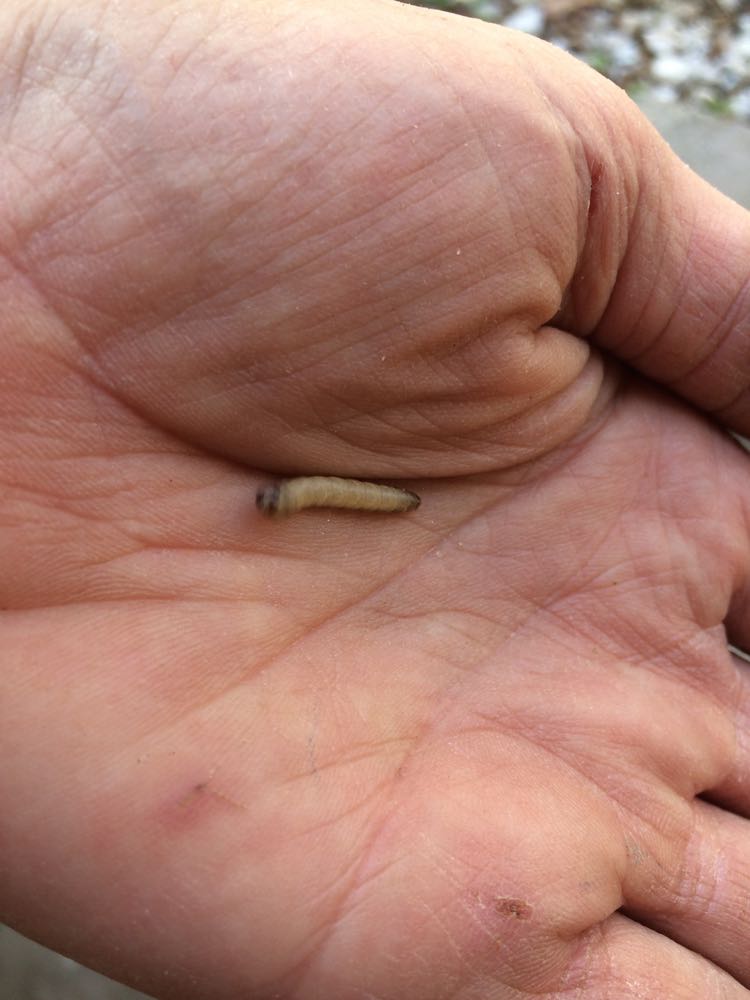
Here is what one looks like:

Kill the black beetles, then look for the larvae growing in frass and hive nooks and crannies.

Kill the black beetles, then look for the larvae growing in frass and hive nooks and crannies.

In addition to killing the black beetles, and removing the larvae, make sure to use traps with lures to try to keep small hive beetle populations down and replace the lure every week or so.

Colonies also need to remain strong and packed in the hives to make sure there are few uncovered frames where small hive beetles can hide.

What are you doing to manage for small hive beetles?

Charlotte

How to Safely Provide Bees Water

My honeybees get a little sugar water treat in a bird bath shaped like a flower.

My honeybees get a little sugar water treat in a bird bath shaped like a flower.

How to Safely Provide Bees Water

I can't say for sure that the shape of the bird bath makes a difference but my bees seem to think it does. I have a number of bird baths throughout my one acre, hillside garden. The one the bees seem to visit the most is the one shaped like a two-foot flower.

I use this favorite watering spot to give them a regular source of water. The bird bath is lined with rocks and sticks to give bees a safe place to land and I don't worry about keeping it immaculate. The bees seem to prefer water with a little age to it.

It also works well when I have a little sugar water treat when I empty jars feeding my beginning colonies. August is a hard time for bees. Bee colony numbers are at their highest and food supplies, especially when temperatures are over 95F, are almost non-existent. Plants stop producing pollen when temperatures rise over that thresh hold for several days in a row.

To make sure my beginning colonies get a good start, I feed them 3:1 sugar water to encourage them to draw wax comb. When I clean their sugar water jars, any extra gets poured into the nearby flower-shaped bird bath. Bird bath rocks and sticks work well for sugar water, too.

My honeybees enjoying a little sugar water drink safely in a flower-shaped birdbath in my garden.

My honeybees enjoying a little sugar water drink safely in a flower-shaped birdbath in my garden.

Adding rocks and sticks has been a practice I have used since I started beekeeping. The rocks give them a safe landing spot and the sticks ensure they have a safe place to climb should they fall in.

It also makes it possible for more bees to access the liquid without piling on top of each other. I love having bees in my garden, they are a lot of fun to watch.

Concrete frog in my flower-shaped birdbath seems to be enjoying the company!

Concrete frog in my flower-shaped birdbath seems to be enjoying the company!

The little concrete frog provides bees another safe landing spot. I didn't think about when I added him to the bird bath, I just liked the way he looked there!

How do you provide your bees water in your garden?

Charlotte
Adding Small Hive Beetle Lure Traps

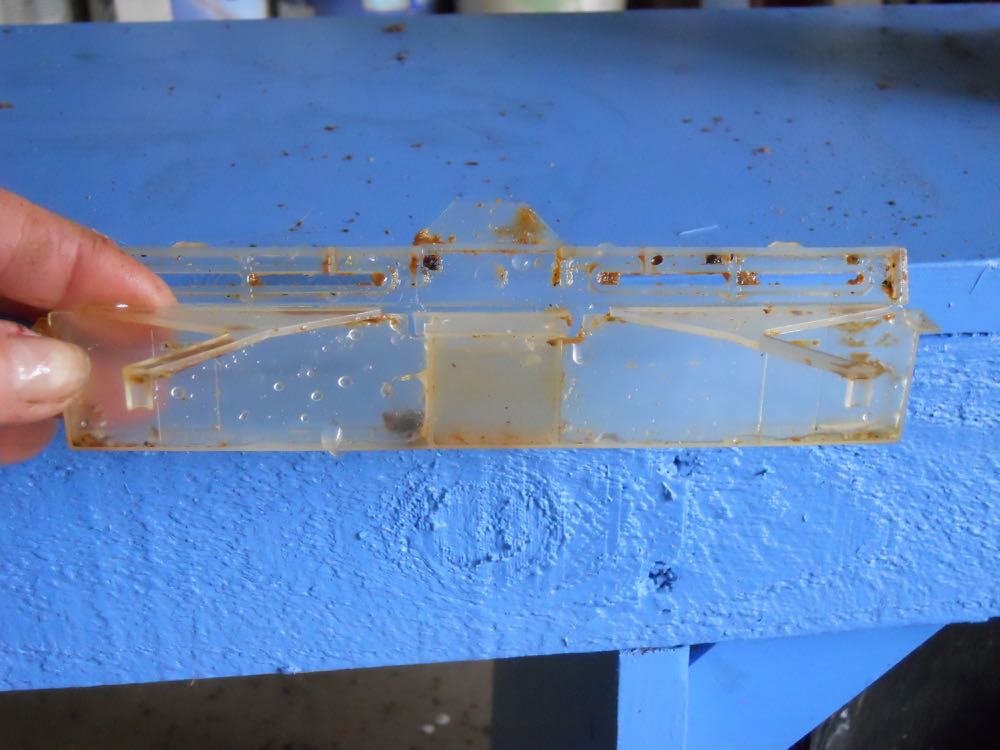
This is one of the small hive beetle traps available. I like these because they are easily reusable.

This is one of the small hive beetle traps available. I like these because they are easily reusable.

Adding Small Hive Beetle Traps

2016 has been a bad year for beekeepers trying to manage the sub-Sahara Africa-based small hive beetles in mid-Missouri. Record hot temperatures may have contributed to their increased numbers but it was heart-breaking to hear beekeeping students loosing their bee colonies to these little black bug larvae in only a matter of days, in some cases.

The principle with the traps is to install small hive beetle traps filled with a lure to entice the beetles away from hive dark corners, where they like to congregate. The traps are not a guarantee of pest prevention, they are one of a series of strategies beekeepers can use to try to control the small hive beetle populations.

You can buy a pre-made lure, use mineral oil or make your own. Here is the recipe I use but note it takes a couple of weeks to ferment so plan on keeping mineral oil on hand to use in the interim:
Small Hive Beetle Trap Lure Recipe (also called David's Cocktail)

½ cup apple cider vinegar
¼ cup sugar
1 cup water
1 ripe banana peel cut up finely

Directions: Combine all ingredients and allow to ferment for about 2 weeks. Fill center well of the trap with lure. Fill wells on either side with an oil - mineral oil, vegetable oil, something that will drown small hive beetles when they fall in. Replace when full or every few days. With hotter weather, traps should be checked and refreshed more frequently.
 

A reusable small hive beetle trap filled with a homemade small hive beetle lure in center well.

A reusable small hive beetle trap filled with a homemade small hive beetle lure in center well.

Reusable small hive beetle trap wells on either side of center filled 1/3 with mineral oil.

Reusable small hive beetle trap wells on either side of center filled 1/3 with mineral oil.

Once you have the small hive beetle traps filled, install two traps per hive body at a diagonal to each other in the farthest corner of the hive. You are going to reverse the installation as you go up hive bodies so doesn't matter which corner you start with, just remember one corner so you can install the rest correctly.

install two small hive beetle traps per hive body. install them at diagonally to each other off the farthest frames in hive corners.

install two small hive beetle traps per hive body. install them at diagonally to each other off the farthest frames in hive corners.

As you add a second hive body, if appropriate, reverse the corners where you placed the small hive beetle traps.

On your second hive body, install the two small hive beetle traps in the opposite corners of the first hive bottom, again at a diagonal.

On your second hive body, install the two small hive beetle traps in the opposite corners of the first hive bottom, again at a diagonal.

Same thing as you add a third hive body and so forth. Your third hive body should match where your small hive beetle lure traps are in the brood (bottom) box.

Same thing with the third box, place the small hive beetle traps in the opposite corners to the second box. This should look like the first hive box.

Same thing with the third box, place the small hive beetle traps in the opposite corners to the second box. This should look like the first hive box.

Once installed, bees may add propolis around, and sometimes inside, the small hive beetle lure traps. Just remove the traps, clean out the propolis, refill and re-install.

Clean and refill the traps away from the hive or the lure, including mineral oil, will get dripped onto the comb.

Once installed, bees may fill propolis around the small hive beetle traps. The traps should be regularly-refilled with fresh lure.

Once installed, bees may fill propolis around the small hive beetle traps. The traps should be regularly-refilled with fresh lure.

The lure needs to be replaced every week or so, depending on how hot the weather is. The hotter the temperatures the less effective the lure is so it should be replaced every few days.

These plastic condiment bottles make quick work of refilling small hive beetle traps.

These plastic condiment bottles make quick work of refilling small hive beetle traps.

If you use plastic condiment bottles or a turkey baster, you can easily pour out the old bug-filled lure and add fresh lure and not spill much. I refill mine in the garage, then take them to the hives to install. If you try to do this at the hives, it can get messy. Remember you will have your leather gloves on, that can make handling these traps cumbersome.

Here's a full trap ready to be cleaned out and refilled:

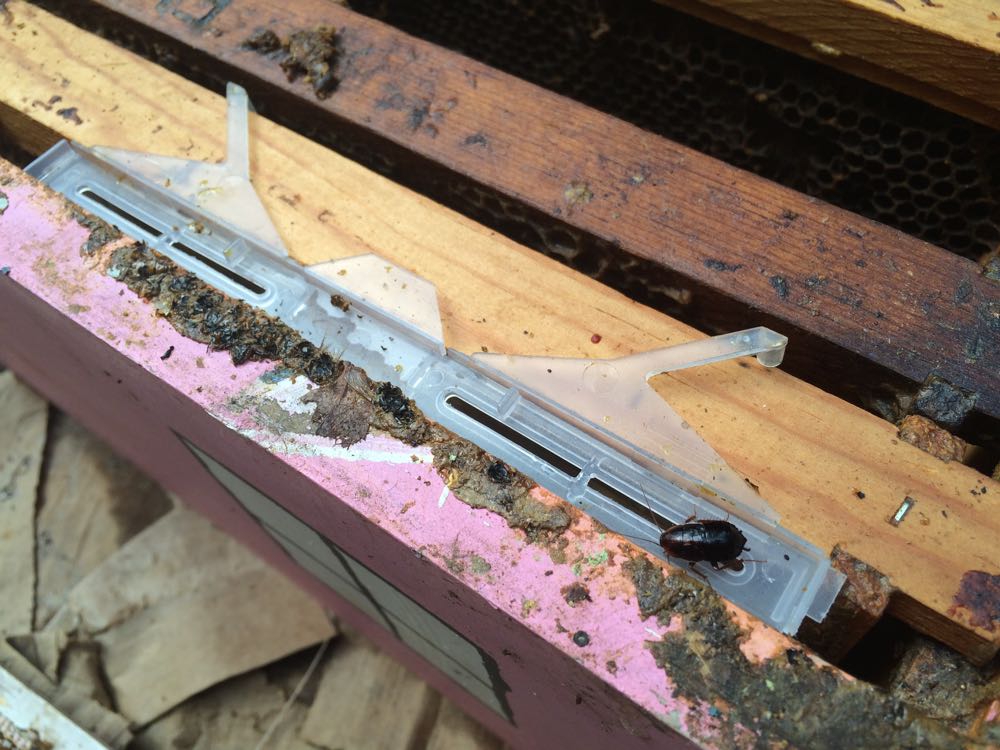
This is a small hive beetle trap ready to be cleaned out and re-filled. cockroaches and other bugs - not bees - may also get caught in the traps.

This is a small hive beetle trap ready to be cleaned out and re-filled. cockroaches and other bugs - not bees - may also get caught in the traps.

If you can't find these traps and need to quickly do something to manage small hive beetle populations, try Swiffer dust rags rolled up into hive corners in the same configuration as the traps.

Don't use dryer sheets, those will capture as many bees as they do small hive beetles.

Small hive beetles can take over strong hives in a week if they are not carefully checked and patrolled. Using small hive beetle lure traps is one way you can try to keep them in check.

Do you use small hive beetle lure traps in your hives?

Charlotte